All posts by Dr. Mike

Save Money, Make Homemade Beef Stew

We are entering fall in the upper Midwest, a perfect time for stew. The great thing about stew is that it is very flexible and can be made economically by adjusting the ingredients.

I have another reason for making stew today: I’m trying to clean out my freezer because I need the space. Once a year, I get a rebate check from Costco, usually for hundreds of dollars. That check has to be spent by the end of the year; otherwise, it becomes void. Traditionally, I have used this bonus money to buy Costco meat, which I’ll then divide into vacuum-sealed pouches and freeze. In fact, this stew meat is from last year’s haul.

It’s now November, so I’ll be going on a meat run soon. However, with inflation and the Trump tariff taxes, I may not have the bounty I had before. I hope my freezer cleaning wasn’t just wishful thinking!

Let’s get into this simple and delicious recipe. I’ll be using an Instant Pot type pressure cooker, but you could also make this recipe in a slow cooker or a Dutch oven. With that said, you would need to adjust your time and possibly liquids if you chose one of those methods.

Brown 1 to 1 1/2 pounds of stew meat in a little cooking oil. Browning isn’t necessary, but it seals the meat, making it more juicy, and adds depth of flavor to the dish.

Add 1 chopped onion. Your chopping doesn’t have to be precise, as the cooking process will dissolve most of the onion.

Add a heaping spoon of jar garlic. Naturally, you could use a couple of cloves of real garlic, or even some powdered garlic. I would not use garlic salt, as it is mostly salt, and could over-salt your dish. If you do decide to add garlic salt, use only 1 teaspoon, and add additional salt only when you adjust the seasonings at the end of cooking. If you don’t like garlic, omit it.

Add some spices. If all you have is salt and pepper, that’s OK. However, I like adding spices to my dishes for extra interest. Today, I’m using around one teaspoon each of thyme, parsley, and rosemary. I had one sad, broken bay leaf, so that is also going into the pot. I also added around one-half teaspoon of pepper and a scant teaspoon of salt. I’ll further adjust the salt and pepper at the end of cooking. Remember, once you add salt, you can’t remove it.

I then added about 4 peeled and cut-up potatoes, a big fistful of washed and peeled carrots, and about three stalks of celery. There are no absolutes here. If I only had two stalks of celery, that is what I would have used. If I were trying to get rid of more carrots, I would have added more. You get the picture.

If you have other vegetables, consider adding them. What are good choices? Green beans, peas, and corn come to mind. I personally love peas in soups and stews, but my wife has an aversion to them, so no peas for us! Fresh or frozen work, and if you want to bolster up your stew, you can even add canned veggies at the end of cooking.

My kids were over for brunch today, and two were remaining at dinner time, so I put them to work. One peeled and cut the potatoes; the other peeled and cut the carrots. Bonus for me!

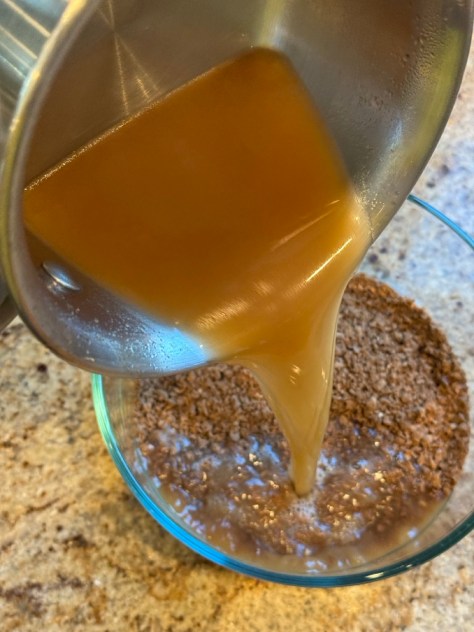
I added one can of tomato sauce. This adds another flavor layer, but it isn’t required. If you don’t use it, you’ll end up with a traditional brown stew. If you go the tomato route, you can use what you have on hand. If you don’t have tomato sauce, you could add tomato paste or canned tomatoes. It is all good. I then added two cans of water. You need liquid when using a pressure cooker. Why two cans? Why not? I could have added one can instead. By the way, two cans are around 4 cups of water.

Here is another optional ingredient. I added a couple of tablespoons of cooking sherry to add acidity, which wakes up the dish. A little vinegar would do the same thing. If I were using vinegar, I would add around one tablespoon.

This is also optional, but almost a necessity in my book. I added a heaping teaspoon of beef bouillon. These products have a lot of salt, which is why I make most of my salt adjustments at the end of cooking. Remember, you can’t remove salt from a dish once it is there.

I pressure-cooked the stew on high for 40 minutes, and then let it rest for 10 minutes before releasing the pressure. Immediately removing the pressure can draw out the moisture from the meat and make it dry. This is the same reason you let meat cooked in other ways rest for about 10 minutes before carving them.

Here is the stew. I like my stew a bit thicker, so I mixed a heaping tablespoon of cornstarch with a little cold water and drizzled it into the boiling stew while stirring. However, adding a thickener is totally optional. This is the time when I would adjust the salt and pepper. The stew is ready to serve and is a complete meal. It fed four of us, and there is a lot left over for lunches. If cooking for one or two, leave out enough for an additional meal and freeze the rest for an easy future supper.

To make the meal special, I baked some delicious onion-and-cheddar bread in a bread maker. I have done quite a few posts on using a bread maker. You can often pick one up very inexpensively at thrift stores; make sure it powers up at the store and that it comes with the baking pan and kneading paddle. I love playing with gadgets and have more than one bread maker. The last one that I bought cost $4.99! It was pretty grubby, but cleaned up very nicely.

Here is the recipe for the Cheddar Onion bread. I made a 1.5-pound loaf and sliced it thick (after it cooled a bit). The recipe is from the Betty Crocker bread-making cookbook. I added 1 teaspoon of Italian seasoning to their original recipe.

Cheese Onion Bread

3/4 C pluse 2 T of water

3 C Bread flour (you can also use AP flour)

3/4 C shredded Cheddar cheese

2 T Sugar

1 T Dry milk

2 t Instant minced onion

1 t salt

1 t Italian seasoning (optional)

1 and 1/4 t instant or active yeast (I used instant)

Note: T = tablespoon, t = teaspoon

Add ingredients in the order listed and use the basic or white bread setting for a 1.5-pound loaf.

This Cheddar cheese and onion bread is really delicious and is a perfect foil for any soup or stew.

Here is my $4.99 thrift store purchase. She looks pretty dirty, but she lit up when I plugged her in, and her buttons worked, so I took a chance.

Here she is after some elbow grease, soapy water, rags, and an old toothbrush. Now she looks brand new!

I’m writing these posts to encourage people to cook from scratch. Cooking at home will save you money, and it is much more economical to cook from scratch than to buy pre-made, highly processed foods. I taught my kids how to cook, and they make food and portion it into containers for easy meals during the week.

If you can’t stand leftovers, freeze your remaining food into meal-size portions to defrost for future use. Lastly, the more you cook, the easier it gets, so don’t be discouraged if your first attempts seem like too much effort.

Cheers

Mike

Save Money, Make Sally Lunn Bread In Your Breadmaker.

Inflation and the Trump tariff taxes have moved me into savings mode and I’m returning to my cooking roots. I love bread, but artisan and specialty breads are expensive. Yet, their ingredients are relatively cheap.

Kneading homemade bread can be therapeutic for some, but for me the process is too time consuming. However, with a bread maker making bread is literally, “set it and forget it.”

Making a custom loaf of bread takes about five minutes of adding ingredients to the bread pan then pressing a button. Three and a half hours later I have a fresh loaf of bread. This has allowed me to customize a bread for a particular dinner that I’m making, such as making a herb bread to accompany a hearty stew. I’m not baking bread for every meal, but I do it often enough that the process has become routine.

My bread maker is accessible; I don’t have to get it out of a basement or the garage every time I need it. The same can be said for my ingredients which are handy; putting a loaf together is effortless.

As far as measuring ingredients is concerned, I do the easiest accurate method possible. Some recipes are listed by volume (measuring cups and spoons). This isn’t the most accurate, but if that is what’s listed, that is what I’ll use. The one exception is that I will always weigh the flour (roughly 125 grams/cup of flour) as measuring flour by volume is notoriously inaccurate. If I’m given a recipe by weight in grams, I will gladly pull out my food scale and use that. Baking by weight is not only more accurate, it is less messy as I can weigh everything directly in the bread machines baking pan. In this case I may still measure very light items, like salt and yeast as I find scales are a bit flaky when measuring very small amounts. No mater what method I use, making bread is very simple, even when making loaves that include a few extra ingredients.

Today’s recipe is for Sally Lunn bread from The Betty Crocker Best Bread Machine Cookbook.

Sally Lunn bread has a brioche quality, but it is a bit less sweet. Its texture and color are similar to brioche and it makes a wonderful sandwich or toast. In fact, I toasted some this morning for an open face PB J sandwich for breakfast. Delicious!

A word about keeping bread fresh. All homemade breads will stale much faster than store bought breads as homemade breads lack preservatives. I have tried a variety of methods and in general two works the best. If I make a specialty loaf that I know won’t be consumed at a meal I’ll freeze half of the loaf for a future meal. If I make a general purpose loaf I have found that a traditional breadbox works the best to keep the loaf reasonably fresh and mold free. In my climate I can still use bread that I made five days earlier, although I’ll likely be toasting it towards the end. Plastic bags will keep the bread softer, but mold usually appears in 3 days. The fridge tends to make the bread go stale faster, so that is a no go. However, if you don’t want to buy a breadbox and want to keep your bread out for a few days then do what my grandmother did. She would wrap her bread in a clean cotton kitchen towel.

Here is the recipe for Betty Crocker’s 2 pound recipe for Sally Lunn bread:

I put two eggs in a measuring cut and added enough water to make 1 and 1/3rd cups of total volume. Not shown: I also added to the bread maker 1/3rd cup softened butter.

I added 1 and 1/2 teaspoon of regular table salt.

Then 2 tablespoons of sugar.

The recipe calls for 4 cups of flour. I always prefer to weigh my flour. Four cups should be around 480 grams (120 grams/cup), but I’m finding that I have to add more flour when I check my dough ball in the machine. Now, I weigh a bit more flour, 500 grams (about 125 grams/cup). That has been working out well.

Finally, 1 and 1/2 teaspoon of instant yeast.

I set my bread maker on basic white bread.

The bread maker has beeped. Bread is done!

Always allow your bread to cool before slicing. I know that it can be hard to resists immediately cutting it, but that will result in a lot of torn and squashed bread.

Here is a slice. Rich, very slightly sweet, wonderful!

Happy bread making!

Mike

There Are No Emergencies For Those Who Are Prepared

If you asked my kids for a dad quote, I’m sure that “There are no emergencies for those who are prepared” would be in their top five.  They have heard me say that hundreds of times over the years, and they have taken it to heart. 

I’m not saying that all problems are solvable. Instead, that quote conforms to my belief that many emergencies are entirely avoidable with a little planning and thought. Case in point, this weekend.

Julie and I had planned a long weekend getaway for the last few months.  Originally, we were going to go to Cuyahoga Valley National Park in Ohio. Still, those plans were dashed with the government shutdown and the knowledge that everything, including the bathrooms, would be closed.

Julie had just read the book James, which reimagined The Adventures of Huckleberry Finn, telling the story from the enslaved man James’s perspective. Hannibal, Missouri, is only about four and a half hours from our home, so going there to see the caves, the town, and the birthplace of Samuel Clemens, AKA Mark Twain, seemed like a good idea. 

We would travel and camp in Violet, my adventure van, a vehicle designed to handle whatever obstacle that came her way.

I bought Violet in 2018 as an empty Promaster high-top van and initially camped in her using an air mattress on her bare steel floor. Later that first year, I drove out to Colorado Springs and had Wayfarer Vans install basic camper structures, including a laminate floor, ceiling, and bed platform.  However, the real work on Violet has been ongoing, and a project shared with my friend, Tom, who is an expert builder. 

Violet was an empty cargo van when I bought her in 2018.

The idea was to create something more functional than a typical RV.  The plan was to design a vehicle that could be independent of society’s infrastructure. Violet is just that.  Every year, she has been modified as I learn more about her strengths and weaknesses.  

Here are some of the things that we have changed. In 2018, we installed 400 watts of solar panels on Violet’s roof. This year, I purchased and installed a much higher power alternator as a backup to charge Violet’s house batteries on cloudy days when the solar panels are insufficient. I installed a much more sophisticated navigation system and sound system.  Tom and I installed cruise control, and I installed a center console for more storage and to create space for atlases and camping directories.  We installed 12-volt lights in the ceiling.  I installed an advanced 4KW battery system to power everything in the cabin, along with a 2KW DC-to-AC inverter as a backup.  Tom and I installed a Wabasto heater that connects to Violet’s gas tank and can keep the cabin warm on wintery days.  Tom and I built an elaborate storage system under the bed that holds a fridge, pantry, storage boxes, and even a secret compartment.  We built a newly designed all-electric kitchen with a built-in induction cooktop and microwave oven.  The kitchen also sports a three-quart Instant Pot, a small air fryer, and an electric coffee pot, all powered by Violet’s solar panels/battery bank.  The kitchen countertop was made from wood we harvested from a fallen tree. We even installed a turntable so the front passenger seat can rotate to face the cabin, which adds extra seating.  And, by the way, when I mention “we,”  when talking about construction, I need to emphasize that I’m just the assistant, as my friend Tom is the man with the tools and knowledge.

We built an all-electric kitchen that is powered by solar energy.
From the bed looking towards the front of the van.

Violet is designed to function off-grid.  Cooking, refrigeration, heating/cooling, lighting, and entertainment systems are all powered by the roof’s solar panels combined with Violet’s 4KW house battery system. She carries water, but she can also purify stream water if needed.  She carries tools and emergency supplies.  She carries electronic test equipment and has advanced two-way radio gear, and she can even communicate via satellite in an emergency. She is built for adventure, and she has camped everywhere from a Walmart parking lot out east to a National Forest in Wyoming to the desert plains of Arizona. She has taken me to all parts of the eastern, southern, northern, and western states.

The “garage” side of the cabinet that we built under the bed.
The front side shows the chest refrigerator and the basket pantry. The kitchen to the right was replaced by our new design with a built-in induction cooktop and microwave oven.

I have upgraded her mattress, and sleeping in her is almost as comfortable as my home bed. The bed is very comfy for one, and acceptable for two due to space constraints. Violet even has a toilet, although the preferred option is to use external facilities. 

Despite all my preparation, things can still go wrong on any trip, and the journey to Hannibal was no exception. 

I usually borrow a sturdy ladder from Tom to wash off Violet’s solar panels before a trip. I did this two days before the Hannibal trip, and my roof inspection looked fine. The day before the trip, I was loading up Violet’s refrigerator with supplies. The fridge is right below Violet’s vent fan.  Then, too, everything looked fine.

We drove to the Mark Twain Cave campground, which was 2 miles outside Hannibal. By the time we got there, I was tired.  I told Julie that I was going to lie down on the bed for a few minutes and did so.  I looked up at Violet’s vent fan in the ceiling and saw that the Lexan plastic cover over the fan had been shattered.  This had to have happened on the day of the trip —how? The broken cover was a disaster as the fan is directly over the bed, and any rain would destroy the mattress.  I have a genuine fear of heights, and Violet is over 8 feet tall, but I needed to get up to the roof and fix the problem.  What to do?

Violet’s roof fan cover was shattered!

In 2018, I bought a collapsible ladder that was buried in one of Violet’s side compartments.  I can’t tell you how much junk I store in that spot, but it all had to come out so I could wiggle out the ladder. Without the ladder, there would be no way to patch the broken fan cover. Luckily, I had also stored some plastic sheeting and tape just in case of an unknown emergency. That would also come in handy.  I placed one piece of plastic over the fan base and closed the cover. I then put another piece of plastic over the cover and tapped it liberally. I did this standing on a fairly rickety ladder. I was grateful to be prepared to handle the emergency, but getting up high on a ladder was frightening.  However, I had no other options.  Survival tops fear in my book, so I just did it. I told myself that I could be afraid after the job was done.

A few other disasters occurred over the weekend, but they were minor compared to the shattered fan dome.  I’ll try to correct them today. Because we were prepared, we were able to complete our mini-trip and had a great time.  My favorite event was touring Mark Twain’s cave, which is very different from the other caves I have been in.  

I really enjoyed touring Mark Twain’s cave.

We decided to drive side roads along the Mississippi and started back on Sunday morning after we toured Mark Twain’s boyhood home.  We planned to stop for breakfast, but we could not find a restaurant along the way.  Planning once again came to the rescue. We got gas for the car and bought some coffee at the gas station.  We still had plenty of food left in the fridge, so we had a little in-van picnic at the gas station.  Our preparation paid off.

A gas station picnic.

The rest of the trip was uneventful, and we arrived home around 7:30 PM.  I brought in the refrigerated foods and settled in. However,  within 10 minutes of being home, the power went out and stayed out for hours. 

It had been cold, and the weather was not suitable for going to the unheated bathhouse to take a shower, so a hot shower was a top priority on our return.  No power equals no lights.  What to do?  I keep battery-operated lanterns on every floor of the house, and one came in handy to illuminate our bathroom. We got our showers!  Then Julie told me her phone was almost dead, so I went back into the camper and bought her a large battery bank to charge it.  Additionally, I have a battery-operated radio, which we used for information and entertainment, so the whole situation became an event rather than an emergency.  

Showering by lantern light.

All of these things could have been “emergencies,” but they were not because of a little planning. There are so many simple steps anyone can take to plan for unforeseen events.  Have some emergency food and supplies on hand to stay safe during a winter storm. Make sure you have a light source and a portable radio with batteries. Consider your individual needs. Do you have infants?  Buy an emergency pack of diapers.  On medication?  A little extra supply wouldn’t hurt. Think about what problems you may face and have a plan of action.  Do you know how to turn off the main power to your house? Do you know where your house water valve is? 

Have basic tools in your car.  Have an alternate way to charge your phone both at home and in your vehicle.  Keep several simple first-aid kits: one for the house and one for the car. Wear appropriate clothing when driving so you are prepared if you get stuck. Keep a winter kit in your vehicle with some non-perishable food, a blanket, hat/gloves, jumper cables, and a flashlight.  Make sure you take your cell phone with you when you are out and about.. 

Run scenarios through your mind and come up with solutions to the problems they raise.  Your situation and place of residence will determine your needs.  You may not need an emergency winter kit in Florida, but you might need some hurricane supplies. 

Be prepared and turn emergencies into inconveniences. Remember, there are no emergencies for those who are prepared!

Cheers

Mike

Save Money: Make my Sister Carol’s Pot Roast Dinner

With inflation and the Trump tariff taxes, grocery prices are insane, and meat prices lead the pack, but sometimes you want meat.

I was surprised that the price of a pot roast was actually less per pound than some hamburger offerings. Yet, a delicious pot roast dinner feels a lot more special than a hamburger on a bun.

You can see that this boneless chuck roast is $7.99/pound, which is less than some varieties of hamburger.

Back in the 1960s, my sister Carol was having dinner at a friend’s house. Her friend’s mother made a pot roast, and Carol thought it was the most delicious pot roast that she had ever had. She felt so strongly about it that a few weeks later, she made it for our family. Those were the days when people were discovering using convenience foods, like condensed soups, as ingredients. It turns out that her friend’s mother was doing just that, and the pot roast recipe became an absolute classic because it was not only delicious, but it was also incredibly easy to make.

The other day, my son asked me if his girlfriend could come over for dinner. “Of course,” I said. Usually, I keep my cooking simple on weekdays, so my goal was to make a simple dinner that tasted great. I went back to my mid-century roots and resurrected Carol’s pot roast recipe.

I’m using a 3.5-pound pot roast.

In a bowl, mix up one can of undiluted condensed cream of mushroom soup with a couple of tablespoons of soy sauce. You can omit the soy sauce if you wish.

The mixture will look like this when mixed.

Add some oil to a heavy pot and brown the pot roast on all sides using medium heat.

When browned, remove from the heat and sprinkle on a package of dry onion soup mix. If that is too salty for you, use some sliced onions instead. However, using the soup mix is very convenient.

Pour the soup/soy sauce mixture over the roast.

Add your vegetables on top. I’m using some carrots and baby potatoes. You could use cut-up regular potatoes just as easily.

Cover and place in a 325°F (160°C) oven for 3.5 hours. For a smaller pot roast, use less time; for a larger one, use more time. The roast should be fork-tender.

When done, remove the vegetables to a serving bowl.

Here is the pot roast. It was so tender that I had to be careful when removing it to a cutting board. The juices make an instant gravy.

Plated up. It was really delicious. I’m serving it with a slice of “All American Beer Bread.” That recipe is coming up later in this post.

Today was a typical retirement day for me. I listened to some medical lectures to keep myself current. I then drove out to my friend’s worksite and brought him a cup of coffee and borrowed a ladder.

I was off to the self-car wash to clean Violet the camper van, and I needed the ladder to rinse off her solar panels. Afterwards, I felt an urge to go to Goodwill to check if they had any bread makers. Dear reader, you know that I have been posting about saving money using a bread maker. If you have followed my posts you likely realize that I already have several bread makers, so why in the world would I want another one? To be honest, it is just one of my quirks. I love machines and I love how subtle differences between manufacturers can impact outcomes. When you study machines you need machines to study (awkward sentence-I know).

Naturally, I wasn’t going to spend a fortune, but my eye spied a dusty, but cleanable bread maker from the mid-1990s for only $5.99! I had to have it, and I used it to make bread for today’s dinner. Of course, I scrubbed it from top to bottom before using it. Let’s go over that recipe, shall we?

Here is my $5.99 find.

The recipe that I used is from the book “More Bread Machine Bounty.” My only addition was to add 1 teaspoon of Italian Seasoning to give it more of a savory flair. The recipe is called “All American Beer Bread.” I used the basic (white) bread setting which worked out fine, but I probably should have used the whole wheat setting as the recipe was more than 50% whole wheat flour.

Adding the ingredients took all of 5 minutes. I weigh a lot of my ingredients because it is not only more accurate, but also less messy.

The final product. This was a 1.5-pound (750 g) loaf. The crust was very crunchy, and the bread was the perfect foil for the pot roast.

The crumb was soft and the crust was crunchy!

It is my goal to show others that cooking economical meals can be both simple and delicious. A pot roast may be a bit of a luxury for a weekday meal in 2025, but there will be plenty of leftovers for sandwiches. Additionally, the bread was very inexpensive to make, but it tasted like it came from a fancy bakery.

We all have to eat, and cooking from scratch is one of the easiest ways to save money. I mentioned in that past that one of my daughters makes scratch meals for 4 and divides the food into 4 containers for 4 days of suppers. This way she has a delicious hot meal within minutes of coming home from work. She rotates around 10 different menus to give her variety over the weeks and never feels deprived while saving time and money.

Dear reader, I would like you to consider the art of simple scratch meal preparation.

Peace

Mike

Save Money, Make Sausage Lentil Soup.

Another in my series to battle grocery inflation and the Trump tariff taxes. Live your best life!

The combination of inflation, ‘shrinkflation,’ and the Trump tariff taxes is increasing food budgets to out-of-control proportions for many U.S. citizens. Generations have been raised on convenient, ultra-processed foods that are tasty, easy to prepare, and inexpensive.  However, they are not only unhealthy, but they have also been steadily increasing in price. Food costs are now so high that individuals and families are struggling to afford enough for their weekly meals.

I was raised in the 1960s in a family of 7 with one parent who worked outside of the home. We always ate well because my parents practiced skills that they learned during the Great Depression. Convenience foods were available, but not to the same extent as they are today.  It was common to eat at home and prepare food from scratch.  

I found myself in an unusual situation, as I was retired yet still had children living with me.  Feeding them nutritious food was important, and I also wanted to teach them some of the money-saving skills that I learned as a child.

Cooking basic foods from scratch is a critical skill to have to survive inflation and the Trump tariff taxes.  It still “hurts” to go grocery shopping, but I know that there will be food on the table.  Currently, my one son is in grad school and at home, but my other kids frequently visit, and I’m always happy to feed them a meal.

In today’s post, I share a recipe for lentil soup with sausage.  This recipe is very flexible and can be made with a variety of sausages, including cut-up hot dogs.  Additionally, it can be made as a vegetarian dish by omitting the meat and using a vegetable broth.  It relies on lentils, which are very inexpensive, and whatever sausage you have on hand.  Unlike beans, lentils don’t require soaking, and they easily cook in this soup in under an hour.

I made this soup yesterday, and three of us ate to our fill.  There is a lot of soup left for lunches, and I’m certain I’ll have to freeze some in vacuum bags for future meals. This recipe makes quite a bit.

Lentils come in a variety of colors and varieties.  Although they have slightly different characteristics, they are all high in carbohydrates, protein, and fiber.  They are also excellent sources of some vitamins and minerals and are low in fat.

You can buy lentils in cooked in cans, but they are the most inexpensive when purchased dry.  All grocery stores sell lentils, and you can find them in the same area where dried beans are kept. A pound of dry lentils yields approximately 2.5 cups.  Many recipes use one to one and a half cups of lentils, and you can buy a pound of them for around $1.50, even less if you have access to a bulk store. 

One pound of dry lentils for only $155? That is a bargain!

Lentils are grown in the US, with Montana being the largest producer.  Inflation has impacted costs, but the Trump tariff taxes will have a less significant impact on their price. Unfortunately, the U.S. exports a lot of lentils and that will be impacted by retaliatory tariffs from other countries. This may negatively impact independent farmers.

I make this soup in a heavy pot called a Dutch Oven.  My Dutch oven is pricey, but you can find inexpensive ones online and at places like HomeGoods. Inexpensive Dutch ovens may have less durable enamel, but they will perform just as well as the high-priced versions.  Don’t have a Dutch oven?  Use a large pot with a lid.  Like many soup recipes, this recipe can also be made in an Instant Pot or slow cooker.  If you go those routes, you may need to adjust liquid levels, and you will need to adjust cooking times.  Simply Google for a recipe, for instance, “Lentil soup recipe for an Instant Pot” to get an idea of the changes you need to make.  Of course, you can use your found recipe, but I know this one tastes great, even if you modify it somewhat.

Sausage Lentil Soup

-Cooking oil

-1 pound sausage.  You can use more or less.  If you are using a smoked sausage, such as Polish sausage, you can slice it and add it directly to the soup.  However, I like to brown it as it adds to the flavor.  If you are using fresh sausage, such as Italian sausage, you need to brown it first.  Use whatever sausage you like.  I have made this soup with hot dog slices that I browned, and it was delicious.  Also, don’t get hung up on the amount of sausage.  I had a package of Polish sausage in the fridge that was 13 ounces, and it was enough.  

Use whatever sausage you have on hand. This package was only 13 ounces, but it was still enough to make a delicious soup.

-1 onion, any type, diced.  I had some red onion, so that is what I used.

-2 to 3 stalks of celery sliced.  A great way to use up limp celery.  Don’t have any fresh?  Use dehydrated.

-3-4 carrots diced.

-jar garlic, heaping spoonful.  Of course, you can use a couple of cloves of fresh garlic or even some powdered garlic.  This is home cooking after all. 

-heaping spoon of tomato paste.  Don’t have it?  Omit it.

-1 tablespoon of Italian seasoning.  You can also use Oregano, but cut down the amount to a teaspoon.  

-½ teaspoon of fennel seed.  You can omit this, but it really adds to the soup.

-1 or 2 bay leaves. You can omit these, but they add a subtle “something.”

-ÂĽ teaspoon red pepper flakes.  You can omit this, but it really adds to the soup.  If you like foods to be “hot,” you can up the flakes to around ½ teaspoon or a bit more.

-1/2 teaspoon of black pepper.

-1 teaspoon salt to start.  Adjust this seasoning at the end of cooking.  Remember, you can always add salt, but you can’t remove it. If you are using chicken bouillon, start with even less salt, as bouillon is salty.

-28 oz can of tomatoes.  If using whole, break them up.

-5 cups chicken stock.  I only had four cups, and so I added a cup of water; all was good.  You can use vegetable stock, chicken bouillon/water (reduced your salt content), or even water alone if that is what you have.  Stock does add complexity and flavor. 

-1 and ½ cup dry lentils that you rinse in water (using a sieve or colander).

-Some greens like spinach, kale, or even salad greens (optional).

Dice carrots and onion, and slice celery.
Slice the sausage of your choice. If using a fresh sausage, remove the skin and brown it. Browning a smoked sausage is optional, but I think it adds flavor.
Soften onions in a little oil. Then add carrots and celery. Continue to cook for a few more minutes or until they slightly soften.
Add garlic and spices and briefly cook, being careful not to burn either.
Add the tomatoes. I also had an overripe tomato that I chopped up and added. No sense in wasting it just because it was no longer sandwich-worthy.
Mix it all together.
Add the broth (or water) and the sausage meat. I brown the Polish sausage for more flavor, but it is not required if the sausage is already cooked. You will need to brown fresh sausages, like Italian sausage.
Add the rinsed lentils to the soup.
Bring the mixture to a boil and then reduce the heat to a simmer. Cover and cook for around an hour. You can simmer much longer than that if you wish. If you like a thick soup, you can remove 1/3 of the soup (minus the meat), blend it in a blender, and return it to the pot. I thought my soup was thick enough without blending.
I added some greens at the very end of cooking to add some color. Stir them in and they will wilt in a minute or two.
Ready to serve.
Plated and served with some oyster crackers and homemade bread. Delicious! You can add a drizzle of olive oil to the top of your bowl for extra luxury.

Soup is a great way to stretch your budget and there are many different soups so you will never tire of it. You can be very flexible when making soups and still get a good result. The more times you make any soup the more comfortable you will become in adjusting and substituting. Plus, soup is really easy to make. Once in a pot, it does its own thing and there is no problem cooking it for a long time as that often enhances its flavor.

Make some soup today, and save some money!

Enjoy!

Mike

Save Money By Making Potato Pancakes For Dinner!

Here is another recipe in my series to help you reduce food costs.

I grew up Catholic in the 1960s, and during that time, we had meatless Fridays.  Well, they weren’t exactly meatless, as fish wasn’t considered meat and could be consumed. I think of the Fridays of my youth as times that I dipped my appetite into being a vegetarian or at least a pescatarian. I have many fond memories of the non-meat dishes my mom would make on Fridays.  I never felt that Fridays were deprivation days. 

Growing up, I was told the Pope conspiracy story where some maniacal Pope made a pact with the fishing industry to promote the sale of fish.  That is a great story, but unfortunately, there isn’t any real data to support that conclusion.  Rather, the history of meatless Fridays seems to stem from the fact that Jesus was crucified on a Friday, so as a measure of respect, no warm-blooded animal could be eaten on that day. Fish, being cold-blooded, was fair game.

As we deal with runaway inflation and the additional burden of Trump’s tariff taxes, food has become increasingly unaffordable.  This is especially true for beef, where even a simple hamburger now seems like a luxury food. 

Potato pancakes are a dish that is prominent among many cultures, particularly among the various Eastern European groups with which I am familiar.  The ingredients are simple, and the results are delicious.  Growing up, we often had them as a Friday main course, served with applesauce or sour cream. I always liked dipping a piece of a potato pancake into the apple sauce, as the result was sweet/salty goodness. Sometimes, my mom would make them with fish sticks. By themselves or with fish sticks, we loved them.

When we make potato pancakes now, we still serve them with applesauce and sour cream. It is the end user’s choice which condiment to use.  Sometimes I choose both and alternate my dipping, one piece into the applesauce and the next into the sour cream. We add a side of bacon or sausages so the meal is no longer meatless.  However, it is still very economical.

Now, some people prefer whey protein bars or a tofu stir-fry over traditional foods.  I do not argue with your food choices.  However, I ask that you be respectful of mine.

Potato pancakes and many other meals served in the 1950s and 1960s would be considered “unhealthy” by current food gurus.  However, look at the obesity rates then and now. Most were of normal weight in the 1960s, and they ate those foods. Food fads are constantly being pushed on us.  No sugar, no fat, high protein, low protein, only raw foods, and so it goes.  Yet, we have been a nation that has moved from being mostly normal weight to one of being overweight, and we are now a nation of obesity.

I have battled obesity all of my life, and I have great respect for those who also deal with that affliction. There are many reasons for obesity in America. I believe that it is contributed to by the amount of engineered ultra-processed food that we consume, coupled with the high availability of food designed to be irresistible, and possibly by the high amount of sugar we ingest. Methods for losing weight have long been promoted. Drink some strange juice, eat only meat, don’t eat meat, fast, only eat soup, and so on.  Honestly, I have tried just about every diet to lose weight, and some of them do work.  The problem is that eating a diet that restricts entire categories of food is impossible to maintain.

My current view of “healthy eating” is not a radical plan that involves eliminating food groups. Instead, it is simple-minded.  I try to limit my intake of ultra-processed foods and aim to eat a diverse range of foods.  Additionally, I try to reduce snacking and cut back on the amount of packaged foods I eat.  Unfortunately, I’m still a sugar junkie (I’m doing my best). Lastly, I attempt to limit my eating to three meals a day, with a rare small snack around 4 PM, only if I’m feeling extremely hungry. 

I find that if I eat a lot of packaged foods or diet foods, I’m starving an hour later.  If I eat traditional foods, I’m satisfied until the next meal. I would rather eat a smaller portion of a food that I enjoy than a larger portion of some concoction with lower calories that tastes like it was manufactured at DuPont Chemical. 

Beyond being real food, potato pancakes are incredibly economical. The ingredients are simple, and most households have everything on hand. My mom would spend a lot of time shredding potatoes with a box grater; however, I use a food processor to shred both the potatoes and the onion. I’ll start with the shredding disc to shred and then use the “S” blade to turn the shredded potatoes into pulp. This is a speedy process. 

After I initially shred the potatoes and before I use the “S” blade, I use a colander to press out as much liquid as possible from the potato-onion mixture.  This results in a better product.  However, at times, I’m lazy and skip this step, and still get acceptable pancakes. However, the extra water in the mix will result in more splattering when you fry them. 

One of my kids prefers chunkier hash-brown like potato pancakes, which can be achieved by only shredding the potatoes.  However, I prefer more traditional potato pancakes. An egg or two, a little flour, garlic, some salt, and pepper, and your batter is ready to go.

Add some oil to a hot pan, drop in the batter, and use the back of your spatula to press it into a pancake. Cook one side until browned.  Turn the pancake and repeat…done! I’ll toss our pancakes into the oven at a low temperature (as close to 200°F as your oven will allow) to keep them warm so we can all eat together.  You can use your regular oven, but I prefer a toaster oven because it is more energy-efficient.    

Here is the recipe.

Simple Potato Pancakes

4 large potatoes or equivalent

½-1 medium onion

2 eggs

ÂĽ cup all-purpose flour

½-1 tsp. salt or to taste

1 heaping tsp. of jar garlic (you can use real garlic or powdered garlic if you wish).

ÂĽ tsp. black pepper or to taste

  1. Using a grater or food processor, shred the peeled potatoes and onion.
  2. Place the grated mixture in a colander and, using a paper towel, gently squeeze out as much liquid as possible.
  3. Replace the shredding disk on the food processor with the “S” blade.  
  4. Return the potato/onion mixture to the food processor and use the pulse control until you have a slurry with some chunks remaining. 
  5. Transfer the contents to a bowl and add the remaining ingredients, then mix them all together.  You may need to adjust the flour slightly to achieve a lumpy pancake batter consistency. 
  6. Heat some cooking oil in a pan and drop in dollops of the potato mixture. Flatten into pancakes using your spatula (pancake turner).
  7. Cook at medium heat until one side is brown, turn the pancakes over, and repeat.
  8. I’ll turn my toaster over to its lowest heat setting (a bit over 200°F) and transfer the cooked pancakes to an aluminum foil-covered dish, so all the pancakes are hot when served. 

Served with a side of bacon, applesauce, and sour cream, this meal is truly delicious and satisfying.  

Peeled potatoes were shredded along with the onion. I then squeezed out as much liquid from the mixture in a colander. I replaced the food processor’s shredding disc with the “S” blade and pulsed the mixture until it resembled the texture in the photo above. I put the potato mixture in a bowl and added flour, eggs, and seasoning.
When it is all mixed, it will have the consistency as above. You may need to adjust the flour a bit.
Add dollops of the batter to hot oil in a medium heat frying pan. The top left pancake has been flattened with a pancake turner (also known as a spatula). I’ll do the same for the remaining three in the pan.
When one side is brown, flip it over and repeat the process on the other side. I keep my potato pancakes hot by placing them in a warming oven as I go. That way, everyone gets hot pancakes, and we can all eat together.

Bon appetite!

Mike

Save Money: An Easy Chicken Dinner

If you have been following my posts, you know that I have been on a mission to help people cope with inflation and the Trump tariff taxes. I have been writing about everything from making your own bread to saving on cleaning projects.

One of the expenses we all have to deal with is food. It is clear to just about everyone that eating out regularly is an avoidable expense, and that goes for fast food, too. But what to do if you feel insecure about cooking?

I have been posting inexpensive and straightforward recipes to demonstrate how easy it is to make food from scratch. This post does the same; it is one of the easiest recipes you can make, yet it looks like you spent hours preparing a fancy Sunday dinner. Come with me on this recipe journey! Today we are making roasted chicken with vegetables.

A friend of mine just told me that the $100 beef tenderloin that I usually buy for Christmas dinner is now $190! I had to catch my breath. At this time, chicken is still reasonable, with whole chicken selling for $1.46 a pound. Yes, you are paying for some bones, but that chicken carcass can become another meal by turning it into soup!

If you are starting your cooking journey, this is a good place to start, as preparation is straightforward, and it is a “set it and forget it” dinner that looks impressive.

One item that you may want to consider for many cooking tasks is a food thermometer. I have had mine for many years and I think it was under $15. This one is selling for less than $6 and it is an Amazon choice item. If you don’t want to buy on-line you can find food thermometers at any hardware or big box store. They take the guesswork out of cooking, and are a very worthwhile investment.

Today’s recipe will be roasted chicken with vegetables. Let’s start with the vegetables.

Chop up an onion and add it to a pot. I’m using a Dutch oven, which is ideal, but you could use any big oven-safe pot with a cover. If you don’t have one, you could use a baking dish with some aluminum foil to cover it.

Add to the pot some cut-up carrots and small potatoes. You could also use regular-sized potatoes that you cut up. These potatoes were thin-skinned, so I didn’t bother to peel them. Wash your vegetables in water first. Peel the potatoes if they are thick-skinned.

Add some cooking oil. I’m using avocado oil, but you can use any cooking oil that you have on hand. I used a couple of tablespoons of oil.

Sprinkled on some spices. Around one teaspoon of rosemary, a sprinkle of salt and pepper, and a big sprinkle of garlic powder. I mixed it all up so all of the vegetables were covered. If you only have salt and pepper, that’s OK too.

Now it was time for the chicken. You can use just about any spices that you like. Smear some cooking oil on the chicken and sprinkle salt and pepper on it (inside and outside). I added some smoked paprika and garlic powder, but there are many other options, including oregano or Italian seasoning. Here again, if you have only salt and pepper, that’s fine. However, some spices will definitely add some interest to the chicken.

Cover and place in a 375°F (190 °C) oven for 45 minutes.

Then uncover to brown, and continue to cook for 30-40 minutes or until the internal temperature is 165°F (75 °C). It is normal to go a bit over 165°F; that’s OK.

Remove the chicken and, after letting it stand for around 10 minutes, carve it. Carving isn’t hard, and it doesn’t have to be perfect. I hold the chicken down with a fork and use an 8″ Chef’s knife. You can use whatever you have.

Using a slotted spoon, remove the roasted vegetables. By the way, check to make sure that they are done by piercing some of them with a fork. If the fork enters easily, the vegetables are done. If they are still hard, continue to cook them, checking every 5 minutes until done.

Here is the complete meal. I added some steamed broccoli for color, and I’m also having a little of my homemade oatmeal bread. Delicious!

This was a nearly effortless dinner. Yet, it looked and tasted like I spent the hours making it. The leftover chicken carcass will be used to create a chicken soup in a day or two. I’ll even toss in the leftover carrots and potatoes (I’ll cut them up) into the soup. Why waste them, as they will add great flavor to the soup?

Consider making a roasted chicken. If you are cooking for one, you will have several dinners, chicken for sandwiches, and soup to boot. If you are cooking for a family, they will be impressed with your efforts.

Bon appétit!

Mike

Save Money, Make Marry Me Chicken!

Inflation and the Trump tariff taxes have made grocery bills reach astronomical proportions. One way to stretch a dollar is to make meat a complement to a meal instead of the main course. Nothing does that more deliciously than combining meat with other ingredients in a one-pot meal.

Marry Me Chicken is also called Chicken with Orzo, but I think that the Marry Me title gives the dish a bit of interest.

One of my daughter’s friends was visiting us from out of town and offered to make us dinner. She made this dish which was delicious. My daughter now loves to make this recipe for herself as it is fast, and simple. She will portion it out into 4-5 dinners and have dinner prepared for much of the week.

The first recipe is the one that I’m illustrating here. The second is the one that my daughter uses and is more cost effective.

Use this recipe as a springboard. If you don’t have orzo, use some other pasta. No heavy cream? Try half-and-half, evaporated milk, regular milk with a flour thickener, coconut milk, or even sour cream.

In my daughters recipe the sun dried tomatoes and 3/4 cup of Parmesan Cheese are replaced by less expensive tomato sauce and smaller qualities of Parmesan Cheese. It is all good.

This is the recipe that I used (borrowed from the internet). It is a bit more upscale with greater quantities of ingredients and more expensive ingredients.

This is my daughter’s recipe (also borrowed from the internet). It is more cost effective. However, it is also delicious!

Here are the ingredients that I used. The sun dried tomatoes were drained and I did grate the Parmesan cheese. However, you could use the stuff in the green jar, if needed. You can also see the pesto bread that I made to serve with this dinner. I’ll have that easy recipe in another post.

The cut up chicken was cooked in some olive oil (any oil works) for a few minutes until it gained a little color.

In went the spices and the sun dried tomatoes.

I stirred it all up… oops, I forgot the garlic! No problem, I’ll add it now. Fresh is great, but I used jar garlic as that is what I had on hand. I cooked this mixture for a couple minutes.

In went the orzo and chicken broth. You could use water or water plus bullion if you wished. If you used bullion use less salt and adjust at the end. Orzo is awesome, but you could use some other sort of pasta if needed.

Cover the pan and cook on medium low for around 12 minutes. Every once in a while stir the pot to prevent the orzo from sticking. I tested the orzo at 12 minutes and mine needed a few more minutes to fully cook.

Add the heavy cream (or other dairy product). Stir it in.

Stir in a few handfuls of spinach and allow them to wilt.

Just before serving add the Parmesan Cheese.

Here it is served up with some asparagus, a salad, and my homemade pesto bread. Yummy!

Save Money, Make Your Own Hamburger Buns!

Grace: I was thinking of stopping over on Sunday.

Me: Great!  Will you be staying for dinner?

Grace: Probably, but I’m not sure.

Me: I’ll BBQ!

Grace: Sounds tempting.

Me: How about if I make homemade hamburger buns?

Grace:  Hmm.  Sold.

Dear reader, inflation and the Trump tariff taxes are taking a toll on all of us, and I have been encouraging folks to save money by cooking from scratch.  This is my small way of trying to help others during these troubled times.

When I rediscovered my bread maker, I was excited to remember how effortless it was to make really delicious bread, and how much cheaper it was to bake rather than buy. Is the cost of buying a bread maker worth it?  Absolutely, but not everyone has cash to burn, and I knew that used bread makers could be purchased for pennies on the dollar. 

To illustrate my point, I visited a local second-hand store and bought a bread maker for $14.

I never used a bread maker to make hamburger buns, and I was surprised by how simple it was using the dough function on the machine.  I just tossed in the ingredients, and 90 minutes later, I had perfectly kneaded dough.  Since the dough was well-kneaded, it was easy to form into buns.

You can buy cheap hamburger buns for a few dollars, but good buns are considerably more expensive.  Since this recipe uses an enriched dough , I wasn’t sure if my homemade efforts would save any money. However, when I did the calculations, it was clear that my homemade buns were considerably cheaper than not only the upscale rolls, but also cheaper ones.  Plus, they were really delicious! For those wondering, an enriched dough has extra ingredients like milk, eggs, and sometimes more sugar. This results in a richer end product, but more ingredients means a greater cost.

I wanted to share the recipe with you.

Alas, I can’t credit this internet recipe as I saved the image without the author’s info. Remember to add the ingredients in the order listed. Bake at 350°F (175 °C) for 12-15 minutes. I checked at 12 minutes and added a few more minutes to achieve my desired color for the buns.
My $14 thrifted bread machine. I usually weigh the flour instead of using volume measurements.
This machine does not have a warming pre-cycle. I used hot tap water and added the cold milk and egg to it. This resulted in a warm solution. Remember, if it is too hot to keep your finger in it, it is too hot for the yeast.
I melted the butter in the microwave using short bursts of time (10 seconds). If you just blast the power, your butter will pop and splatter, making a mess. Into the bread pan it went. By the way, I really like this Oxo measuring cup. It has easy-to-see markings.
In went the sugar. I was too lazy to convert 1/3 cup of sugar into grams. Perhaps next time.
In went the flour. I substituted AP flour, and it worked fine. However, bread flour will give you a slightly better texture. Weighing the flour is vital as flour can settle, giving you wildly different amounts if you measure using a cup.
In went the salt. I always put the salt far away from the yeast. Concentrated salt can kill yeast.
Now the yeast. I made a little well and added the yeast. I buy my yeast in bulk, and it is significantly less expensive than in those little jars or packets. You can purchase it online or from places like Costco and Gordon Foods.
I selected the dough cycle on the bread maker and pressed start. I had perfect dough 90 minutes later!
This thrifted bread maker made perfect dough ready for shaping!
I cut the dough into six pieces. Honestly, I should have cut the dough into 8ths as my buns were huge.
I shaped them into balls and then flattened them a bit. Yes, I’m not the best shaper. Then, I covered them with a tea towel and let them rise for 30 minutes. I then baked them at 350°F (175 °C) for 12 minutes. I checked them and added an additional 3 minutes to achieve the color that I wanted.
This step is optional. After the buns rose, I gave them an egg wash and added some poppy seeds. I didn’t include the seeds in my cost calculations as I had some in the pantry and had no way to calculate their price. I’m using parchment paper, but you could use a reusable silicone mat or any other option that suits your preference.
All baked and ready for today’s BBQ. I’m storing them using a cake cover to keep them fresh. But what about the costs?

Cost analysis

This recipe made over 1.5 pounds of dough. The cost of ingredients was $1.62. Cost would be less if I bought the flour in bulk. Cost would be more if I bought the ingredients at a more expensive grocery store.

I’m comparing prices by the ounce. Buns are from Walmart.com.

These are cheap hamburger buns. A 15 oz package is $1.97. These buns were 1.8 x more expensive than my homemade buns and not near the quality. This surprised me as I thought my buns would be more expensive.

These 16 ounce Brownberry buns were $3.78 and represent a better quality bun. However, there were other hamburger buns at Walmart.com that were even more expensive. These buns were 3.4 x more expensive than my homemade buns!

I thought making hamburger buns would be more difficult than it was. With the bread maker doing most of the work it was then simple to shape and bake the buns in the oven. I’m sure I’ll do this again.

I knew that my buns would be less expensive than the Brownberry buns, but I was surprised to see that the price per ounce was 3.4 times more. Even more surprising was the fact that the cheap, Bimbo buns were 80% more expensive than my much higher quality home made buns.

Yes, you can save money by making your own hamburger buns, and it was really simple to do so. The $14 bread maker made light work out of a normally labor intensive task!

Peace

Mike

images are my own or screen shots from websites. All images are for educational purposes only.

Save Money: The TVP Meatloaf Experiment

Inflation and the Trump tariff taxes have impacted many areas, but price increases have been felt the most at the grocery store. Add to this beef shortages, and the cost of beef has gone through the roof.

Above, we have a “nothing special” pound of ground beef going for $9 a pound!

I have done posts on how to stretch your meat dollar. One way to to make a classic meat loaf which uses fillers like bread crumbs or oatmeal to bulk out a small amount of ground beef to proportions enough to feed a family. This is a useful strategy, but what is you could go a step further? What if you could find a very inexpensive substitute to replace 50% of your ground beef in a recipe? What if that replacement was healthy, high in protein and minerals, and offered fiber for gut health? That is today’s experiment.

TVP or textured vegetable protein was developed in the 1960s as a way to use up waste material from soybean oil production. After the oil was squeezed out of a soybean the solid matter that was left over was dehulled and turned into soybean flour. That flour was then treated to separate the protein which was heated and extruded through a mold. The extrusion process can be adjusted to make differed shapes, such as crumbles, strips, and chunks.

TVP can be made from various plants, but it is most commonly derived from soybeans. Soybean TVP is low in fats, high in complete proteins, and high in multiple minerals, including iron, magnesium, phosphorus, and potassium. Despite what you have heard, there is no need to worry about soy-based estrogens, as they are different from human estrogens.

The cost of TVP is significantly less than that of ground beef. If you buy small amounts from a boutique health store, it will be more expensive than if you buy it in bulk. Shopping on Amazon, I found drastically different prices for TVP, which is interesting, as there isn’t a lot of difference between brands, as this is a very basic food product.

I find that 1 cup (100 grams) of dry TVP, when hydrated, is about the same bulk as 1 pound of ground beef. One pound is around 450 grams, so one pound of dry TVP makes (roughly) the equivalent of 4.5 pounds of hamburger.

This Bob’s Red Mill TVP sells for $6.88 a pound, so 1 pound of hamburger equivalent (using 100 grams of dry TVP) costs around $1.52.

If you shop around, you can buy TVP in bulk. On this site, TVP is $3.80 a pound. For 100 grams of TVP (1 pound hamburger equivalent), the cost is 84 cents.

Looking for an even better bargain? This bulk bag of TVP is 50 pounds. One hundred grams of dry TVP (1 pound hamburger equivalent) costs only 37 cents! It is unlikely that you will buy 50 pounds of TVP, but it does have an extremely long shelf life. Additionally, you could buy a bag and split it in a group purchase.

TVP has essentially no flavor, and like its cousin, tofu, it picks up whatever flavor is in the dish. TVP is usually soaked in boiling water for around 10 minutes before using. I use a 1:1 ratio of TVP to water and find that adding two teaspoons of a bouillon like “Better Than Bouillon” to I cup of boiling water gives TVP a meaty taste. Vegetarians and vegans have created a variety of “soaks” for TVP that are meatless, yet add a meaty flavor. Since TVP comes in a variety of shapes it is possible to create all sorts of meat-like dishes using this ingredient.

You have probably eaten TVP many times, as it is often used as a meat extender in many frozen meals. The ingredient list on the package may say TVP, or textured vegetable protein, or TSP, or textured soy protein, or soy protein isolate, or soy chunks, or soy meat, as well as other terms. All of these names are synonyms for TVP.

TVP granules are readily available and can be found in many grocery stores. Chunks and strips can sometimes be found in health food stores and are available at online retailers.

TVP is best when combined with flavorful ingredients. Although it can stand alone as a “meat,” I find that it is easiest to use it as a substitute for 25-50% of the hamburger. In today’s example, I’ll be using it in a classic meatloaf recipe.

Let’s look at the easy process of substituting TVP for 50% of the hamburger in this meatloaf. recipe

Here you can see that 100 grams of TVP is the equivalent of one cup. As I mentioned above, I find that 1 cup of dry TVP, when hydrated, is approximately equivalent to 1 pound of hamburger.

I measured 1 cup (100 grams) of dry TVP into a bowl.

I added 1 cup of boiling beef broth (1 cup water and two teaspoons of “Better than Bouillon”), mixed, and let it sit for 10 minutes.

Here is a classic meatloaf recipe. The hydrated TVP is on the right at the 3 o’clock position. The recipe that I used had 1 pound of not too lean hamburger (don’t forget that TVP is very low in fat so you need the extra fat in the hamburger). One cup dry TVP hydrated to about 2 cups. One chopped up onion, 1 egg, 3/4 cup oatmeal, 8oz tomato sauce, 1/2 teaspoon salt, 1/4 teaspoon pepper, 1 teaspoon garlic powder. Mix it up (I use clean hands). Place in a 5″ x 9″ pan and top with catsup mixed with a little brown sugar. Bake at 350F (175C) for around 1 hour or until the internal temperature is at least 160F (71C).

Here it is out of the oven.

Served up with some mashed potatoes and vegetables.

I didn’t tell my family that I was using TVP. After they had a few bites I asked them how the meatloaf was. They all said, “Good.” I then told them that I added a special ingredient and asked them if they could guess what it was. They replied, “No, it just tastes like meatloaf.” They were surprised when I told them that 50 percent of the “meat” was TVP.

Granular/crumbled TVP can be used for many dishes beyond meatloaf. Spaghetti sauce, on top of a pizza, Sloppy Joes, chili —the list goes on. TVP chunks and strips can add variety when making TVP-containing dishes. Consider experimenting with this inexpensive, protein-rich, low-fat, high-fiber meat substitute.

Peace

Mike

Images are my own or from various websites and are used for educational purposes only.