In the 1980s Popeye’s Chicken came to Chicago and I was introduced to their wonderful fried chicken and sides. Up to that point a “side” meant only one thing, french fries. However, Popeye’s gave that term a tantalizing new meaning to me.
I loved their now discontinued dirty rice, but I have to say that I went crazy for their red beans and rice.
Red beans and rice is traditionally a Louisiana dish made on Mondays which were wash days. Before the advent of the washing machine washdays were back breaking labor days. Busy moms needed something easy for dinner, and they borrowed from their African, Spanish, and French cultures and came up with red beans and rice. This dish was simple, cheap, filling, and delicious. It could be parked on the stove, or in the oven and cooked for hours unattended. When dinner time rolled around it was waiting to fill hungry bellies.
For years I searched for the most traditional red beans and rice recipe. I discovered that there are dozens of “traditional” recipes.” However, they often have a few elements in common. Red beans typically simmer along with aromatic vegetables and some spices for hours until they become a delectable dish. Let’s take a look at the basics.
The beans
These are typically small, red kidney beans traditionally of the Camellia brand. However, any kidney beans can be used. Most often used, and most economical are dried beans. However, you can find quick recipes that use canned beans.
Dried beans are usually soaked overnight, but can also be softened by boiling them in water and then letting them sit for several hours. Additionally, you can cook them “dry” if you use a pressure cooker.
The fat
Naturally, you saute your vegetables in fat, if you have some bacon grease, great! However, you can use cooking oil, olive oil, butter, margarine, lard; whatever you have around.
The meat
Traditionally, a ham bone leftover from Sunday dinner was used. However, the choices are endless and many recipes use combinations of meats. Some common meats include Andouille sausage, smoked turkey wings, ham chunks, salt port, and ham hocks. You can also find recipes that use smoked sausage and smoked Polish sausage. Stick type sausages are usually sliced and sometimes the slices are browned for added flavor.
The liquid
You need to cook the beans in something and water is often used. However, chicken broth adds flavor.
The spices
The spice combination varies from recipe to recipe. Some sort of heat is added in the form of red pepper, pepper flakes, or hot sauce. Thyme and oregano are popular herbs, and they are sometimes used separately and in other recipes together. Garlic seems to be in most recipes, as is a bay leaf or two. Some recipes use a combination spice, such as Cajun seasoning, while others may add smoked paprika, dried parsley, and even a hint of sage. Different combinations produce slightly different, yet still delicious, red beans and rice. Some recipes even used dehydrated onions and powdered garlic for ease; it is all up to you.
The holy trinity
Many Louisiana dishes incorporate a vegetable combination known as the holy trinity. This consists of a green bell pepper, a yellow onion, and several celery stalks, all chopped up. This combo is a must for red beans and rice.
Cooking methods
Traditionally, the mixture is made on the top of the stove. The vegetables are sauteed, and the soaked beans, spices, meat, and liquid are added. The mixture is brought to a boil and then simmered slowly for hours in a covered, heavy pot. A Dutch oven is ideal, but any heavy pot can be used as an alternative.
If you prefer your red beans and rice thicker, you can mash some of the beans after everything is cooked, or you can uncover your pot towards the end and use evaporation to thicken it. Some cooks add a little flour and water to thicken the sauce. Lastly, you can opt for a simple approach and not thicken at all.
There are versions of this dish that also can be made in the oven, a pressure cooker, or even a slow cooker. There are many possibilities.
The rice
The rice is prepared separately and added to either the serving bowl or the diner’s plate.
As you can see, red beans and rice is a flexible recipe. Each family has its own version, and it can vary based on what you have on hand. Don’t have chicken broth? Use water. Don’t have thyme? Use some oregano or Italian seasoning. There are also vegetarian versions of this dish.
However, red beans and rice always have some form of the holy trinity and, of course, red beans.
Today’s beans and rice
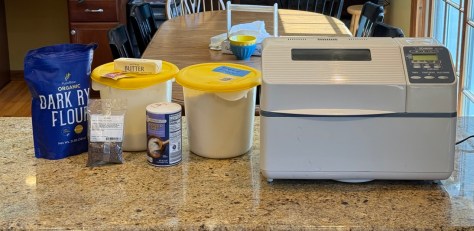
I’m cleaning out my pantry today and making beans and rice. I’m borrowing from red beans and rice recipes, but making several substitutions. I’m using dried pinto beans instead of red beans, a red pepper instead of a green pepper, red onions instead of yellow onions, and Italian sausage instead of a more traditional meat. I’m not trying to challenge the original recipe; I’m using it as a springboard to use what I already have on hand.
This recipe is an excellent example for beginner cooks to see how to substitute similar ingredients and still achieve a good result. My end product was comparable to red beans and rice, but clearly not the same. However, it was delicious. Three of us ate our fill, and there is quite a bit left over for lunches.
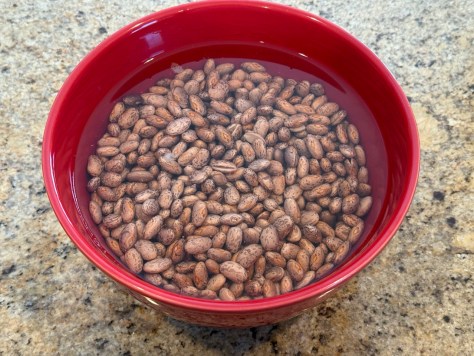
Pick out any bad or split beans and soak the beans in water overnight. You can use other methods to soften the beans if you prefer. Before using them in the dish drain and rinse them.
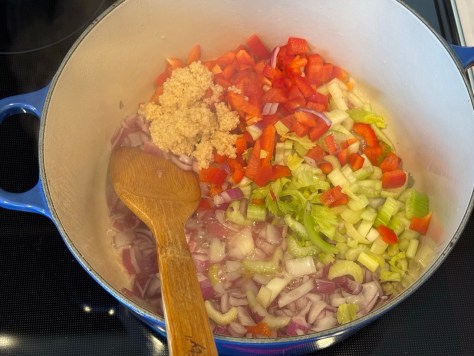
The holy trinity consists of celery, yellow onion, and a green pepper. However, I’m using a red pepper and red onion. Why? Because that is what I had on hand. It is all good.
I had some Italian sausage in the freezer that I wanted to use up. Certainly, not traditional but it worked out in the end. In this situation I removed the sausage from its casing and browned it along with the softened vegetables.
My spice combo consisted of a quarter teaspoon of sage and red pepper (I can’t tolerate super hot foods), two bay leafs, 1 teaspoon of thyme, 1 teaspoon dried parsley, one-half teaspoon of black pepper, and 1 teaspoon Cajun seasoning. Why do I have such a large jug of Cajun seasoning? I must have gotten it on a closeout. Note, you don’t have to use all of these spices. Garlic and some heat are a must. Instead of thyme you can use oregano or some Italian seasoning. You can forgo the Cajun seasoning, parsley, and black pepper. You do you. Remember to taste and adjust seasoning at the end of cooking. I had to add some salt at the end.
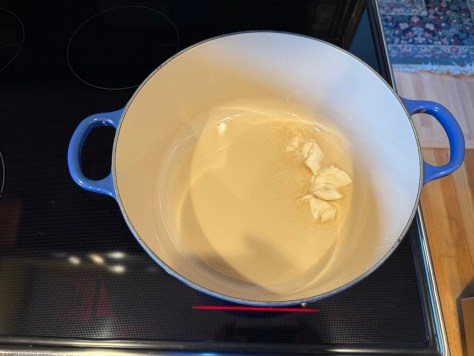
I heated some bacon grease in a Dutch oven, but you could use any fat or oil.
I sauteed the “holy trinity” of vegetables and when they were soft I added some jar garlic. Fresh garlic would be better, but this is what I had. Heck, you can even used powdered garlic if that was all that you had.
I added the spices and “cooked” them for around 30 seconds to bloom their flavor. I added the sausage meat and browned it. If I had slices of stick sausage I would have also browned those.
I added 6 cups of liquid and the soaked beans. I used water with some “Better then Bullion.” However, chicken broth or just water works too.
I brought the mixture to a boil and then reduced the heat to a low simmer. The pot was covered to complete cooking. Cook until the beans are soft or longer if you wish. It should take around 90 minutes to cook the beans. In my case I cooked the dish around 3 hours as I started the recipe early. When cooking was complete I used a wooden spoon and smashed some of the beans to thicken the dish. However, that is totally optional.
Served up with some rice and my homemade freshly baked multi-grain bread. This was not a traditional red beans and rice, but it was close enough to still be delicious!
I hope that some of these cooking posts encourage you to cook from scratch. With inflation and the Trump tariff taxes making all forms of food more and more expensive it is important to return back to the basics of cooking to survive these difficult economic times.
I used ingredients that I had on hand and inexpensively fed three hungry adults with quite a bit of leftovers for future lunches.
In today’s world of inflation and the Trump tariff taxes times are rough. This is another in my series on how you can save money on groceries by simple actions.
I not exactly sure when I first had yogurt; possibly when I was in late grade school. I do remember it was the Dannon brand and that it had some syrupy fruit on the bottom that you mixed into the yogurt. I liked it.
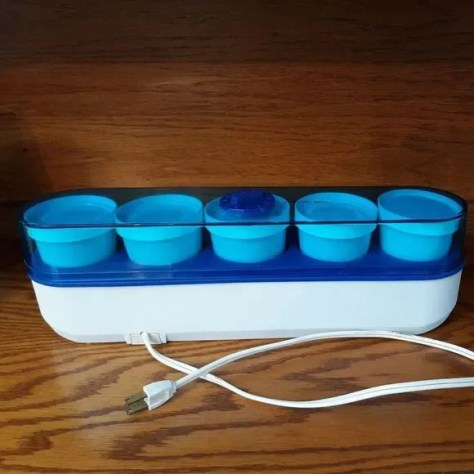
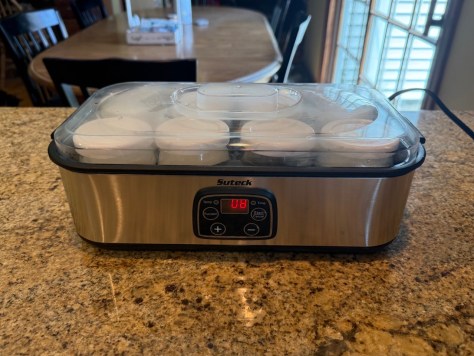
In the 1970s I was doing research on Multiple Sclerosis at the University of Chicago. A fellow researcher made her own yogurt and that intrigued me. I bought a Salton yogurt maker which made 5 cups of yogurt. I used that machine for quite some time, but I lost it in a divorce.
This looks exactly like my original yogurt maker. It was simple to operate and made enough yogurt for five workday lunches.
Yogurt is one of those foods that is better than the sum of its ingredients. It was likely discovered by accident and can be traced back to Middle Eastern civilizations as long as 10,000 years ago. That is way before the pyramids.
Yogurt can stay fresher longer than regular milk, is thicker and creamier, and is loaded with good bacteria that enhance gut health. Many people who are lactose intolerant can still eat yogurt.
Yogurt is extremely versatile and can be used in countless savory dishes. It can also serve as a substitute for other dairy products, such as sour cream.
The opposite end of savory is sweet, and yogurt shines there, too. Who doesn’t love frozen yogurt, and most yogurts sold in the store are flavored and sweetened, making them perfect for a snack or for a quick breakfast.
Yogurt consists of milk that has been inoculated with a specific bacterial culture, usually containing Lactobacillus bulgaricus and Streptococcus thermophilus. The milk is placed in a warm environment, and 6-8 hours later, you have yogurt.
I like both regular yogurt and Greek-style yogurt. What is the difference? Greek-style yogurt is regular yogurt that is strained through a sieve, allowing some of the whey (the liquid) to drain away. This makes the yogurt thicker and increases its protein content because it is more concentrated.
You can use a bit of unflavored active culture yogurt from the store as a starter or buy freeze dried starter. You can use any type of milk, but whole milk is preferred for the best results.
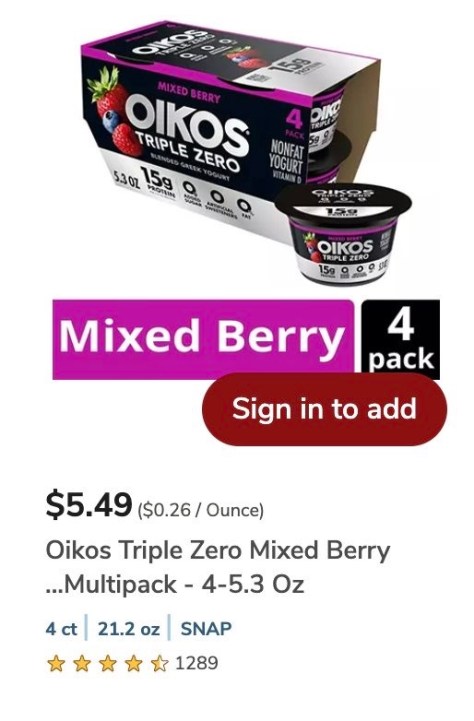
Making your own yogurt is not only simple, it will save you money. A four-pack of Oikos yogurt costs $5.79 as off this writing, which yields only 21 ounces total (4 x 5.3 oz).
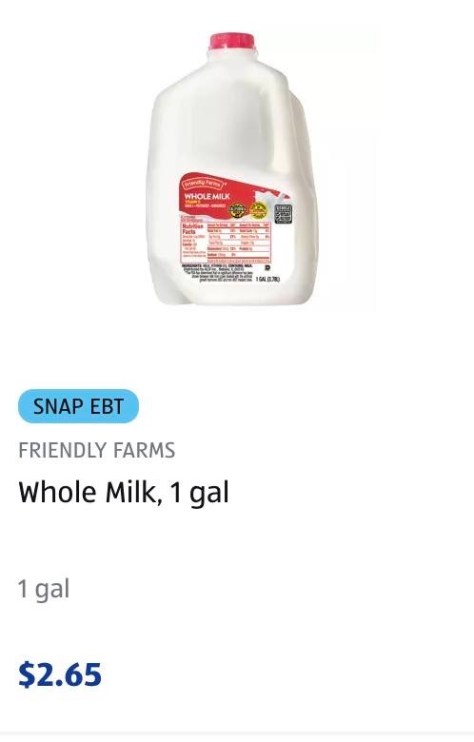
A gallon of whole milk can be had for as little as $2.65. This will make 128 ounces of regular yogurt or 64-96 ounces of Greek yogurt (depending on the thickness).
It is likely that you have all of the tools needed to make yogurt, but you can certainly up your yogurt making game with dedicated equipment if you wish.
These costs are for unflavored yogurt. There are dozens if not hundreds of ways to flavor yogurt, and none are terribly expensive. I’ll discuss some sweet options later in this post.
Here are the simple steps to make yogurt.
Ingredients:
Whole Milk
Starter Yogurt culture.
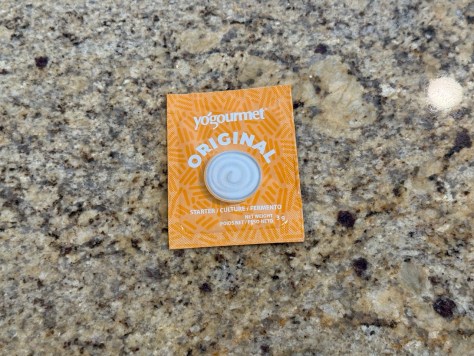
Starter yogurt can be a few spoonfuls of unflavored active culture yogurt from the store, a bit of your last batch of yogurt, or a dedicated commercial yogurt starter powder. Once you are making yogurt regularly you can simply reserve a few tablespoons of your current batch in the fridge to seed your next bath. In that case, the only cost, beyond a few pennies of electricity, is the cost of your milk.
You can inoculate a new yogurt batch with a few spoonfuls of unflavored yogurt (active cultures) from the store, some reserved yogurt from your last batch, or, as in the photo above, some commercial freeze-dried yogurt culture.Using a clean pot, heat whole milk on medium to medium-low heat until it steams and is 180°F (82°C). Remove from the heat and let cool. I use a kitchen thermometer. Pro tip: Swish and pour out a little water in your pot before adding the milk. This will prevent burning. Also, don’t crank up the heat; go slow. Heating too quickly will burn the milk on the bottom of the pot, and that is a mess to clean up. Heating to 180°F is necessary to kill competing bacteria. In addition, the heat will have a positive effect on the texture of the yogurt. The milk will form a skin. Remove the skin using a spoon and discard.Wait until the milk temperature is reduced to approximately 110°F (43°C). If it’s too hot, you will kill the bacteria; if it’s too cold, the culture won’t grow. Add your yogurt culture. In this case, I’m using a commercial culture. If I were using actual yogurt, I would use around two tablespoons per 2 cups. However, this is very flexible. Some recipes use more, while others use less. If you don’t have a kitchen thermometer, you can use the “baby bottle” test. Spoon some milk onto your wrist. It should be very warm but not burning. If that is the case, you are at the right temperature to inoculate.Thoroughly stir the culture into the warm milk. Now transfer your milk into the vessel(s) that you will use for the yogurt.
Now it is time to incubate the milk to turn it into yogurt. This can be done in a variety of ways. You can placed your your container in a warm draft free spot and cover it with blanket or heavy towel. You can place it in a cooler in a bath of warm water, Both of these methods will require longer incubation times as the heat is not regulated.
Another common method is to use a slow cooker. Heat the milk to boiling then turn off the slow cooker. Wait until the milk is 110F and inoculate with around 1/4 cup of yogurt culture for a gallon of milk. Wrap the slow cooker in a heavy towel and let the mixture incubate for 8-12 hours. Give it a peak at 8 hours to see if it looks like yogurt. Too liquidy? Give it more time.
In general, the longer you incubate the thicker the yogurt. However, it will also be tangier (more sour) the longer you incubate.
There are many appliances that allow the proper temperature for a controlled yogurt environment. Using one of these appliances will give you consistent results.
Many electric pressure cookers have a low-temperature yogurt setting. Additionally, some multi-cookers and sous vide machines also allow for a controlled low setting that can be used to make yogurt. In these cases, try to incubate between 6 and 8 hours. You can always add a bit more time if your milk has not turned to yogurt.I like using a dedicated yogurt incubator. This little guy makes 1 quart of yogurt and isn’t much bigger than a coffee cup. It was less than $20 on Amazon.This yogurt incubator can make eight jars of yogurt at a time. You can switch out the jars for 2, 1-quart containers if you prefer. Like the incubator above, it will make yogurt in 6-8 hours. I usually wait 8 hours for the consistency that I like.
After your yogurt has incubated it is important to refrigerate it for at least several hours, preferably overnight. This enhances its favor and thickens the yogurt.
This gives you an idea of what the yogurt will look like after it has been incubated. Remember, you still need to refrigerate the yogurt for maximum flavor. Greek yogurt is just yogurt with some of the liquid (whey) removed. You can use a sieve over a bowl with a coffee filter in the sieve. Add the yogurt and refrigerate the contraption. When the yogurt is thick enough, remove it to a covered container. I like regular yogurt, but if I want it thicker, I reduce the volume by 25%, which takes a few hours in the fridge. You can use the whey for all sorts of things, from drinks to soup. It is high in protein. Here is a dedicated gadget to make Greek-style yogurt. It is a bit more convenient than the sieve method. It was very inexpensive and recommended if you always want to turn your regular yogurt into Greek-style yogurt.Here is some Greek-style yogurt that I made by draining out some of the whey. You can tell that it is thicker.
You can eat your cold yogurt as is, but I prefer adding sweeteners and other add-ons.
Sweeten with honey, or maple syrup, or brown sugar or whatever you like.
Adjust the flavor with a little vanilla or add fruit or granola. The options are limitless. I know of some who actually flavors their yogurt with Crystal Light.
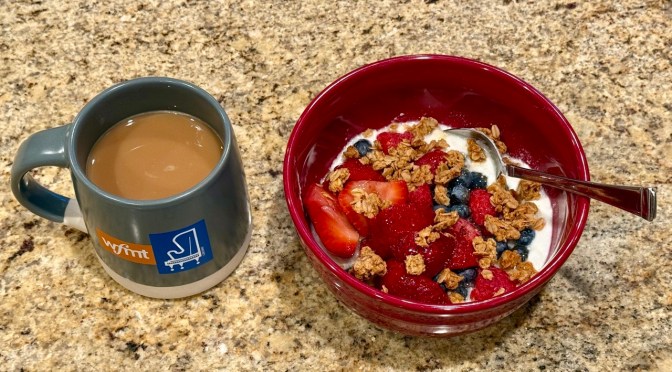
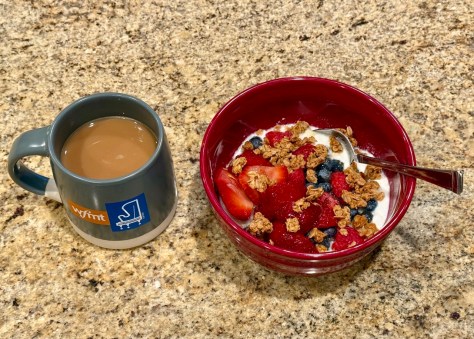
Here I’m flavoring some plain yogurt with leftover cherry pie filling and some nutty trail mix.Here I added a little vanilla, honey, granola, and some fresh berries. Last Mother’s Day, we brought my wife breakfast in bed, featuring homemade yogurt. This was plain yogurt with Maple Syrup, strawberries, and granola. The options are limitless.
Making yogurt is super easy and very satisfying. You know exactly what is in it, and you add exactly what you want. To use the example above, the Oikos yogurt is $0.26 an ounce vs. my standard yogurt make from milk at $0.02 an ounce. MY Greek-style homemade yogurt would be $0.03-$0.04 an ounce. The electricity is negligible.
Of course you will incur more cost with your add ons, but home much does a spoon of strawberry jelly or a drizzle of honey cost?
Making yogurt is very easy, inexpensive, and satisfying. The end result is chemical free and tastes fresher than store bought. Making your own yogurt vs. buying it is a no brainer.
I like history. I wouldn’t say that I’m a history buff, but I find it fascinating to learn about other times and other people. I have a special fascination for the first half of the last century. For whatever reason, that time feels familiar to me.
A few years back, the YouTube algorithm brought me to the “Great Depression Cooking With Clara” channel. The channel was started by Clara’s grandson, who was documenting her life during that tough time. In her videos, she shares budget-saving recipes that her family relied on during the 1930s. The channel became a surprise hit with over one million subscribers, likely due to Clara’s clarity and charm. Sadly, she has passed, but her legacy lives on.
One of her simple recipes was dubbed “Poor Man’s Dinner,” but I have renamed it “Clara’s Great Depression Dinner,” as I believe that captures the dish’s intent. It is straightforward to make and, of course, very inexpensive. I made it for my family as a weekday meal, so I’ll give you their taste impressions at the end of this post.
With runaway inflation and the Trump tariff taxes, people are genuinely suffering, so this recipe is more than a trip down memory lane; it could be a cost-saving option when both bellies and wallets are empty. But first, let’s get into the recipe.
Oh, by the way. I believe that these types of recipes are based on whatever you have on hand, so I did make some modifications. I’ll let you know both her version and my slightly altered one in the photos below.
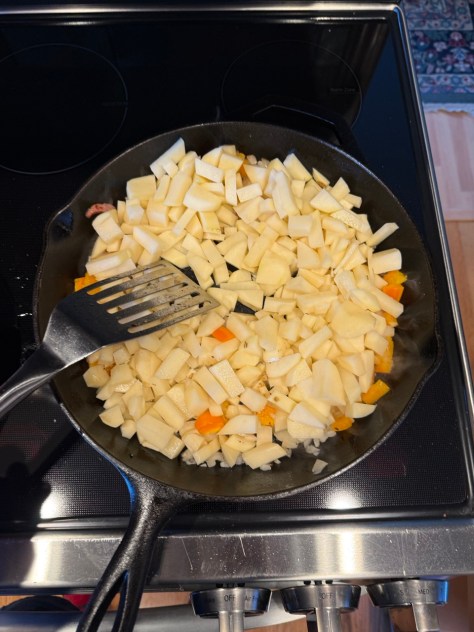
Cut up some potatoes. I was making dinner for 3 and used 4 medium to large spuds.
Chop up an onion, and slice some sausage. In Clara’s recipe she uses hot dogs, but I had some Polish sausage in the fridge, so I used that. I also had one-half of a pepper left over from a salad that I added, just because.
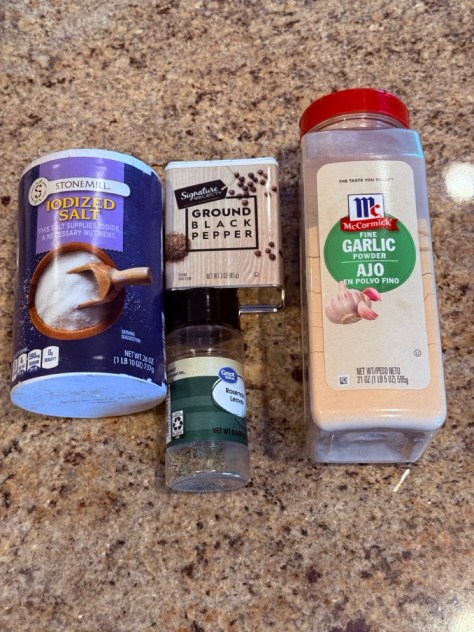
I believe that Clara only used salt and pepper. I added some garlic powder and a tiny bit of rosemary (around 1/2 teaspoon).
I like crispy sausages, so I browned the Polish sausages in a little oil and then removed them from the pan.
In the same pan I softened the onions and peppers.
I then added the potatoes on medium heat.
In went a tiny bit of rosemary. I probably could have used about twice as much.
Then some pepper.
And some salt. I under salt as I’ll adjust the salt when the dish is complete.
Then a sprinkle of garlic powder. Also, I added cooking oil here and there as needed. I cooked the mixture for a bit, turning the potatoes every once in a while.
I added around 1/3 cup of water.
And covered the pan to completely cook the potatoes. I continued to turn the potatoes several times to prevent them from burning. I think it took around 15 minutes to completely cook the potatoes.
I returned the sausage to the pan to reheat it. I adjusted the seasonings and tossed in some green onions. The green onions were added to give some contrast to the dish and are unnecessary.
Here it served up with a little fruit and my homemade oatmeal/sunflower seed bread.
The dish fed three adults, and two additional hefty portions were packed away by my son that he will use as two days of lunch.
So what did the family think about Clara’s Great Depression Dinner?
My son really liked it. He said it was filling and delicious.
My wife had concerns over the fact that it used smoked sausage as she had heard somewhere that smoked sausage was bad. However, she felt that it tasted pretty good.
I liked it. To me it tasted like amped up home-style hash browns. When I make it again I’ll top it with a friend egg. I think that would make the dish perfect.
Before becoming a physician, I was a lab rat researcher, and one of the tasks I performed on a daily basis was weighing out small amounts of powders to create various reagents. To do this, I used several different scales. Most were electronic, but one was a balance beam system so sensitive that the scale was enclosed in its own plexiglass chamber, as the random movement of air could impact its accuracy. These lab-grade scales cost hundreds, if not thousands of dollars, so how is it possible to buy a kitchen scale with a one-gram sensitivity for around ten bucks?
Should a cook or baker even bother to use a scale? My grandmother was a fantastic cook, and I don’t think she even owned a measuring cup. Fanny Farmer introduced the concept of correct measuring of ingredients at the turn of the last century, but before then, chefs created great dishes.
The bottom line is that you don’t need to bother with any type of measuring device if you possess one thing: tons of experience. If you have been cooking the same recipes all of your life, you know how much basil to add or how much sugar to spoon in. My mom never used a cookbook for our daily meals, and her dishes were fabulous. However, she did use a recipe with measurements when she made less frequent foods, such as holiday kolacky. She knew her limitations. I follow my mother’s advice: if I’m not wholly certain, I hit the books and follow a plan.
If you have read some of my recent posts, you know that I’m once again enamored with baking bread in a bread maker, and I’m trying to perfect my craft. For a novice like myself, each step presents a challenge as I attempt to achieve consistent results.
In the US, we still use the very archaic imperial system of pounds and ounces. The rest of the world has long moved to the significantly superior metric system. A US recipe will say, “Add 1 cup of flour,” where a European cookbook will note, “Add 120 grams of flour.” Measurement by weight is not only more accurate, but it is also easier. Recently, I was following a recipe that required 1/4 cup of honey. I hate measuring honey as it is a pain to use due to its thick viscosity. However, instead of dirtying a measuring cup, I put my dish on a kitchen scale, tared the scale to zero, and squeezed the honey bottle until the screen read 85 grams. That was easy!
However, my measurements are only as good as my scale. Could I trust it? The main scale I have used for nearly 20 years is a 2.3 kg (5-pound) scale from Oxo, which I purchased from the now-defunct Kmart. However, I have a couple of other scales around the house that I either received for free or purchased on Amazon Prime Days. You may be asking why I have more than one scale. In the past, I would come up with a logical reason, but as a retired guy, I have the privilege of not having to justify my purchases. I have them, because I have them. Let’s leave it at that.
Is your kitchen scale accurate enough for baking? I suggest that everyone follow my example. Simply use your calibrated weight sets to verify the accuracy of your kitchen scales and adjust accordingly. What, you don’t have a set of calibrated weights? You think it is a bit odd that I do? Well, you are probably right. Let’s utilize my oddness to your benefit and verify the accuracy of the Oxo scale. I did this test with my other scale, and they all showed various inaccuracies (each a bit different). However, their errors were similar enough for me to offer the same bottom-line advice. When do inaccuracies matter? Let’s look at some photos to find out.
Here I’m using a one-gram weight, and my scale reads it as zero.
However, the scale is able to read 2 grams accurately.
How about adding that 1 gram back? Will the scale be able to read it? Nope!
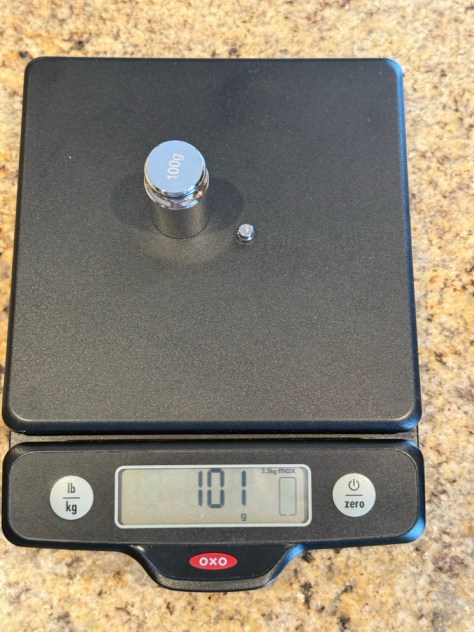
Here I’m weighing 100 grams, and the scale is spot on.
Now, I add 1 gram and the scale gets it right. However, sometimes it was able to read the additional 1 gram, and at other times it couldn’t.
This illustrates the above. On this attempt, starting with 50 grams, the scale could not recognize the additional 1-gram weight.
Here, it was accurate when I added two more grams for a total of 53 grams.
Let’s move on to a 500-gram standard weight. The scale is only showing 498 grams. That is an error, but it is only a 0.4% error. That’s not very significant for our baking purposes.
Here, the measurement should be 901 grams, but the scale says 898 grams. That is a 0.3% error. Not a big deal.
Additionally, the kitchen scales I have tested all exhibit a slight lag when measuring. If I’m adding something and reaching my desired weight, I have to sprinkle and pause as it takes a fraction of a second for the scale to catch up.
The Bottom Line
The kitchen scales that I tested were accurate enough when weighing larger quantities. An error of less than 1% is insignificant when cooking or baking.
However, they all seemed to struggle with very small weights. Out of the three scales I tested, only one could register the 1-gram weight, but all three were accurate when using a 2-gram weight. However, when I added an additional gram to the 2-grams, it was a bit hit or miss. Additionally, the slight lag in registering made it very easy to overshoot a small amount, even when the scale was weighing accurately.
Some of the most critical measurements in bread making are for ingredients like salt and yeast, which are measured in the smallest amounts. So, what do I recommend?
When measuring anything over 10 grams, your kitchen scale will likely do an adequate job. If possible, measure your flour, water, butter, and sweeteners by weight. You will have better results and less cleanup. When it comes to items that are often under 10 grams, like yeast, I recommend using an accurate measuring spoon. All bread makers come with a measuring spoon that is ideal for this purpose.
Have you ever heard the term, “Don’t let opportunity kick you in the butt?” A while back an opportunity presented itself to me in the form of a gift. What was the gift? A bone! Now, dear reader, you are probably thinking that I have fallen off my rocker, but I can assure you that I’m sitting steady. Let me explain further.
My sister was hosting a party and had a large ham as the main course. She asked me, “Do you want the ham bone for soup?” “Sure,” I replied. She also threw in a bag of scrap ham meat as my brother-in-law is pescatarian, and she knew that she wouldn’t be using it to make another meal. They went into my freezer.
I decided that yesterday was the day that I would use the ham bone to make a delicious Navy Bean Soup. Inflation and the Trump Tariff Taxes are making grocery prices go through the roof and I’m on a money saving mission.
Bean dishes are cheap and offer so many benefits. They are an excellent source of protein and fiber, contain all sorts of minerals, plus they are good for gut health.
You can buy canned beans inexpensively, and I certainly do that. However, dried beans are a better bargain. This soup uses dried beans that have been soaked overnight. I’ll talk more about that later.
There are as many ways to prepare a bean soup as there are beans in a pot. The recipe that I chose was from a website called “BudgetBites.com.” The website was recommended by my daughter who is trying to save money by cooking her own food. She is a chip off the old block. I have tried a few of the site’s recipes with good results.
Oh, and that ham bone? It went missing from our freezer. Both my wife and I tore the compartment apart, but the bone was not to be found. We did find the ham scraps, so we substituted them with good results. The great thing about home cooking is there are no rules. If the end result tastes good, then all is good.
Let’s get into the recipe!
Here is the recipe. The author is Marsha McDougal.
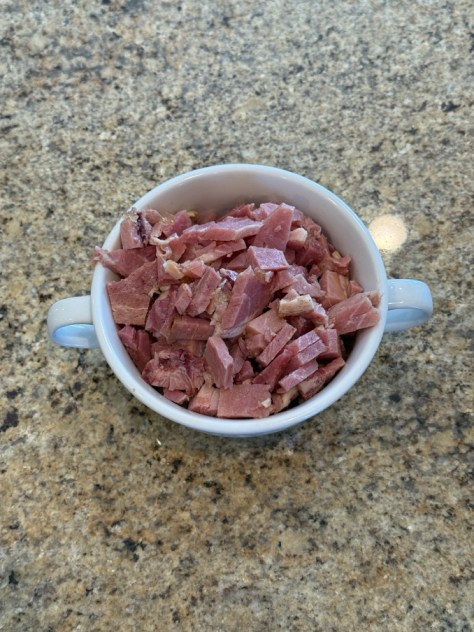
Instead of a ham hock I used the ham scraps that my sister generously gave me.
Here are the spices that we used. In addition to the ones listed in the recipe I added a very small amount of chili pepper flakes and a sad broken bay leaf. Spices can add a lot of depth to a dish. You can buy spices for less if you shop the house brands at Walmart, Aldi, and Dollar Stores. If you know that you are going to use a lot of a particular spice you can buy a large container cheaply at Sam’s Club, Costco, or on Amazon. Ethnic stores and the ethnic aisles in standard grocery stores often have spices for less than at the typical spice section in the store. Lastly, you don’t have to use all of the spices if you choose. You can just use salt and pepper. If I had to add just more more spice to this soup (beyond salt and pepper), it would probably be oregano. A little of this spice adds so much to so many dishes.
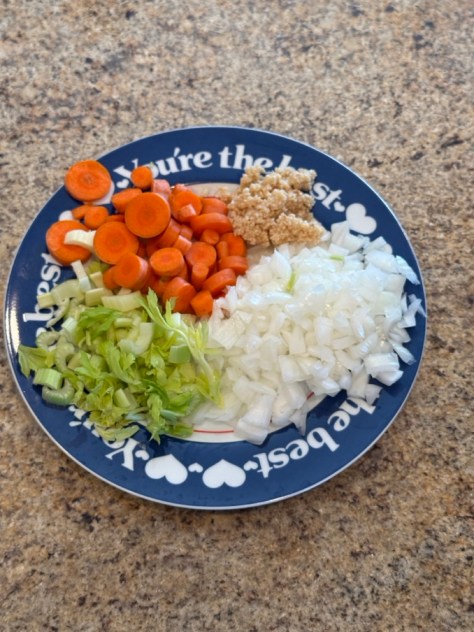
This recipe uses a classic mirepoix (celery, onions, and carrots). We almost always have those vegetables on hand and they store well. Additionally, this plate has some jar garlic. Is jar garlic as good as fresh? No, but it still is good and I always have it on hand.
The recipe calls for chicken broth, but I used Better than Bouillon chicken base. Sadly, this jar was almost empty. Luckily, I had some ham base so I added some of that to make up for the reduced amount of chicken base. It is OK to substitute as long as you don’t go too-far-afield.
I sauteed the ham in a little oil. I wanted it to get a bit crisp to intensify the flavor since I didn’t have a ham bone. I then added the mirepoix and softened the vegetables for a few minutes, stirring the mixture now and then. Finally, I added the garlic and stirred that around for a minute or two. You can see that I’m using a big pot. I like cooking in a Dutch oven, but you can use any large pot that you have. You will also need a lid for the pot.
Here you can see the garlic being added. I’m a bit excessive when it comes to garlic. You don’t have to be.
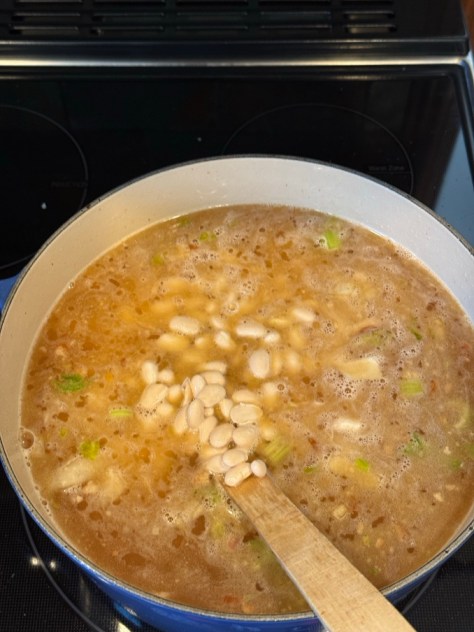
Now 6 cups of chicken broth. I used 6 cups of water and whatever chicken Better than Bouillon that I could scrape out of the jar. I added a spoonful of the ham Better than Bouillon to make up the difference. In went the Navy beans. I had soaked the beans overnight and dumped out that water before adding the beans to the pot. When it comes to dry beans, pick out any damaged beans before soaking. You may find a little rock or two; get rid of those too.
I added a few drops of liquid smoke (totally optional) to add a smoky flavor. Never add too much of this stuff or your food will taste like burnt wood.
In went the spices. Remember, if you don’t have all of them, use what you have. However, these are spices that you can use in so many dishes. If you eventually build up your spice rack, consider these as essentials.
That’s it! So easy. Now bring the pot to a boil and then turn it down to a simmer. Place the pot’s cover. It will take about ninety minutes for the beans to completely cook, so you may want to stir the pot on occasion. I actually left mine cooking for around two and a half hours as I made it early. To thicken the soup I smashed some of the beans using my wooden spoon. When the soup is done adjust the salt level. It is always better to use less salt at the start of a recipe and add what’s needed at the end. This soup didn’t need any extra salt because the ham was salty as was the soup base.
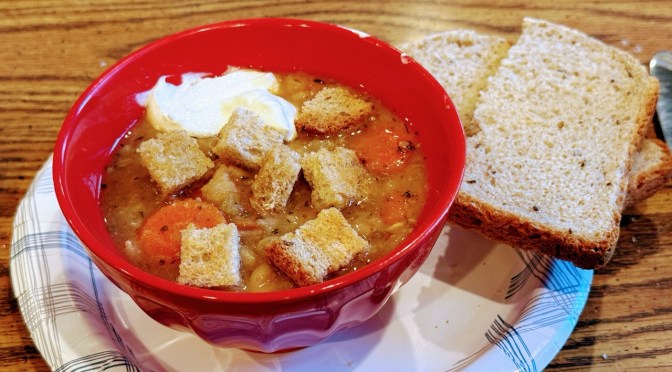
Here it is, all served up. We had some sour cream, so I added a dollop of that plus some croutons that I made earlier. As an accompaniment I served some of my homemade rye bread, but you do you. This was a delicious weekday dinner. You could make it in a slow cooker or an Instant Pot with a little modification of the liquids. Three of us ate our fill and there is plenty left over for lunches or whatever.
You don’t have to eat garbage to save money. This soup was absolutely delicious and tasted so much better than something out of a can.
As I mentioned in previous blogs, three things excite me: I love to learn, I love to create, and I love to teach. That’s my jam.
I enjoy delving beyond the superficial and exploring various topics in depth. Some of my interests are mainstream, while others are not.
As a child, I was fascinated by watching my mom knead yeasted bread dough on the kitchen table. However, kneading dough by hand is not my thing.
One of the few items that I got from my divorce in the 1980s was a large food processor, as my ex was not a cook and didn’t want it. I studied that gadget and prepared many foods using it, including kneading bread dough. When you are a dirt-poor resident physician living on generic food, the prospect of bakery-quality bread is compelling.
My love of machines, along with my love of food, got me interested in bread makers, and I did a deep dive to understand them in the 1990s and early 2000s. I explored many machines in my study, from expensive to bargain, most of which I gave away when my interest waned.
For many years after that, I continued to bake bread, making many loaves at a time, first with a Kitchenaid, and then with a Bosch Universal mixer. Now, my kids are out of the house, and I no longer need such productivity.
For many years I made six loaves at a time of 100% Whole Wheat Bread using my Bosch Universal Mixer.
I’m not a professional chef, and I’m sure that many know a lot more about bread-making than I do. However, I do know more than some, and I would like to offer that knowledge in this post. Remember, this is my opinion; you may have a different one.
About a year ago, I rediscovered my remaining bread makers on a basement shelf and was once again fascinated by these simple gadgets that could do something extraordinary: make delicious bread at the touch of a button. I got hooked again.
I have used many different brands of bread machines. After baking hundreds of loaves in various machines, I’m here to state that all bread makers have the potential to produce an excellent loaf of bread if their instructions are followed precisely. If you don’t believe me, just check out the many YouTube videos showing folks getting great results with every brand under the sun.
If I believe that all bread makers can make a great loaf of bread, why would I ever buy a premium machine, like a Zojirushi? Let me use a car example. Both a Yugo and a Lexus will get you to the same place in the same amount of time. However, the Lexus will get you there in style, and it will likely be more reliable as well.
I thrifted a vintage Japanese-manufactured Regal bread maker for $14. Although not as well-built as my Zojirushi machines, it was still built like a tank. I recently tested an inexpensive and newer Briskind bread maker. It makes a perfectly nice loaf of bread, but it is light as a feather and feels a bit cheap. How long will it last with regular use? You can watch teardown videos for cheaper brands where the low-quality drive belt has shredded or some other part has failed. This usually means that it is time to send the bread maker to a landfill.
This thrifted Regal machine was made in Japan and is built like a tank. It was likely manufactured in the mid-1990s.This recent Briskind model made a decent loaf of bread, but it is light as a feather, and I wonder about the quality of its components.
I have Zojirushi machines from the early 2000s that still work perfectly. Additionally, Zojirushi sells replacement pans and paddles and also has a bread maker repair service. If you have the cash and know that you’re committed to bread machine bread making, it is reasonable to consider a Zojirushi machine.
Currently, Zojirushi offers four models of bread makers. Two of them make 1-pound loaves, and the other two make 2-pound loaves. I’ll only be discussing the 2-pound machines, as those are the ones with which I have experience. Specifically, I’ll be talking about the Zojirushi Supreme and the Zojirushi Virtuoso (Plus).
I did some research before this post to get some others’ answers on the benefits of one model over the other. YouTube comparison videos were primarily based on repeating the manufacturer’s listed feature sets; therefore, they were of no use to me, as they provided zero actual usage information. Contributors on sites like Quora, Reddit, and Amazon Reviews commented when someone asked if they should buy the Supreme or the Virtuoso, stating, “Get the Virtuoso, there is no comparison,” and “Get the Virtuoso, you won’t regret it.” But why? Clearly, those commenters had a Virtuoso and were happy with it. But would they have been just as pleased with a Supreme? Commercial review sites often list the Virtuoso Plus as the number one bread machine, but they don’t examine the two models side by side. I could find only one review that examined both; America’s Test Kitchen preferred the Zojirushi Supreme over the Virtuoso Plus due to its more straightforward user interface.
Please do not use AI to explore the differences or capabilities of any of these machines. I found multiple serious errors in the information provided by AI search engines during my research for this post.
I have owned and tested all four versions of these Zojirushi machines, so I feel that I can offer a fair opinion.
I have used both the X20 (discontinued in 2010) and CEC20 (current model) versions of the Supreme machines, as well as the PAC20 (discontinued in 2018) and PDC20 (current model) versions of the Virtuoso (Plus). All make an excellent loaf of bread.
Zojirushi bread makers have unique features. However, some of these features have drifted down to less expensive bread machines. Innovations tend to do that. Beyond the classic features that all bread makers have, here are a few more unique ones that both the Supreme and the Virtuoso/Virtuoso Plus share:
-Preheat. Zojirushi bread makers will heat up and warm ingredients before they start the kneading cycle. A few other machines that feature this option include models from Panasonic, Breadman, and Brevelle.
-Custom courses (baking programs). These machines have three custom courses, allowing the end-user to program all aspects of a baking program in lieu of using the factory-programmed courses. Most will never need this function, but if you are serious about bread-making or need to adapt a recipe to your bread machine, this option could be invaluable. Several models from other manufacturers can also do this, including some machines from Breadman, Panasonic, Brevelle, Vevor, and others.
-Sourdough starter course. You use the machine to quickly incubate a yeast-based sourdough starter, allowing you to make a sourdough-like bread the same day. I believe that some Cuisinart machines also have this feature.
-Twin kneading paddles. All Zojirushi 2-pound machines feature bread pans with two kneading paddles, which produce a loaf more similar in shape to bakery bread. This makes the machines slightly more mechanically complicated and sometimes leads to an uneven loaf top. However, the loaf shape is a definite aesthetic plus over other bread makers. Several other brands have models that use a similar double paddle system, including Vevor, West Bend, and Saki.
Zojirushi machines omit some of the cycles, like “sweet dough,” that you can find on many other machines. However, their Basic white bread course, combined with their crust color control, does a good job with many types of bread.
In addition to bread-making programs, Zojirushi 2-pound bread makers also have a Jam course and a Cake/Quick Bread course. These programs are also available on many other bread makers.
Other brands may have programs for everything from stir-frying to making rice. Most of us will not use all of these extras, as it is usually better to do these tasks more traditionally.
What is the difference between the X20 Supreme (discontinued) and the CEC20 Supreme (current) models?
The X20 was the earlier version of the CEC20, and for the life of me, I can’t see a difference between the two. They appear identical, offer the same options, and perform similarly in my tests. I’m guessing (and this is a guess) that some internals have been changed.
Should you buy a used X20 instead of a CEC20, as a used X20 will be cheaper? You would have to decide if the cost savings are worth having an older machine. In my limited sample, the X20 remains an excellent performer.
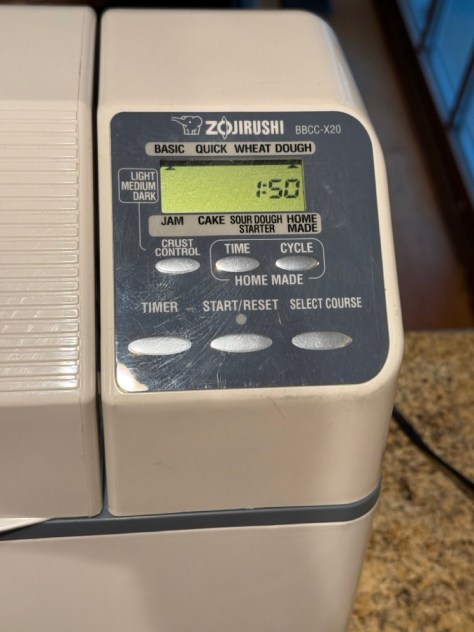
The Zojirushi X20 has a control panel that is identical to the CEC20 and performs similarly to the newer model, in my opinion. Here is the control panel from the CEC20. It is the same as the X20.
What is the difference between the Supreme models and the Virtuoso models?
The Virtuoso bread makers add the following features:
Making a loaf using the Virtuoso Plus.The Virtuoso looks very similar to the Virtuoso Plus, but the user interface is a bit different.
Top Heater
Both the older Virtuoso and the newer Virtuoso Plus have a top heating element to more evenly brown the top of a loaf of bread. All breadmakers must have the ability to brown the tops of their bread adequately, and they all incorporate passive or active systems to achieve this.
In the case of the less expensive Zojirushi Supreme, a passive convection system is utilized, where heat rises from the baking chamber and the outer wall space. It is then vented through the bread maker’s cover.
The dedicated top heating element in the Virtuoso machines does a slightly better top-browning job, but the system used in the Supreme also works well. The top heating element is not a deal breaker, in my opinion.
Gluten Free Course (program)
Kneading bread dough helps gluten form from glutenin and gliadin, yielding a delightful chewy yet tender slice of bread. However, gluten-free bread doesn’t have gluten, so the kneading cycle is really just a mixing cycle when making this type of loaf. Additionally, long multiple rises are not helpful, so this course focuses on the final rise. You could program a Supreme machine to do the same thing, but it is more convenient to have a dedicated button for this purpose. Other bloggers on the internet report that using this cycle gives a better finished product than using the Basic course (white bread) when making gluten-free bread.
Baking Pan With Handles
Both the Supreme and the Virtuoso have top-notch baking pans. They are heavyweight and have an excellent system to mate with the bread maker. However, the Virtuoso Machines took a step further by providing exceptionally high-quality handles on the bread pan. The non-handle pans on the Supreme work fine, but the handles on the Virtuoso are a nice addition.
Real Time Clock
Most breadmakers only provide the time to completion when you select a course (program). For instance, a display may show 3:25 when you choose a white bread (Basic) course. If you start your machine at 10:00 AM, you need to mentally add three hours and twenty-five minutes to determine the finish time (1:25 PM). Honestly, this is no big deal. However, the Virtuoso Machines will give you the actual time of completion. If you start the bread at 10:00 AM, and the bake is three and twenty-five minutes, the completion time will read “1:25 PM” on the display of Virtuoso machines.
Pause On Cover Lifting
Kneading will pause when you lift the cover to “take a peek” on Virtuoso machines. On the Supreme, the kneading keeps on going.
Shape Cycle
The homemade option allows you to create a custom course where you can program the timing of each step of the baking process. Both the Supreme and the Virtuoso machines allow you to do this. However, the Virtuoso adds the ability to add a step called Shape after kneading. This will enable you to remove the dough and reshape it if you wish. I don’t believe that there is a way to replicate this Shape function on the Supreme models.
The Virtuoso Plus offers the following features in addition to the older Virtuoso machine.
The user interface on the Virtuoso Plus is cleaner than that of the older Virtuoso.
Cleaner-looking button interface
The buttons on the Virtuoso Plus have a cleaner look compared to the slightly more cluttered look of the buttons on the Virtuoso.
Multiple New Courses on the Virtuoso Plus
Many less expensive bread makers have long offered a dozen or more programs, catering to a wide range of options, ranging from sweet breads to pasta dough. However, traditional courses like Basic, Whole Wheat, and Dough do everything that most of us need. The one exception is the Gluten-Free course mentioned above, as gluten-free bread is a hybrid between a dough and a batter.
Zojirushi didn’t just copy a bunch of programs from other companies; they tried to be different with “healthy options’ like Vegan Bread course, as well as specialty courses like Multigrain and European Loaf. However, another blogger tested these courses against the standard Basic course and generally found little difference in the breads made with the dedicated courses vs. the Basic one.
It is possible that, under some conditions, a dedicated course may yield a better loaf, but that is unclear. Most of us just want regular bread. Using the standard Basic bread course, I have made a variety of white breads, herb breads, cheese breads, and raisin breads. Using the Whole Wheat course, I have created multiple types of whole wheat bread, 7-grain bread, oatmeal bread, and rye bread. I have made many different doughs using the dough cycle, too. If you are a typical baker, you may not need all those additional courses, and it isn’t clear (except for the Gluten-Free course) that they are significantly better than using the standard courses on the Supreme model. In some ways, all of the extra courses feel more like gimmicks rather than essential additions. But that is just my opinion. Your mileage may vary.
Ending thoughts
Zojirushi machines are pricey, and if you are just testing the bread machine waters, you may be better served by a less expensive brand, either new or thrifted. However, if you are in for the long haul, then the additional quality of a Zojirushi machine may be for you.
I have used all four models, and the one additional Virtuoso/Virtuoso Plus feature that may be useful for some is the Gluten-Free course. If you don’t need that feature, you might consider the Supreme model, which is considerably less expensive and offers most of the abilities of the Virtuoso machines.
In my opinion, I don’t believe that the bread coming out of a Virtuoso machine is significantly better than the bread coming out of a Supreme machine. Let me once again use a car analogy. Let’s say you knew what model of car you wanted, but you had to decide what trim level you were going to buy. You could choose between the base model, which had all of the basics covered, or you could buy the platinum version, with many little refinements that made it just a bit nicer. Some would say, “I will save thousands as the basic car has everything that I need.” Others will say, “I want all of those little extras, and I’m willing to spend the extra cash to get them.” If you are in the first category, get the Supreme. If you are in the latter category, go with the Virtuoso Plus.
Should you consider the used market? I would say yes, but there are risks. Check sites like ebay, and Facebook Marketplace. If you keep searching over time you can find machines for significantly less than others of the same model on the same site. Just make sure that you read the description carefully and that the paddle and kneading blade are included, and in good shape.
All bread makers are devices that make our lives better by allowing us to bake delicious, homemade bread with the touch of a button. I accept their imperfections, like the paddle holes in the bottom of the bread. If you want artisan loaves, then bake by hand. And, yes, I know that you can remove the dough from a machine and hand-form it. I’m just trying to make a point that most of us use bread machines to provide home-made bread for our families, not to enter into contests. Additionally, most just want bread, and decent basic machines accomplish that function well.
How about a slice of warm bread with a little butter and jam?
My grandparents didn’t speak English. Well, I guess they did speak English but they chose to only use their native tongue at home. Sadly, this meant that I knew little about them or their former lives in Eastern Europe.
The one connection to my heritage was through the wonderful foods that my grandmother made.
My grandparents saved and bought a two flat on the west side of Chicago where they raised their family of seven children in a tiny upstairs apartment. Three minuscule bedrooms, a living room, and a kitchen big enough for a large table and a built in china cabinet. There was a old fashioned farmer’s sink, a white refrigerator with a rounded top, and a stove. My early memories were of a stove that possibly used wood or coal, but later on I remember a gas stove that had some sort of a heater built into it. I don’t think their apartment had any sort of central heat, and they relied on space heaters to keep warm in the winter.
My grandmother was a short woman, and to me, appeared to be a bit stout. She was always in motion getting this or that. My grandparents were elderly by the time I was around, and my grandfather spent most of his time in bed. I remember him as a frail man. However, he was quite strong in his younger days.
The kitchen, was the heart of the house. When my parents would visit we would all sit around the kitchen table. Coffee was served along with some sort of homemade strudel, a rolled coffee cake called a kolache, or jam filled cookies called kolachky. I was offered coffee, even at a young age. Mine was usually equal parts coffee and milk with an overdose of sugar. The adults drank theirs black.
I was probably six in this photo, and even then, I would drink coffee when I visited my grandparents.
My grandmother wore her hair pulled back in a bun, and unless she was going out, she wore one of her house dresses that had tiny patterns on them. Some were pink, others yellow, but all in the exact same style. Over her house dress would be some sort of an apron. Hair bun, house dress, and apron, I thought of them as the required uniform for grandmothers.
A birthday party for my grandmother, likely in the late 1940s.My grandparents, circa 1950s?My grandfather is standing, and seated directly below him is my grandmother. By the style of the outfits, I’m guessing the 1920s.
When she would see me she would smile and say, “Good boy,” at which point she would give me a hug. She smelled vaguely of yeast and garlic. It was a pleasant smell.
Many years later I learned that both my grandmother and my grandfather spoke fluent English. In fact, my sister told me that my grandfather didn’t even have an accent. I believe that he wanted the grand kids to learn their native tongue so he never spoke English around us. None of us took the hint.
My parents lived in my grandparent’s downstairs apartment until my oldest sister was nine. She has fond memories of going upstairs and being pampered by our aunts, who were teens at that time. This was during the war years and she recalls sitting on the front porch with my aunts and soldiers who were on leave, “I have a photograph of that somewhere,” she told me.
My aunts had cleaning duties on Saturday and my sister would go upstairs and watch them as they meticulously washed and dusted the entire apartment. When all was done my Aunt Susie would play on the piano “Lilli Marlene, ” “The Parade of the Wooden Soldiers.” and a few other tunes, a recollection that my sister cherishes to this day. Apparently, an unnamed soldier had sent my Aunt Lil the “Lilli Marlene” piano music, since her name will Lillian. I’m guessing that this was from a hopeful but unsuccessful suitor, as she eventually married my Uncle Steve.
My sister remembers my grandmother making bakery every Saturday. She would set up a folding table and place it in the kitchen next to the china cabinet. My grandmother would heap flour on the table and make a crater in the center of the flour mountain. There she would add her liquids, which varied depending if she was making a sweet bread, or her luscious light rye. She did this all from memory; no recipe or measuring cups or spoons were required. She knew how much liquids to add, and when the knead was done by the touch of her hand. I had dozens, possibly hundreds of slices of her rye bread over the years and I never remember a single one being less than perfect.
Here, my Uncle Jim is holding one of my grandmother’s rounds of light rye bread.
I’m 15 years younger than my oldest sister, and my aunts were long married by the time that I came around. However, my grandmother’s habits continued. She was always busy, always making things from scratch. She would still can vegetables from her Victory Garden, grind her own hamburger meat, make her own noodles, and bake her own bakery.
Her bread is my fondest memory of her. I remember that the light rye bread was often dotted with caraway seeds that added their own distinct flavor. She would bake it into a giant round, so large that it had to cut into reasonable chunks before slicing. The bread had a hard crust and a solid, yet soft interior. It was heaven in a slice and was delicious with cold butter, or served up in a ham, hard boiled egg, and horseradish sandwich.
In memory of my grandmother I decided to make a light rye in the bread maker. My goal was to make a bread similar to her’s as a homage, rather than trying to duplicate her recipe. Let’s be honest, there were no bread makers when she was making bread, and if one did exist it is unlikely that she would have used it.
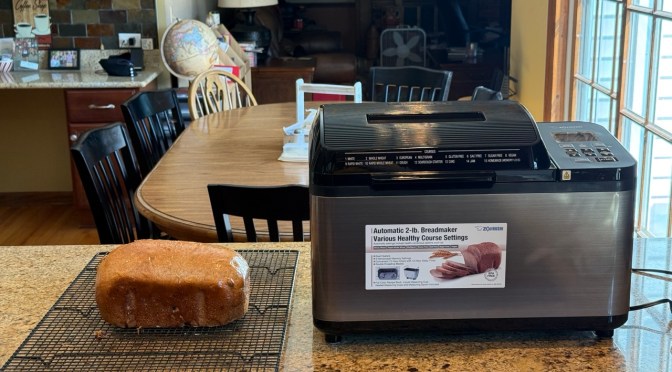
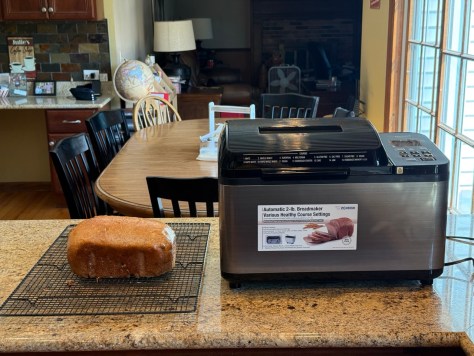
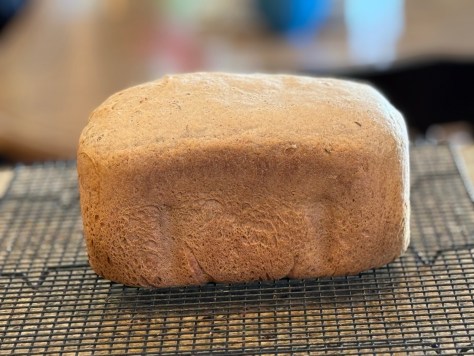
This bread tastes very similar to hers, but the crumb is a bit lighter and more spongy. The crust, however, is dead on. Here is the recipe that I used from the Zojirushi bread maker manual:
The ingredients are very simple. Use the the Active Dry Yeast amount listed. The Rapid Rise Amount is for when you are using the “Quick Wheat” setting on the bread maker. Since all of the ingredients were listed in grams, I was able to weigh everything, including the water. No mess, and so easy!Here is everything in the bread maker. Remember, liquids on the bottom, then dry ingredients, finally yeast in a little well made in the flour. I set the course to “Basic Wheat” and pressed start. That was it!The finished loaf. Not the beautiful round that my grandma made, but a lot easier!You can see that the crumb is soft and airy. Childhood memories restored!
Most families have their own traditions, as does ours. Their significance may or may not be recognizable to others, but they are still important.
One of our traditions centers around our birthday celebrations. When someone in our family has a birthday they get to choose the dinner menu for their special day. The rest of us work as a team to make that dinner for the celebrant. Our labor is part of the gift that we give them.
Inflation, the Trump tariff taxes, and other factors have made beef prices skyrocket through the roof and now we think twice when considering hamburgers for dinner. Steak has become a rare luxury item in our home, so it is no surprise that it is a frequently requested item for a birthday dinner.
We recently celebrated my daughter’s birthday. This was her chosen menu:
Steak, salad, broccoli, real mashed potatoes, cut up strawberries, yeast rolls and Rainbow cake.
What is Rainbow cake? When my kids were very young my wife had a major operation that left her bed bound for many weeks. I took off time from work to not only take care of her, but also our small children, one who was still in diapers. I wanted things to be as normal as possible for our children, and I came up with activities that we could do ranging from going to the zoo to having picnics at our local park. I did all of the cooking during that time and one day I came up with the idea of making a rainbow cake. I added a magical descriptions about the cake concerning the power of the rainbow, and the cake became a hit. In fact, some of my kids request that I still make Rainbow cake for their birthdays to this very day.
My daughter enjoying a slice of Rainbow cake for her birthday.
All of the above is just background for the reason of this post, which is another writing to encourage you to save money by using a bread maker.
I have done several posts showing how easy and inexpensive it is to make bakery quality bread using a bread maker. Today, I’ll write about using the dough function to make other yeasted products. In this case, dinner rolls.
I don’t think that I have made dinner rolls in over a decade, so don’t expect perfection. The bread maker easily makes a perfect dough, but dinner rolls are still more work than pressing a button as you have to form them, and bake them in the oven.
I found a traditional recipe from an author named “Sally” that looked good, so I went with that. Honestly, they turned out delicious. They were exponentially better than commercial dinner rolls and significantly better than those from the grocery store bakery. Rich, yet light, they had a slightly sweet and eggy flavor and were a dynamite addition to our birthday feast. For me, they were extremely nostalgic, as they reminded me of the wonderful rolls that my mom made so many years ago.
I was too lazy to cost out this recipe, but I know that they these rolls are significantly less expensive than comparable ones purchased from a good bakery. The level of work is a bit more than the “press and forget” bread from a bread maker. But since the machine does all of the heavy lifting, it is a pleasure to make them.
Consider giving this recipe a try, and you will elevate a simple dinner into something special. Let’s take a look at the recipe.
This recipe is for a traditional bake. To convert the recipe for a bread maker remember to add your liquid ingredients first, followed by the dry ingredients and the yeast last.
I measured the milk and added the butter to it. I microwaved the mixture for around 15 seconds until the milk was warm to touch but not hot.
Into the baking pan it went.
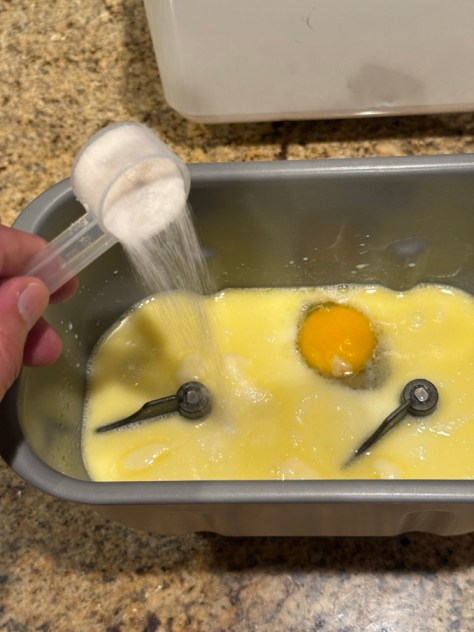
In went an egg and then the salt.
Next, I added the sugar.
I weighed the flour, as that is the most accurate way to measure it.
Lastly, in went the yeast.
I selected the basic dough course and pressed start.
This is an extra step, but do it if you have time. After the dough was kneading for 5-10 minutes I checked it. It was looking a bit slack. There was still dough that wasn’t incorporating into the dough ball. This can happen even with careful measuring for a variety of reasons ranging from humidity, to variations in the brand of flour, to the size of the egg. If I did nothing the dough would probably be OK, but fixing it is easy.
I added about one tablespoon of flour and waited about 30 seconds to see if I needed to add more. That one tablespoon was enough, all was good.
Now the machine was on its own. I would come back when it beeped that it was done making the dough.
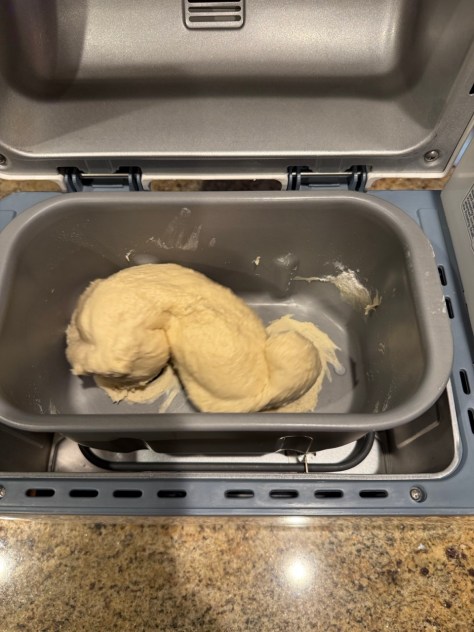
Here is the dough all puffy and beautiful.
I placed the dough on a lightly floured surface and allowed it to rest for around 10 minutes. This makes it more “cooperative” with shaping.
The next step involved a pastry scraper. This is a very inexpensive gadget with many uses. If you don’t have one you can just use a knife.
The dough was divided into 12 pieces. You can use a scale to be precises, but I just eyeballed it.
The edges of each piece was pinched together, and then I rolled the dough in my hand to form a nice ball.
The dough balls were placed in a 9 x 13 pan that I had sprayed with some cooking spray. Yes, not professionally shaped, but good enough. Don’t let perfectionism prevent you from bread making!
I covered the pan and placed it in a draft-free location and allowed the buns to double in size. I think it took between 30-40 minutes (I lost track of time).
I then baked them at 350F (175C) for 20-25 minutes. My oven may vary from yours so keep an eye on your rolls.
The rolls were a hit at dinner. The amount of work was more than making a bread maker loaf, but it was still very easy. The biggest drawback was that I had to be around when the dough was rising and then baking. Neither was a big deal.
One of my favorite things to do is to dive deeply into a topic to gain a broader understanding of it. My fascination may last a day, a week, or sometimes decades. Eventually, I’ll feel that I have learned enough, and I’ll move on to another topic. However, it is not uncommon for me to return to an area of former interest years later, and so it is with bread makers.
I became interested in bread makers sometime in the 1990s, and that interest lasted for quite a few years. I was fascinated that someone had developed a home appliance that could automate the laborious process of bread-making using a simple, consumer-oriented machine. I was intrigued not only by the process of making the bread, but also by the mechanics of the bread makers, as well as how they differed from each other. As a result, I had an extensive collection, most of which I purchased used or on closeout. I also requested and received some premium machines as Christmas and birthday gifts. Over time, I gave away most of the bread makers, but saved a few on a basement shelf where they sat for over a decade, only to be rediscovered about a year ago.
During that interim, I continued to make bread but did so using a high-end mixer, often baking six loaves at a time. Now retired, with most of my kids out of the house, that industrial-level operation is no longer needed, and the single-loaf abilities of a bread machine once again are interesting to me.
I was pleased that my old machines worked, and so I am back on a bread machine baking journey. Along the way, I have had to rely on my old knowledge as well as new skills to optimize my loaves. This post is to share some of that knowledge with you.
Are some brands of machines better than others?
The top 4 high-end brands, in my opinion, are Panasonic, Breadman (now discontinued?), Brevelle, and Zijurushi. I have extensively used all but the Brevelle brand, and I am very familiar with them. I have also used more cost-friendly machines from Oster, Toastmaster, and Regal, among others.
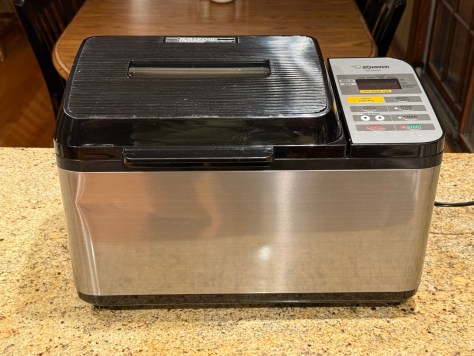
This Zojirushi bread maker is a well loved classic.
The expensive brands are first to innovate features and may offer a better build. I have examined the bread made from both high-end and cost-friendly machines, and the costly machines produce a better loaf, but the difference is minor. However, their overall build quality and innovative features may be enough to sway you to pay a higher price. Note that premium features often migrate to cost-friendly brands over time. For instance, you can now find fruit and nut dispensers, end-user programming, and twin paddle loaf pans on a number of breadmakers in the $100 range.
The bottom line is, if you have a cost-friendly brand, fear not, you can still get it to produce a very nice loaf of bread.
Does the shape of the loaf pan matter?
Early bread machines had a vertical “skyscraper” pan that produced a rectangular loaf with slices similar to sandwich bread or a Pullman loaf. They kneaded the dough well, as the shape of the pan kept the dough in contact with the kneading paddle. These machines yielded bread with uniform slices, but the bread, being square, had more of an industrial look.
This thrifted Regal bread maker cost $14 and is still in excellent condition. It makes a perfectly fine vertical-style loaf. All of the early bread makers had vertical pans, including this Regal machine, and you can still find some newer machines with this style of pan. It makes a squarish slice that cuts nicely, but looks a bit industrial. However, this style of loaf pan possibly does the best job when it comes to kneading and making a loaf with consistently sized slices. However, its bread’s poor aesthetics were likely its downfall in popularity.
Single paddle horizontal loaves were then introduced and are the most popular form factor today. The bread from these machines resembled a traditional loaf, which made it more appealing. However, the loaves were often very tall, necessitating the end-user to cut the bread in half so it could fit in a toaster.
I first saw a twin paddle horizontal loaf pan on a Zojirushi machine. This design produces a loaf that most closely approximates the standard loaf that you would buy at a bakery, as it is both horizontal and the correct height. The downside of this machine is that it creates two holes in the bottom of your bread instead of one due to its twin paddles. Also, it is more likely to make bread with an uneven top (in my opinion).
The twin paddles on this Zojirushi pan allow it to be a bit longer, making its bread resemble a traditional bakery loaf the most.
None of the above problems impacts the deliciousness of the final product. Your choice of pan is strictly a matter of preference.
How many programs do you need on your machine?
Breadmakers have gained an ever-expanding number of programs, some for specialty breads and others that do tasks ranging from making jam to cooking rice. Most specialty bread programs are not significantly different from standard programs and may be unnecessary. Additionally, I have no plans to stir-fry or make jam in my breadmaker. The three essential programs that every machine should have are basic (white bread), whole grain/multi-grain, and dough. Some may want a program for gluten-free bread, if that is the reason they are buying a machine. I have made many different bread types using the standard settings on multiple bread makers with success. Some of the extra programs seem more gimmicky than anything else to me.
You can do all sorts of things using the dough program. Here I made the dough in the bread maker and then formed it into hamburger buns that I baked in the oven.
Additional stuff
Bread makers sometimes have convenience features that you may want. Some Breadman, Panasonic, and other brands feature an automatic seed and fruit bin that drops these ingredients into the bread dough at just the right time. Other bread makers, like many of the Zojirushi units, can be programmed to the user’s baking specifications. Many machines have crust darkness controls, delay timers, warming features, fast bread cycles, and other options that some may find desirable.
My problem
When I returned to bread maker bread making, I had a few clinkers, but most of my loaves were delicious. However, they often seemed much shorter than the ones I saw on YouTube. This led me to dig deeper into the topic once again, and I have come up with some solutions.
But first acceptance!
Realize that a bread made from freshly ground whole wheat will never rise as high as a bread made from commercially milled white bread flour. The same can be said of bread loaded with seeds, cheese, or other weighty additions. Yeast can only do so much heavy lifting. However, it is possible to optimize these breads so that they can be the best that they can be.
Use the right recipe source
Your machine will come with a variety of recipes that have been tested with that machine. Start there, as you are likely to have the greatest success, and you will gain an understanding of how dough performs in your bread maker. I have used recipes submitted by others on the internet with good results, as well as recipes from known sources, like Better Homes and Gardens or a flour or yeast company’s website. Remember, you can download instruction/recipe manuals for many bread makers by searching for them online.
Recent cookbooks (published in 2024 and 2025) on Amazon from unknown sources may be problematic, as some are now created with AI, and the recipes may not have been thoroughly tested. Make sure that you read the book’s reviews carefully when buying a newly published book. Likewise, you may have to do some trial and error, adapting Grandma’s famous bread recipe.
Using a recipe from a bread maker’s cookbook is a great way to start your bread-making journey, as it is designed to be as foolproof as possible. This recipe makes a wonderful light wheat bread. I leave out the basil for general-purpose sandwich and toast making.
About flour
Flour is simply a vegetable product made from milling a vegetable down into a fine powder. Most often, the vegetable is a grain of some sort. There are many different types of flour, with common ones being wheat (of various kinds), buckwheat, and rye. However, flours can be made from other grains, like spelt, and even nuts, like almonds. Each of these flours will have its own unique characteristics.
Wheat flour is often categorized by the amount of gluten that it has. Bread flour contains around 13% gluten, AP flour has around 11% gluten, and cake flour has around 8% gluten. Gluten is what gives bread its remarkable chewy tenderness. This characteristic is excellent for bread; not so good for cake, as no one wants a chewy cake. Hence, less gluten in cake flour.
Some folks have gluten allergies and can’t eat breads made from flours that contain gluten. They eat breads made using more complicated gluten-free recipes, which are a compromise as they don’t have the same bready characteristics as gluten-containing breads.
You can make gluten-free bread using a bread maker’s basic cycle, but because the bread doesn’t contain gluten, it doesn’t require all the kneading that develops the gluten in traditional bread. A gluten-free bread program reduces the kneading times, which may result in a better gluten-free loaf. If you have Celiac disease and are primarily making bread to produce gluten-free bread, you may want a machine with a gluten-free bread program.
The chemistry
Bread making has existed for thousands of years and has been the staff of life and main calorie source for many different cultures. Flour is mixed with water and yeast and kneaded. The kneading process alters several proteins in the bread, specifically glutenin and gliadin which form gluten. This results in an elastic dough and a deliciously chewy and spongy baked bread.
The yeast, being a live organism, utilizes the sugars and starches in the dough and produces carbon dioxide, a harmless gas. This gas causes bubbles in the dough, making the bread rise and expand. Baking the bread kills the yeast, leaving us with a delicious, light loaf of bread.
Other ingredients can be added to the bread to modify it. Salt adds flavor and controls yeast growth, while sugar adds sweetness and helps fuel the yeast. Eggs and milk add richness and can alter the texture of the bread. Butter and oils add richness, flavor, and tenderness. Spices add flavor, and seeds and nuts contribute texture.
If you understand how yeast grows and how ingredients impact yeast, you can solve most of your bread maker problems.
Common bread machine bread issues
-The clinker. In this example, the bread never seemed to rise and is a hard, horrible baked mess. Causes: This is often caused by using bad yeast, forgetting to add yeast, improper mixing, leaving the paddle out of the machine, or insufficient liquid.
-The collapse. In this example, the bread seems to rise rapidly, but then collapses during the baking process. Causes: This is often caused by excessive yeast, or too warm a proofing temperature, overproofing, or dough that is too slack.
-The shorty. In this example, the bread does rise, but not to an expected level. Causes: Insufficient or poor-quality yeast, inadequate liquid in the dough, insufficient proofing time, inadequate gluten development, insufficient kneading time, or unfavorable baking conditions.
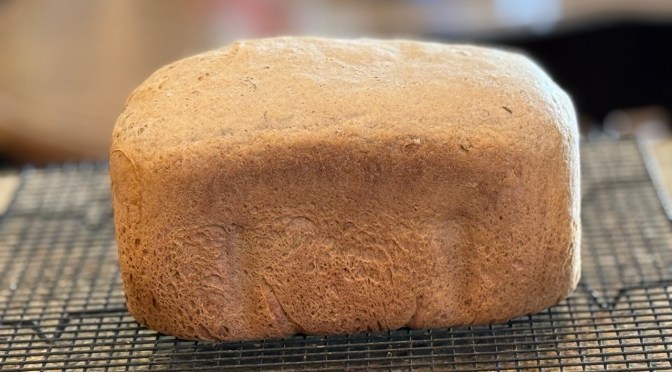
This bread was still delicious, but it should have been at least 50% taller.
-The uneven top. In this example, the bread’s top is uneven or bumpy. Causes: This is common in bread machine bread, especially bread from those machines with two paddles. You can smooth out the dough before the final rise, or do what I do, which is nothing. On dual paddle machines, some say that pointing the paddles in the same direction at the start of baking solves this problem, but Zojirushi says it doesn’t make a difference.
-The paddle holes. Causes: The kneading paddles create holes in the bottom of the bread. You can remove the paddles at the start of the last rise to minimize the holes, or do nothing. I do nothing; it is not a big deal.
-The yuck. In this example, something went terribly wrong. The bread is too salty, bland, or otherwise disgusting. Causes: Bad ingredients, spoiled ingredients, or user error.
The good news is that we know that the machine is doing what it does correctly, so the above problems are most likely due to user error or, rarely, environmental issues.
Yeast issues
Yeast is a living microscopic organism. The dried yeast that we buy is a cultivated strain of yeast known to produce a flavorful bread product. Yeast manufacturers carefully grow yeast in a solution and then remove the water by dehydration. The yeast is ground into a fine powder. Dried yeast is still alive, but in a suspended state. Adding water will hydrate the yeast and revive it. Provide a bit of sugar in the water, and the yeast will start to metabolize the sugar and produce carbon dioxide bubbles.
Yeast will eventually die in a suspended state, but you can lengthen the time before its demise by refrigerating the yeast or, better yet, freezing it. You can take it directly out of the freezer and use it in your recipe.
Yeast exists everywhere, and it is floating around the room that you are sitting in right now. Sourdough is bread made from this natural yeast that is allowed to grow in a solution of flour and water. Making sourdough is an art, but the result is a delicious, crusty, slightly sour bread.
You can buy commercial yeast in soft “cakes,” but these are now hard to find. Dried yeast is readily available in packets, jars, and “bricks.” The bricks are substantially less expensive than individual packets. Yeast comes in two forms: Active and Instant. Instant yeast is sometimes rebranded as Rapid-Rise or Bread Maker Yeast.
Bread-making machines will specify which type (Active or Instant) to use. Typically, active yeast must be activated in water before use, but it can be added without activation in a bread maker. Instant Yeast does not have to be activated to be used in baking. The main difference between the two yeasts is that Instant yeast is pulverized into smaller granules.
These two forms of yeast products have become more similar over the years, and some home bread makers directly substitute one for the other. However, others are more strict and use different amounts when switching from one type to the other, and some avoid substituting altogether.
Dead yeast is the most common reason why your bread will not rise properly, and this is easily testable. Add a small amount of yeast to warm (not hot) water that has a pinch of sugar in it. Wait a bit, if your mixture starts to have bubbles, it is good. No bubbles, and the yeast is dead and useless. Yeast within its expiration date can still be bad if stored in a hot place in your home, a store, or in a warehouse.
I buy yeast in bulk as it is significantly less expensive. I store it in the freezer to increase its freshness.
The measurement issue
Another widespread end-user problem when bread-making is measurement error.
In the US, it is common to measure by the volume of ingredients using a measuring cup. This is especially error-prone when measuring flour, which can be packed fluffy or solid in a cup, significantly changing the amount of flour added to a recipe. Additionally, flour can attract water in a humid environment or lose water in a dry climate, which impacts its volume. Add other errors, such as not leveling the cup, and it is easy to understand why this method is less than ideal.
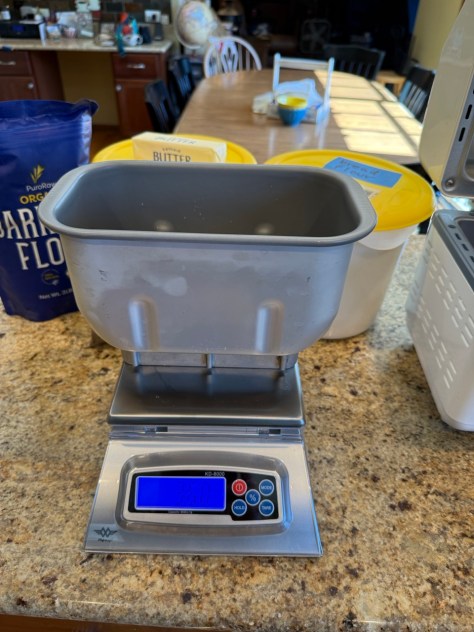
A much better way to measure is by weight, in grams. This is also a more straightforward method, as you can place your baking pan on a digital kitchen scale and then tare the scale, which sets the display at zero. Add the amount of flour in grams for a more accurate measurement.
I now weigh almost all my ingredients, including liquids. Not only is it more accurate, but there is less cleanup. I simply tare the scale and add ingredient one, then tare the scale back to zero and weigh the next ingredient, and so forth.
I have an older scale that can bounce back and forth a few grams, so I still use volume measurements when weighing anything less than 20 grams. Therefore, when measuring my salt and yeast, I still use measuring spoons. For everything else, I use the scale, and it has definitely resulted in better bakes in my bread machine.
You can find many volume-to-weight conversion tables on the internet. Here are some common ones:
Bread flour 1 cup = 120 grams
AP flour 1 cup = 120 grams
Water 1 cup = 227 grams
Milk 1 cup = 227 grams
Butter ½ cup = 113 grams
Sugar 1 cup = 198 grams
Yeast 2 ¼ tsp = 7 grams
Salt 1 T = 8-18 grams, depending on the salt type
Place your pan on a kitchen scale and press tare, and the scale will zero out. You can then weigh your ingredient. Press tare again for the next ingredient. The weight for this flour was supposed to be 340 grams, and I have 342 grams. Such a small difference will not harm the bread. My scale is old, and I don’t trust it to properly weigh tiny amounts. If the item is less than 20 grams, I use measuring spoons.
Ingredient temperature issues
Only a few bread makers have an ingredient warming feature. Yeast, being a living organism, is sensitive to temperature fluctuations. Too hot, and you kill the yeast. Too cold, and you slow its growth. The ideal temperature range for yeast is between 80° F and 90° F (27° C and 32° C); however, going up to 110 ° F (43 ° C) is typically OK, and some dry yeasts may prefer this slightly warmer environment. If the temperature is too hot for you to put your finger in a liquid, it is too hot for the yeast. Conversely, if you are adding cold milk and butter to your mix, don’t expect the yeast to be happy. Try to have ingredients at room temperature or a bit warmer when making bread.
Environmental issue
If your environment is too hot or too cold, or if your machine is placed next to something too hot or cold, it will impact your rise. This is usually an easy problem to solve using common sense.
An additional measuring issue
You can measure everything correctly and still be off. Many bread machine bakers will check their machine after 5-10 minutes of initial kneading. If the dough ball looks too liquidy, with the dough not completely incorporated into a ball, or too dry, with a ratty-looking ball or a lot of raw flour present, this is the time to fix it. For liquidy dough, add a tablespoon of flour and wait 30 seconds; if the dough doesn’t all form into a ball, repeat until it does. Do the same if the dough is too dry, but add a tablespoon of water in place of the flour every 30 seconds until the ball is smooth and roundish. Once you achieve a smooth ball, you can close the lid and go about your business. The machine will do the rest of the work on its own.
Your dough should look like the above. Add flour slowly in small amounts; if it is too slack, add water in small amounts; if too dry.
If you see a lot of flour stuck to the sides of the pan, you can use a silicone spatula to knock it down into the pan at the same time.
Wrong setting issues
I already stated that most of us only need a few program settings on our machines. However, you still need to use the right setting. Whole wheat bread needs different kneading and rising times compared to white bread. If you try to make whole wheat bread using the “basic” setting, you will likely be disappointed with your results.
Bread flour vs. All Purpose (AP) flour
Bread flour has a bit more gluten, and this will give you a better product and a better rise. Many recipes will ask you to use bread flour for this reason. However, I have often used regular AP flour even when the recipe calls for bread flour. Would my bread have been better with bread flour? Probably, but it was still excellent with AP flour.
Ingredient concerns
We already talked about bad yeast, but it is possible that another ingredient that you are using is not up to standard. This is most common with flour. It is easy to try a different brand or batch of flour if you are concerned about this.
I have a problem with my city water, and I’m guessing that the water treatment chemicals inhibit yeast growth. To compensate, I very slightly increase my yeast and very slightly reduce my salt, which is yeast-inhibiting, in my recipes. If a recipe calls for two teaspoons of yeast and 2.5 teaspoons of salt, I may change that to 2.25 teaspoons of yeast and 2.25 teaspoons of salt. Another option that I could try would be to use distilled or filtered water.
Salt issues
Salt adds flavor, but it also inhibits yeast growth. Because it can inhibit yeast, it is also used to modulate yeast growth. Too little and the yeast will overgrow, too much and the yeast is inhibited or dies. All salts (table, Kosher, sea salt, etc) are the same chemical, sodium chloride. However, the granular sizes of different salts vary significantly. A tablespoon of one type of salt may have more or less actual salt than another. For instance, table salt is finer and therefore more concentrated than Kosher salt. If a recipe calls for one teaspoon of Kosher salt, the conversion is to use around ½ of a teaspoon of table salt. Doing a one-to-one conversion will lead to too much salt, and this could inhibit the bread from rising. Conversely, going in the opposite direction can lead to overproofing and having a loaf collapse.
It is essential to separate the dry salt and yeast when loading your bread maker. I put the salt on one edge of the pan and place the yeast in a little depression in the middle of the pan. If they touch when they start mixing, the strong initial concentration of the salt could kill the yeast. Separating the two dry ingredients prevents that from happening.
To protect the yeast, I place the salt along one edge of the pan and the yeast in a little hole in the middle of the flour.
Order ingredient concerns
Bread makers require that you add ingredients in the order listed. Some of this is because some delayed recipes can sit for hours before baking. You don’t want your yeast bubbling away or your powdered milk going sour. Develop good baking habits and add the ingredients in the order listed.
Adding extras
There are products called dough enhancers designed to improve your bake. These are a combination of ingredients that may contain several ingredients like Vital Wheat Gluten, Vitamin C (Ascorbic Acid), lecithin, yeast nutrients, and diastatic malt. However, you can use these additions separately if you wish. I sometimes add a tiny bit (less than 1/8th of a teaspoon) of ascorbic acid, which helps my rise. Additionally, Vital Wheat Gluten (VWG) added at 1 tablespoon/2 cups AP flour can turn AP flour into bread flour. VWG can also help with the rise of breads made with 100% whole wheat flour. Diastatic malt can aid in rise and texture. Lecithin can assist in the texture and tenderness of the bread. All of these are optional, but one or several may help if you have tried more conservative options and you are still not getting the results that you want.
Adding fruits and nuts
If you add fruits and nuts at the beginning of your baking, the paddle will chop them up too much. Some machines can drop them in at the right time, and others will beep to tell you that it is time to add them. This is usually towards the end of kneading.
If your fruits and nuts are clumping towards the bottom of your finished loaves, toss them in a bit of flour before adding them to your dough. This is especially useful for sticky ingredients like raisins.
Dealing with an uneven top
This can happen with any machine, but the dual paddle ones are more susceptible. Honestly, an uneven top doesn’t bother me a bit. However, if it bothers you, you can smooth the top of the bread at the start of the final rise.
Bread machines are more likely to make a loaf with an uneven top. This doesn’t bother me at all. If it bothers you you can redistribute the dough before the machine’s final rise.
Soggy bread issues
Leaving your bread in the machine after it is baked or immediately sticking hot bread in a plastic wrapper will result in a soggy loaf. It is best to cool it out of the pan on a rack if you want a crisp crust. I often leave it in the pan for 5-10 minutes first, which causes less tearing at the paddle site. If you like a softer crust, wrap the bread in a clean dish towel to cool.
Mold and stale bread issues
I have found 3-week-old store-bought bread at the bottom of our bread basket that was perfectly edible. That is scary. Homemade bread is fresh and natural and doesn’t have preservatives. When stored properly, expect 3-4 days before you need to turn the bread into bread crumbs, French toast, or bread pudding.
The best way to store bread is in a cool, dry place in a container with some ventilation to prevent mold growth. There are many options, including a bread box, a bread bag, or wrapping the bread in a clean kitchen towel. I use a cake cover that has a vent hole on its top. If the bread looks good at the 5-day mark, I may still eat it, but I’ll toast it first to make it more palatable.
I store my bread under a cake dome that his an air hole.
If the bread is thoroughly cooled, you can store it in a plastic bag or Tupperware container; however, this will soften the crust, and your chances of getting moldy bread will increase.
Storing bread in plastic will keep it fresher for longer, but it will also increase the likelihood of mold growth.
Another way to preserve bread is to freeze it or freeze half of it. Thawing on the counter will give you bread nearly as fresh as when it was baked.
Cutting the entire loaf into slices will hasten its demise as you have more surface area to dry out. However, I do that as my family won’t eat it unless it is convenient. It is a compromise that I have to make.
My family won’t use my bread if they have to slice it themselves. Although not ideal, I pre-slice my bread. I use a slicing guide as I tend to cut on a slant. Slicing as needed will keep your bread fresh longer, but “ya gatta do what ya gatta do!”
There you have it – a collection of tips to turn you into bread machine experts.
It amazes me how inexpensive bread is when you make it yourself. Yes, you can buy a loaf of bread for a couple of bucks at the supermarket, but that bread is awful and has almost no substance.
To buy bread that has bread like qualities expect to pay anywhere from $4-$10 a loaf.
You can make homemade bread for a fraction of those costs, and customize it to suite your tastes and needs. However, making bread can be a labor intensive process. You can circumvent the labor by using a bread machine.
I have been rediscovering my bread maker, which is over 20 years old. Additionally, I found another used bread maker at a thrift store for only $14 which works well. As you know, I like to play around with machines.
My bread maker has to be at least 20 years old.
I picked up this bread maker at a second hand store for $14 and it works surprisingly well. It even came with its original guide and recipe book. In fact, today’s recipe is from that book!
The wonderful thing about a bread maker is that you add the ingredients, which takes a few minutes, and press a button. Everything is then done automatically. Imagine having your house filled with the aroma of freshly baked bread. It is quite intoxicating.
I have been experimenting with a lot of different loaves from simple white to pesto bread. I made an excellent 7 grain bread that was considerably less expensive than its store bought counterpart. However, I wondered if I could reduce the cost further by using oatmeal as my multi-grain component. I followed a recipe in the Regal bread maker manual/cookbook and it turned out with great success. The cost of the loaf? Only $1.02!
Here is the recipe:
9-11 ounces water
1.5 teaspoon salt
2 tablespoons honey
1.5 tablespoons butter or margarine
2/3 cup quick oats
3 and 1/4 cups bread or AP flour (I used AP flour)
2 teaspoons active dry yeast
Add ingredients in the order listed and use the white bread or “basic” cycle. This recipe is suitable for a bread maker that can make a 1.5 or 2 pound loaf.
Start with 10 ounces of water. If you want to do things right, check the dough after it has been kneaded for around 5 minutes. If the dough looks ratty and not in a smooth ball add more water, about 1 tablespoon and wait 30 seconds before you add the next tablespoon. Stop when the the dough forms a ball. If the dough looks too wet, add a tablespoon of flour in the same manner that you would add the water. You are looking for a smooth ball similar to the photo below.
Let the bread cool for around 20 minutes before attempting to slice it. A serrated knife makes slicing easy. If the paddle is stuck in the bread carefully remove it using something like a plastic spoon as you don’t want to scratch the non-stick coating on the paddle. I take the pan out of the machine as soon as the bread is done. Then, I usually leave the bread in the pan for 5-10 minutes before trying to remove it. This results in less tearing of the bread at the paddle site.
The bread was really delicious. It is best to slice as you go as homemade bread lacks the preservatives that store-bought breads have. However, my family is more likely to use the bread if it is pre-sliced. I like to store it in a container that protects it while having a bit of air circulation. This keeps it the freshest and minimizes mold. The bread is best on day one and two, and usable as excellent toast on day 3 and possibly 4. After that save remains for croutons, bread pudding, stuffing, bread crumbs, and French toast. Remember, you can always freeze part of the loaf if you can’t consume it all in a couple of days.
I’m keeping mine fresh using a cake dome that has a little air hole in the top. Others use a bread box that has ventilation holes, while others use a bread bag. Plastic bags will keep it the softest the longest, but plastic traps moisture and promotes mold. However, I have stored my bread that way too.