Inflation continues, and many are struggling. This is another post in my series to help people get through these difficult times by using common-sense principles.
By now you know that I’m a fan of soups and one-pot meals. I have made a number of bean and lentil soups, and they are all similar, yet a bit different. Bean soups are extremely flexible and forgiving. Ingredients can be added or removed, and you can still get an excellent, delicious end product. Bean soups can also be extremely economical. A 20-ounce, 12-16-bean variety sack costs only a few dollars; the vegetable ingredients are cheap, and the meat can be anything from an Easter hambone to cut-up hot dogs.
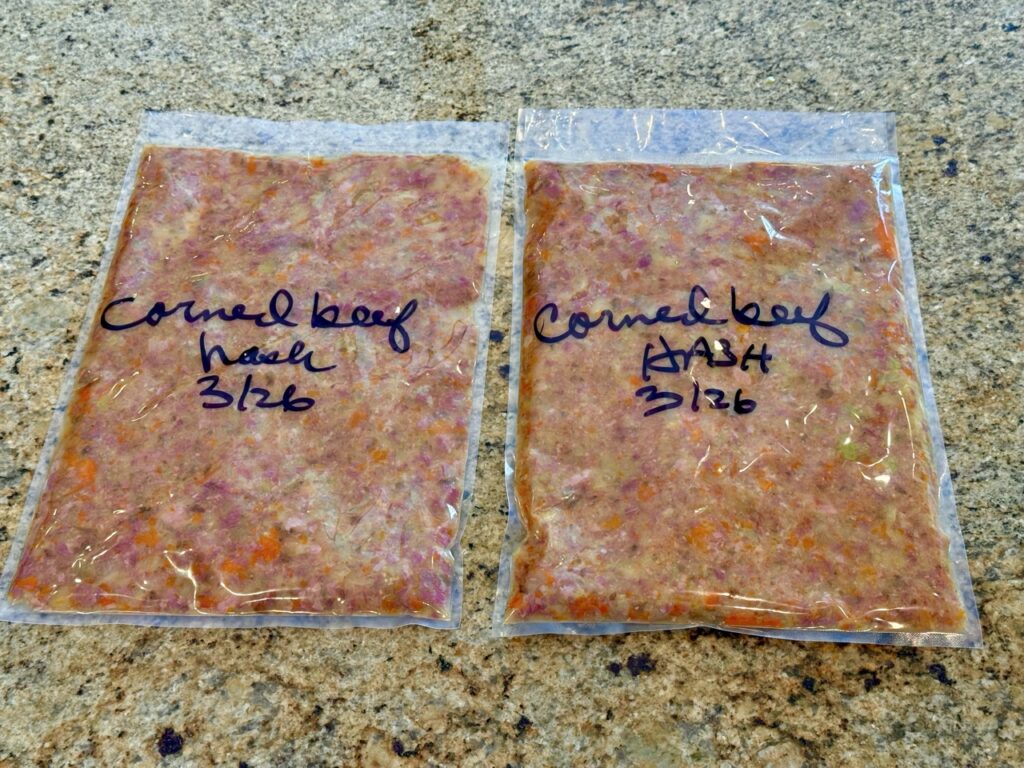
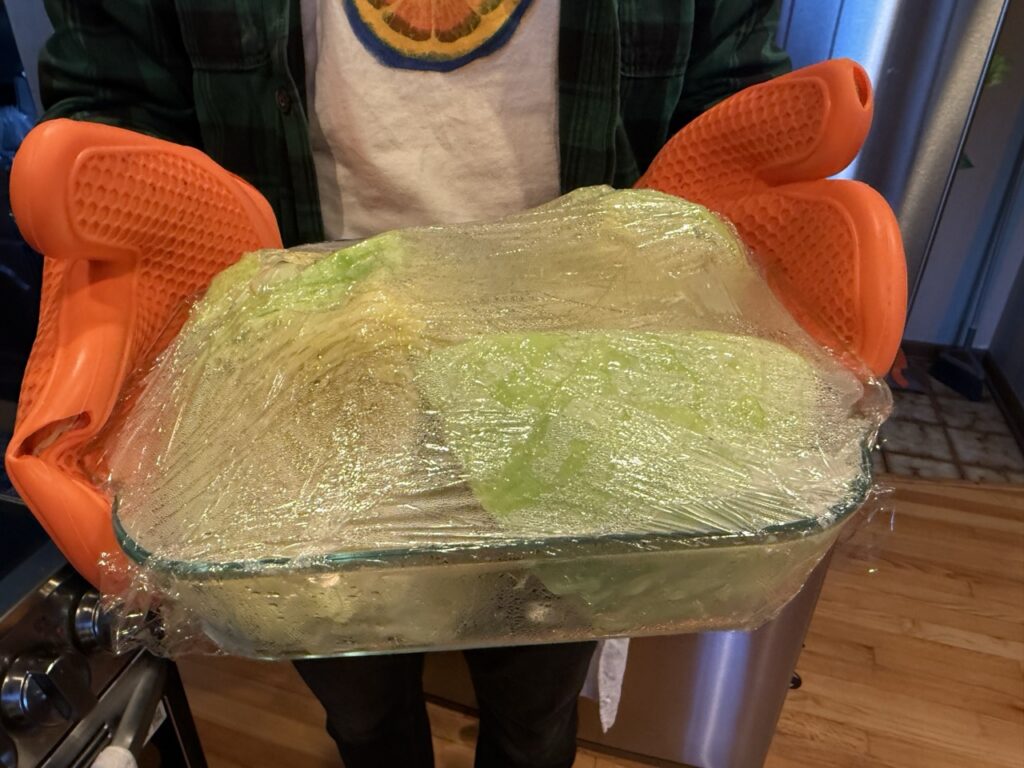
This recipe made over 5 liters of soup, plenty to feed a large family. Only two of us were home when I made this, so we had quite a bit left over. The good news is that this soup freezes well!
Recipe adapted from the website, “Valerie’s Kitchen”
Cut up the vegetables. Exact amounts are not important.
Prepare your spices. Don’t add salt until you can taste-test at the end. The ham is already salty, as is the broth.
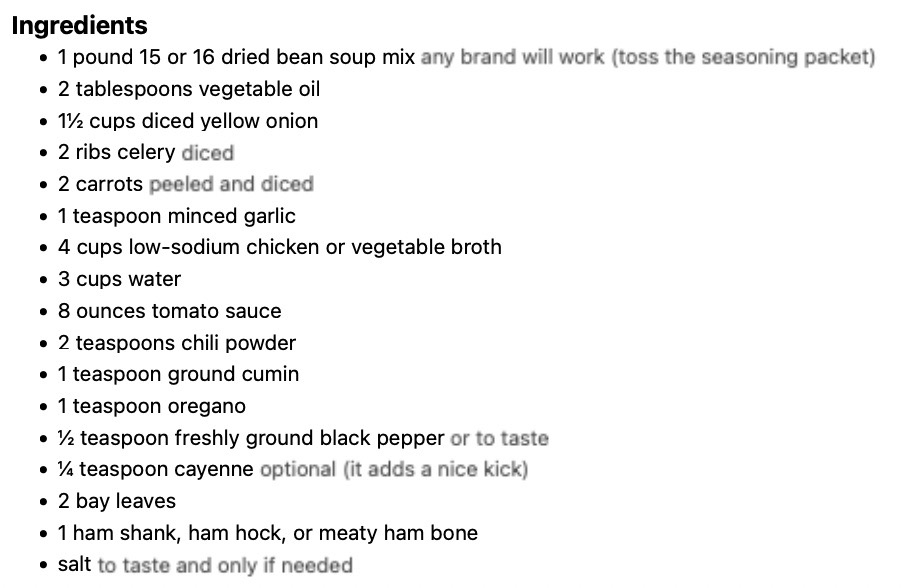
Here is the meat that I used. The ham bone was a gift from my sister, who had it left over from Easter. I froze it and used it all of these months later. I also had a couple of strips of bacon in the fridge. I used these for their grease and for their bacon flavor. If I didn’t have the bacon, I would have used vegetable oil. The meat that you use can vary. Try sausage, other smoked meats, or even sliced hot dogs. You can also omit the meat for a vegetarian dish. However, the meat adds a lot.
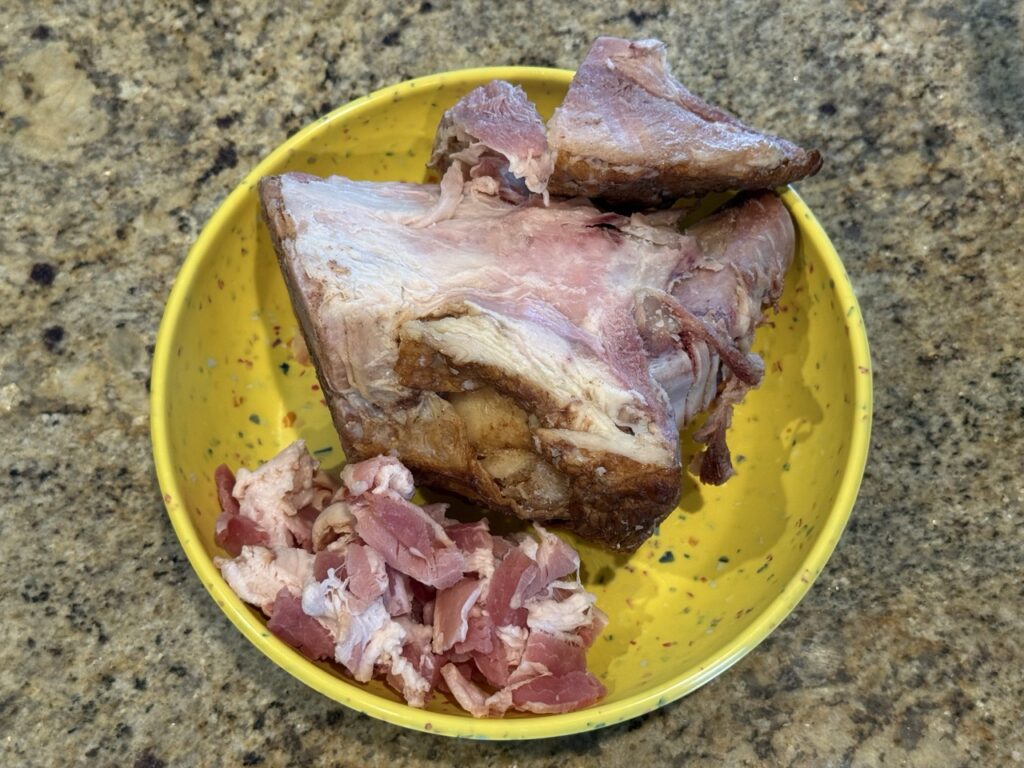
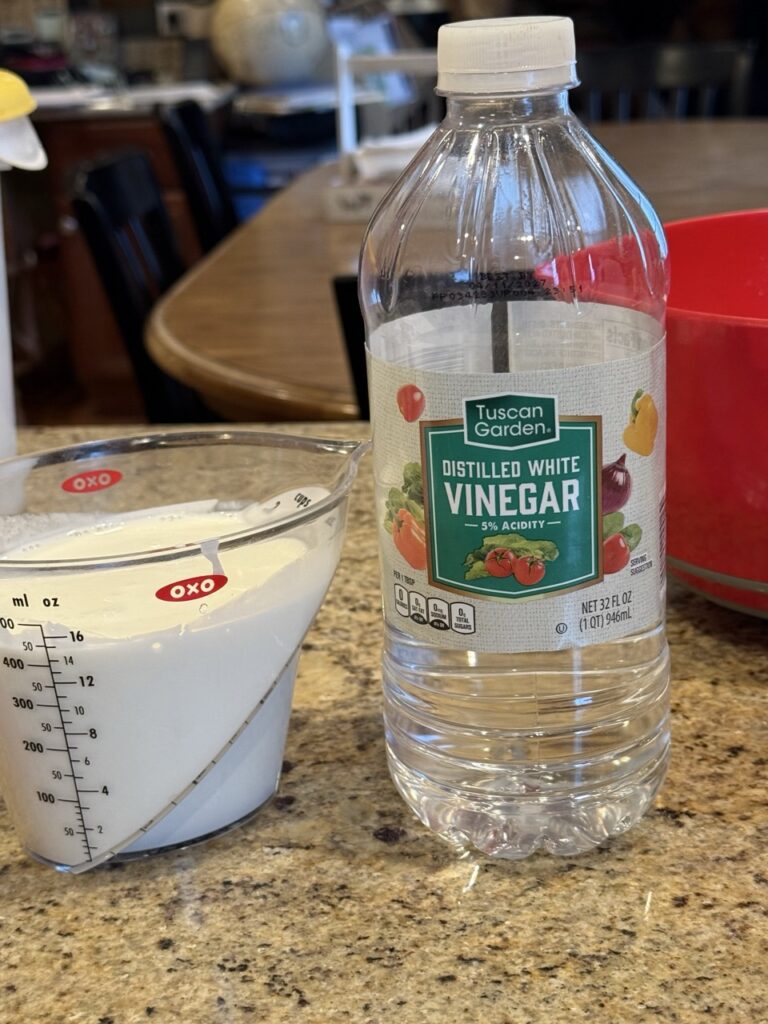
You will need around 6 cups of liquid for the recipe. That can be 4 cups from a box of stock plus two cups of water, 6 cups of broth, or, in my case, 6 cups of water with some chicken bouillon granules. I only used about a tablespoon of the granules, as they are pretty salty.
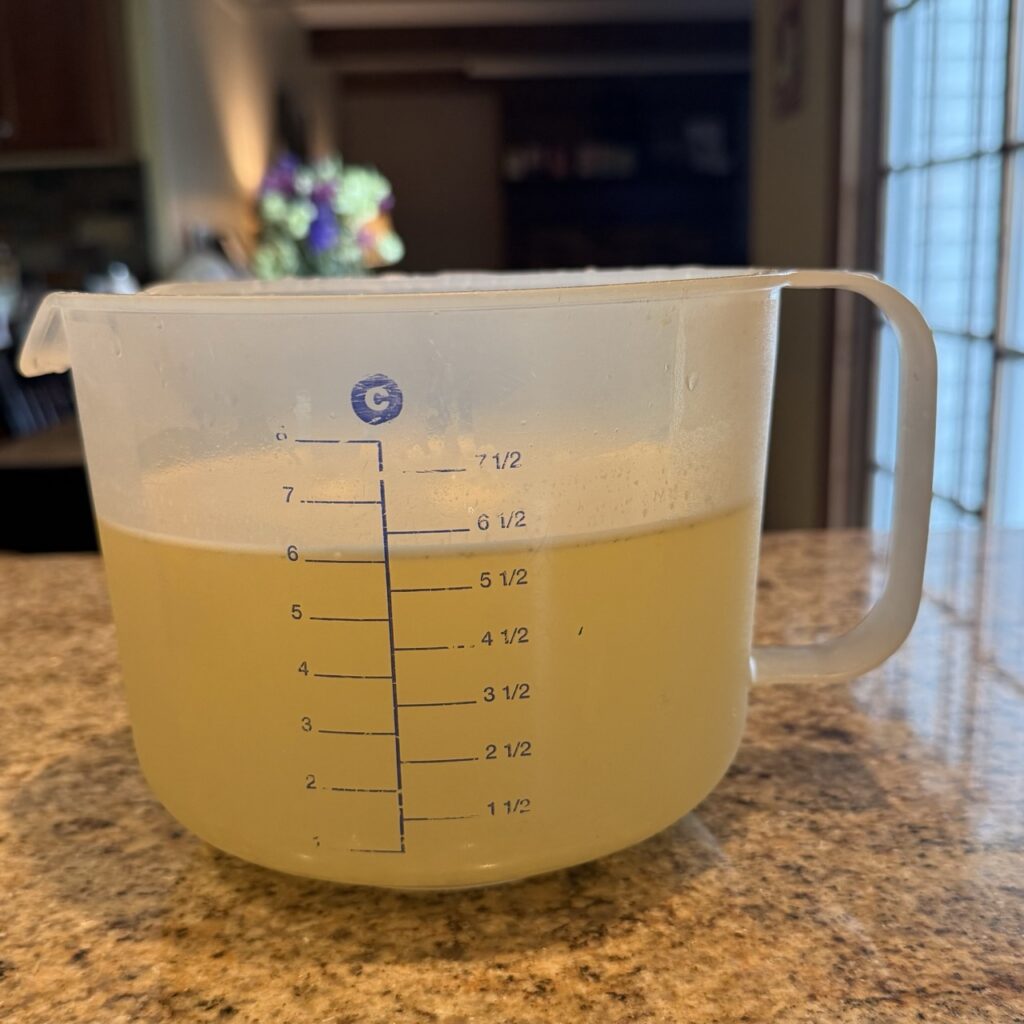
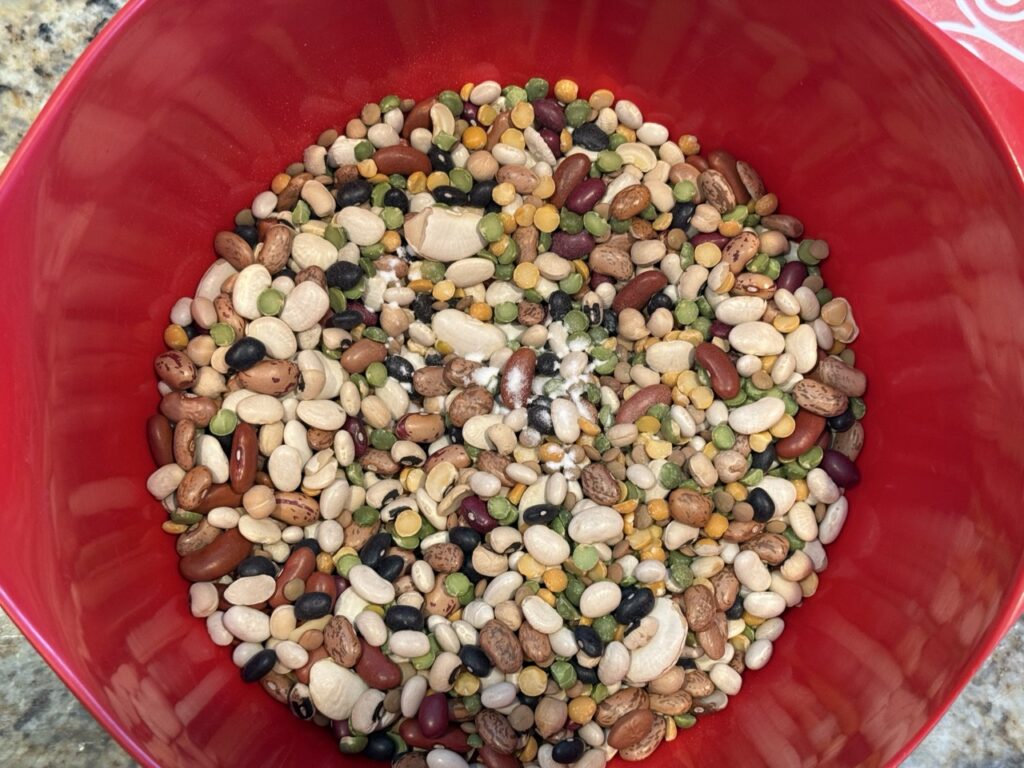
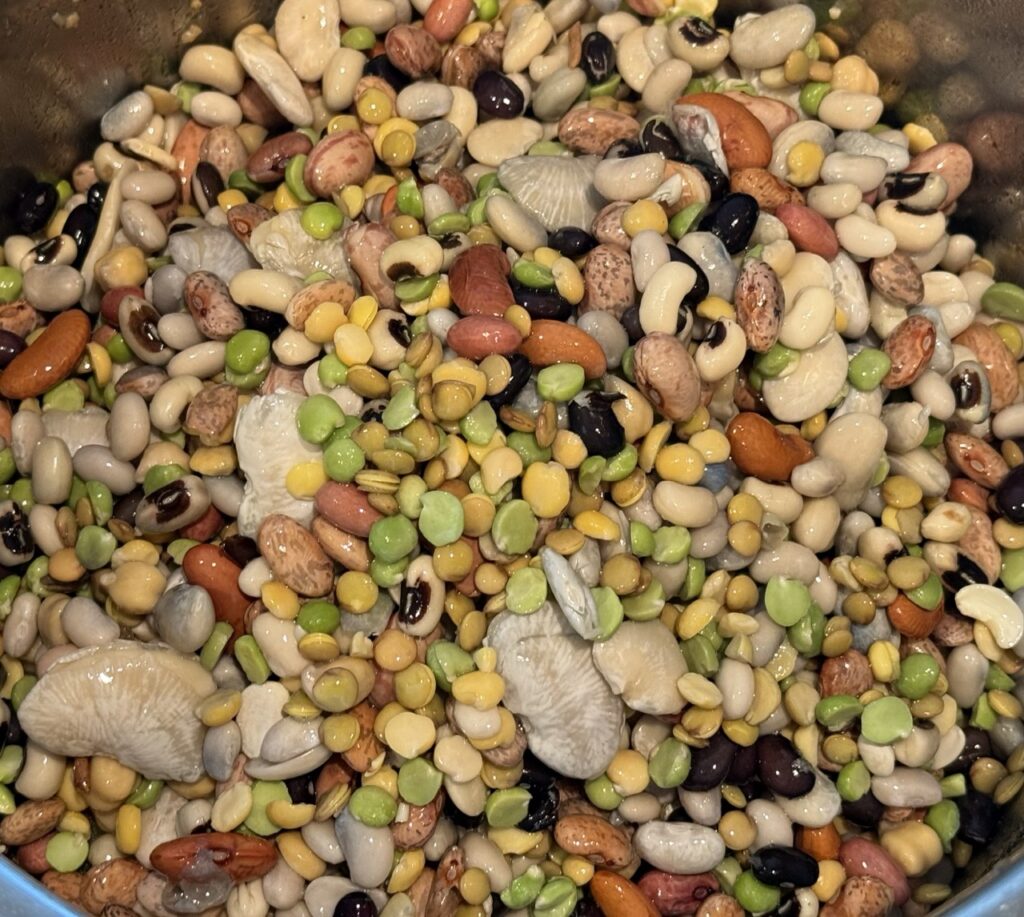
Here are the beans that I used. They are the Aldi brand and were of very good quality. I believe they were a couple of dollars. You should dump the beans and sort for broken/moldy ones as well as small rocks. This bag was very clean, and I only had about 5 beans to discard.
To soak or not to soak? That is the question. With a pressure cooker, you can use unsoaked beans by extending the cook time. I tend to soak when possible, as I believe that it makes the beans more digestible and less… hmm. Well, you know what beans can do. Pro Tip: I added a pinch of baking soda to the soak. This helps old beans hydrate better. I soaked the beans in plenty of water, overnight in a covered bowl.
Here are the beans after a night of soaking. I drained off the old water and rinsed them before adding them to the soup.
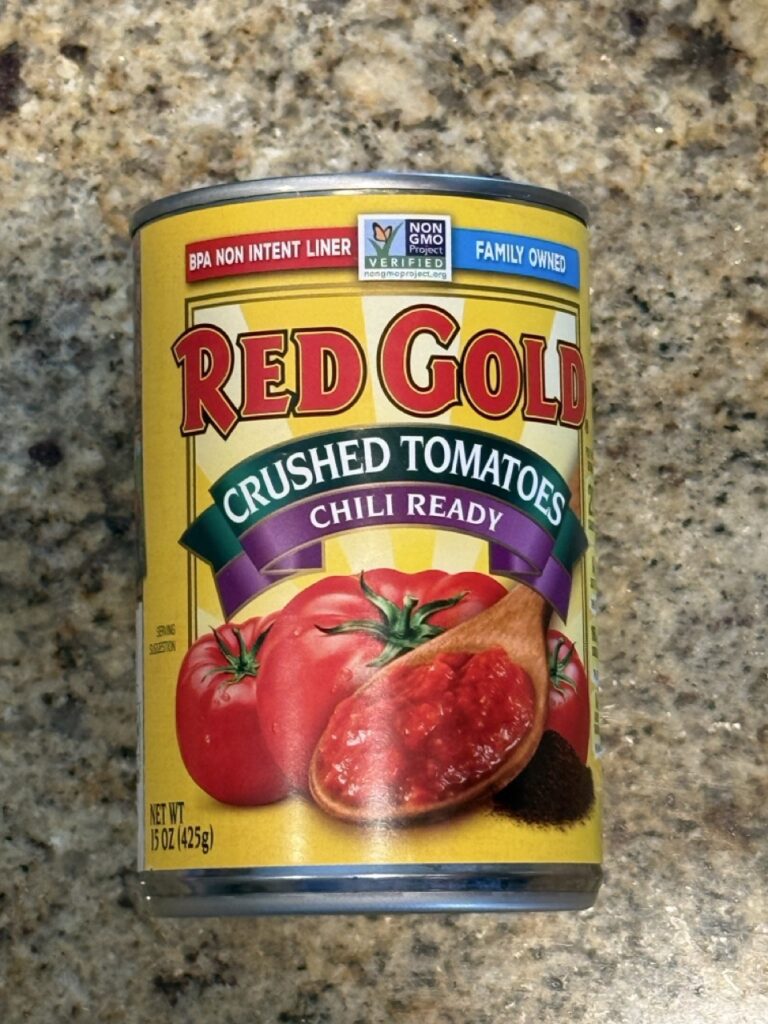
The recipe calls for 8 ounces of crushed tomatoes, but I used a whole can. If I didn’t have these, I would have used any tomato product or even condensed tomato soup. Remember, you are cooking for a family and not following some sort of heirloom recipe.
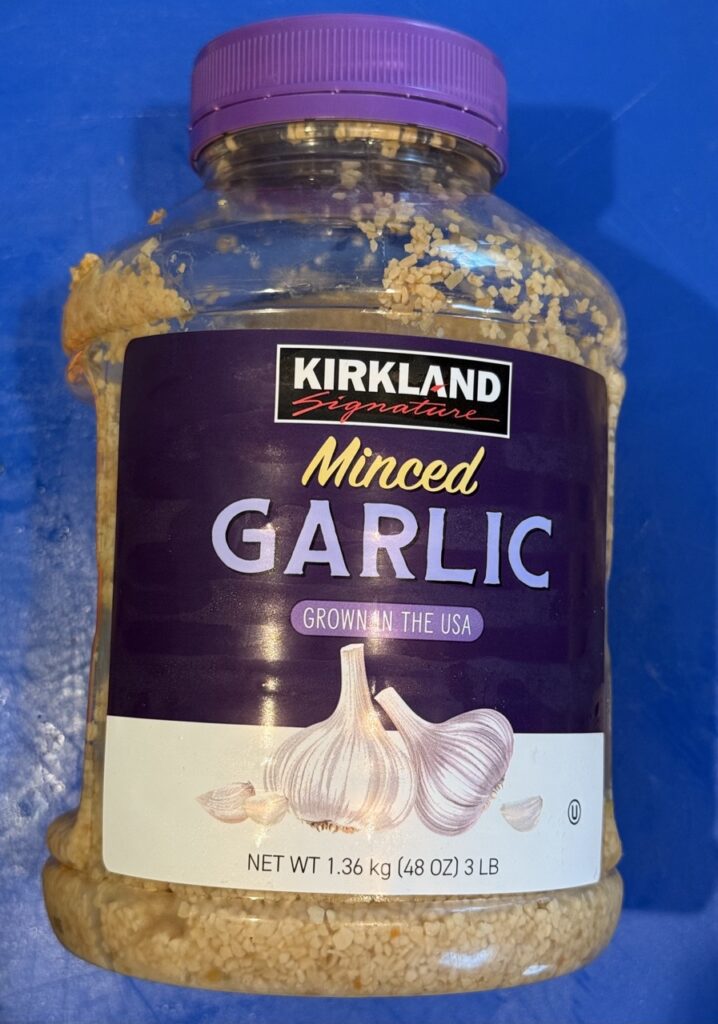
I also used my usual jar garlic. Would fresh be better? Likely, but this works too. If I didn’t have this, I would have used powdered garlic granules.
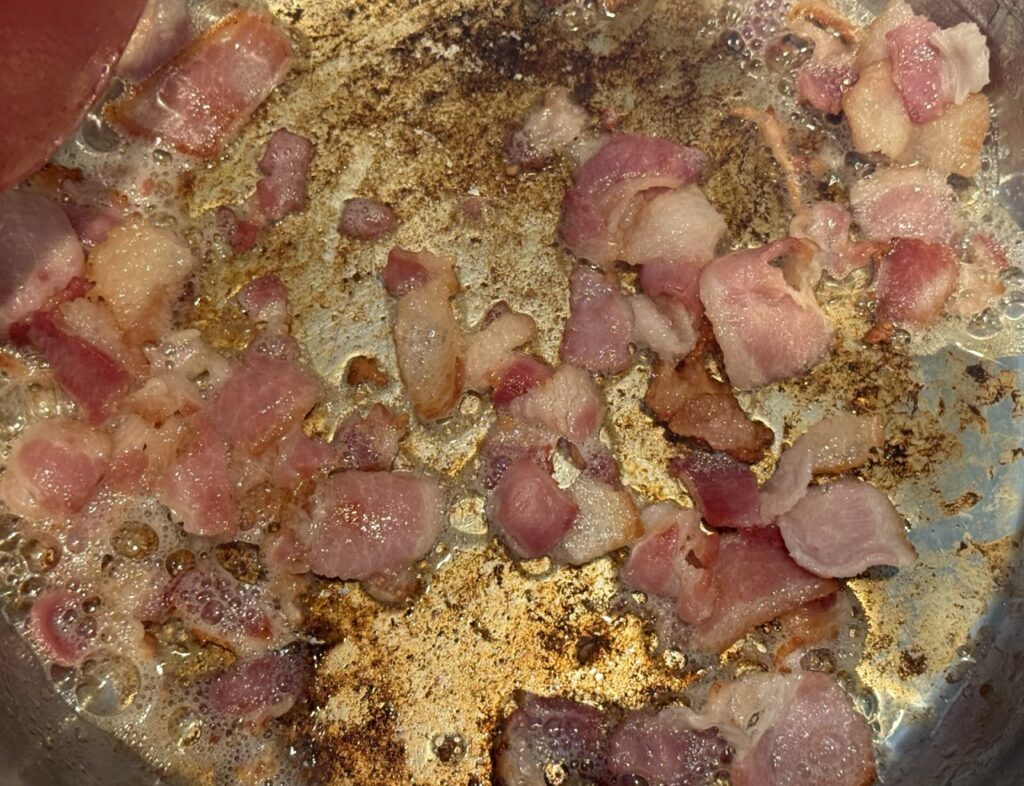
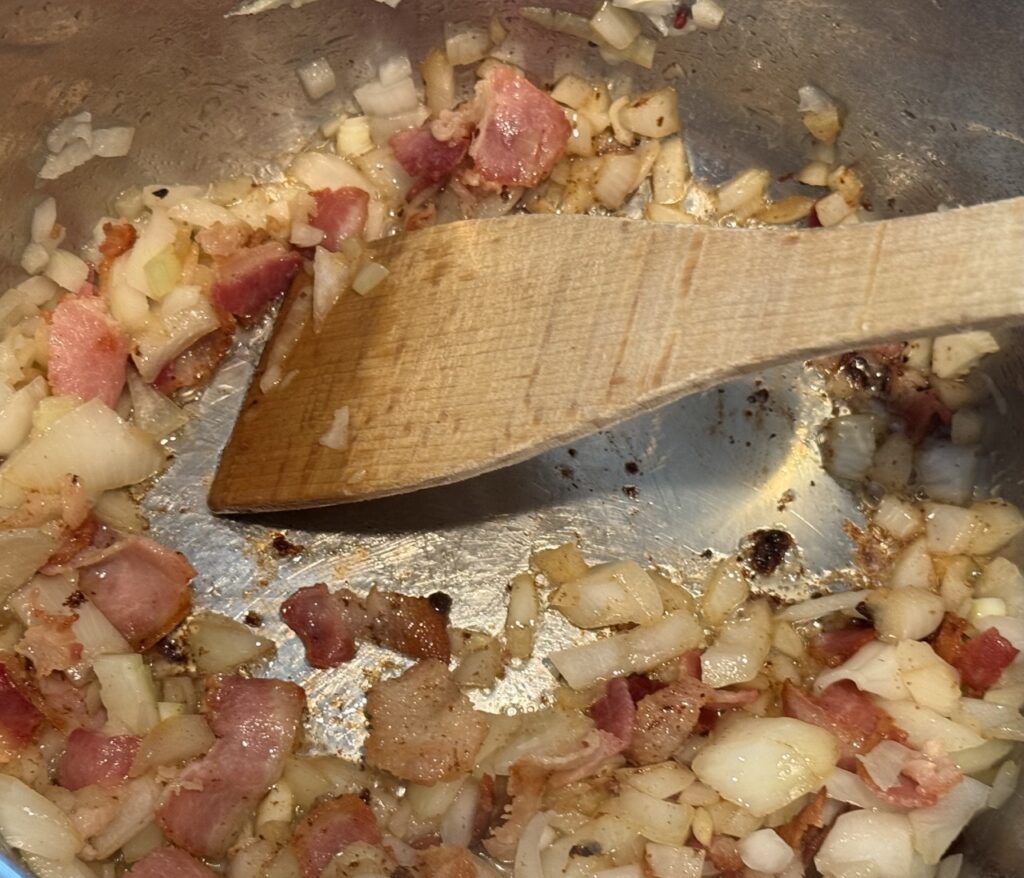
Let’s go! I rendered the bacon for its fat using the sauté setting on my electric pressure cooker (think Instant Pot). Don’t worry about the crispy stuff on the bottom of the pot; I will take care of that in a bit.
After the bacon rendered, I added the onions and cooked them for a few minutes to soften them. The onions released a lot of liquid, which made it easy to remove the fond (the flavorful, burnt-on crust) with a wooden spoon.
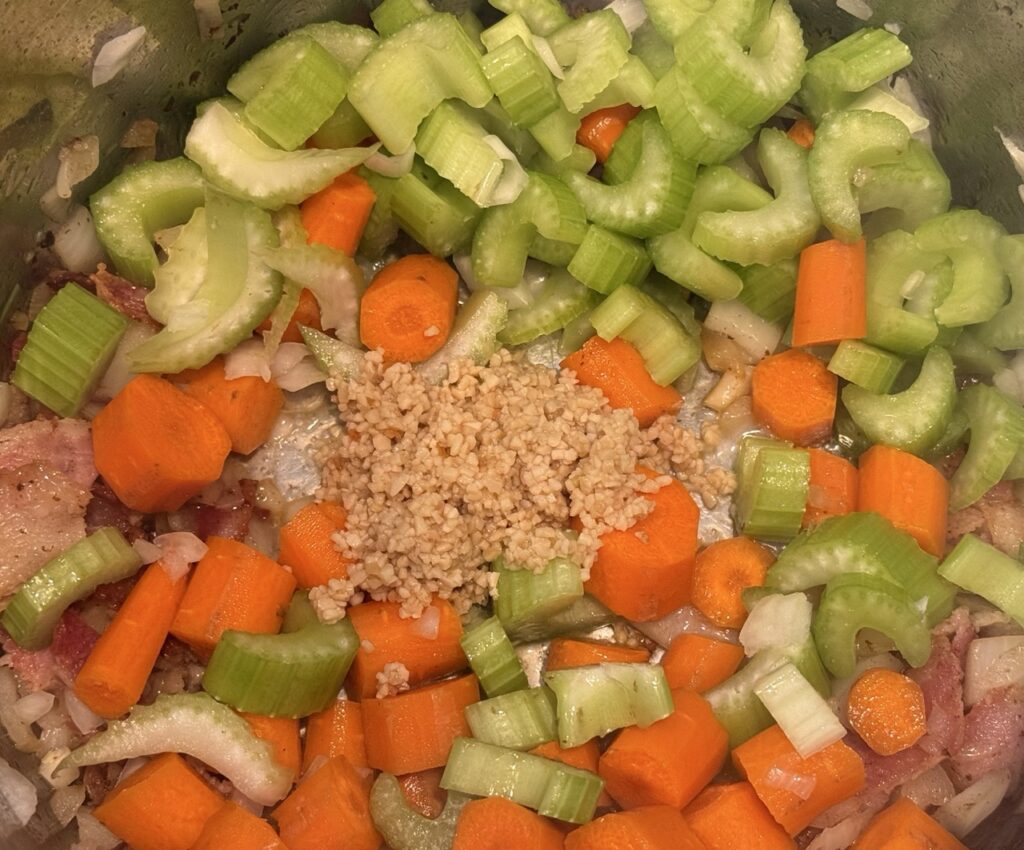
In went the carrots and celery, as well as the garlic. I continued to cook this mixture for a couple of minutes.
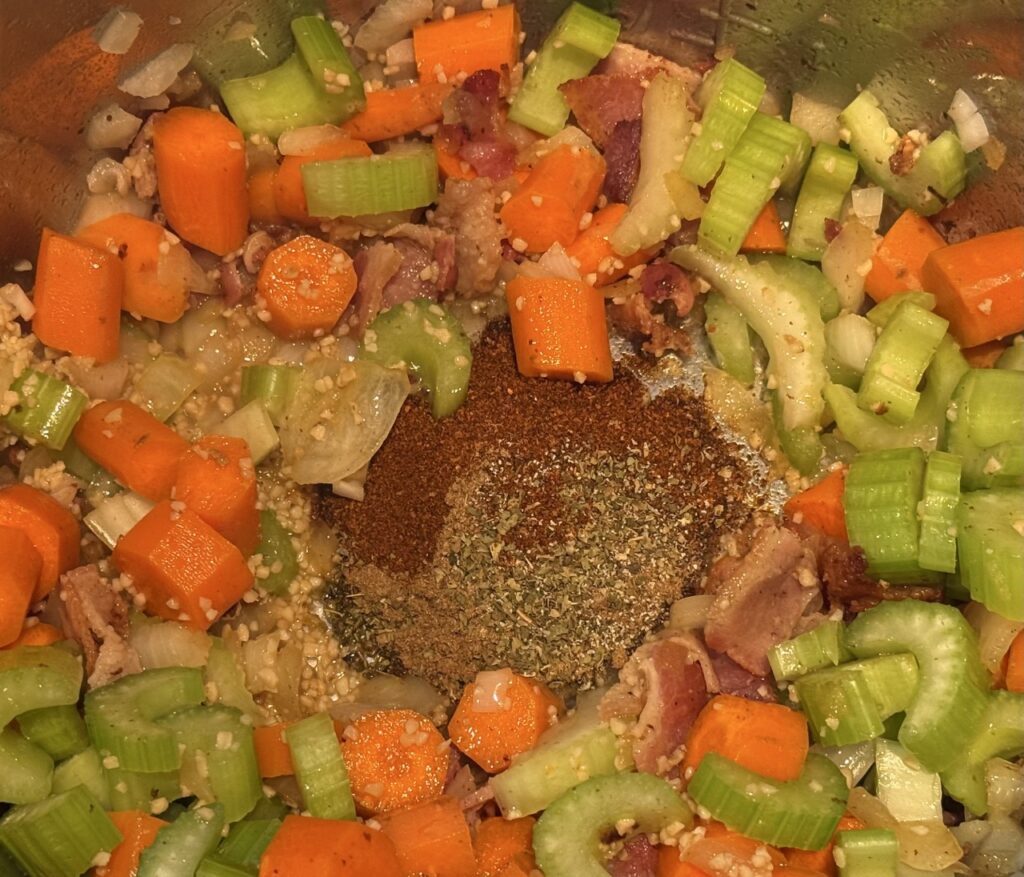
Then my spices. If you cook the spices for a bit, their flavor is intensified. However, be cautious, as you don’t want to burn them.
Now the soaked beans. Remember, you can use dried beans too, you would just need to cook them longer.
Now the chicken broth and the can of tomatoes.
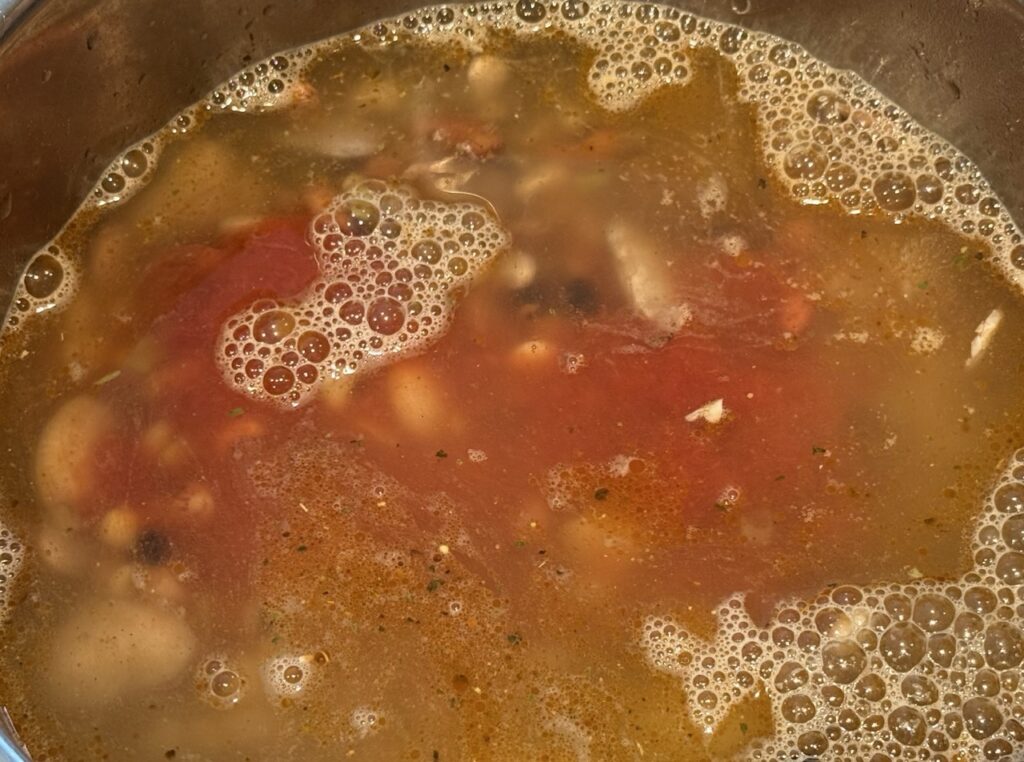
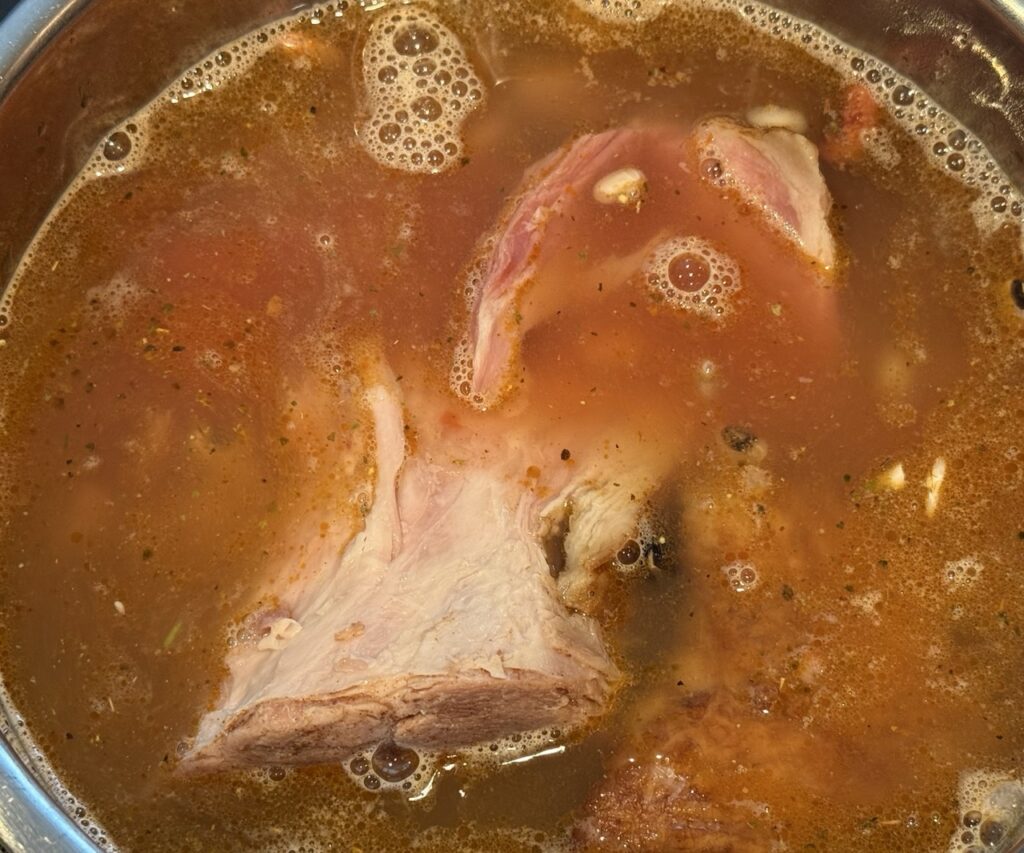
Lastly, the ham bone. My electric pressure cooker is pretty full. Perhaps a bit more than it should be. However, we are going for it. A pressure cooker should be no more than 2/3 full. Probably less if I were just making the beans alone.
All of this is very simple. Now it is time to place the cover and pressurize. Since these beans were soaked, I cooked them for 25 minutes. When the cooking was done, I let them sit for at least 15 more minutes before releasing the steam. If the beans were not soaked, I would pressure-cook them for about 45 minutes and also let them rest for 15 minutes.
As an aside, I looked up this pressure cooker, and I have been using it for over 8 years. I can’t say enough about how useful pressure cookers are. Stove-top units last forever, but you have to watch them. These electric ones are also very robust. It seems that the Instant Pot craze is waning, and you can buy a new 6-quart electric pressure cooker for well under $100. I checked Facebook Marketplace and saw several used 6-quart models (a good size) selling for between $20 and $50. The Instant Pot brand is good, but so are many other brands. My unit is not an Instant Pot, but it works great.
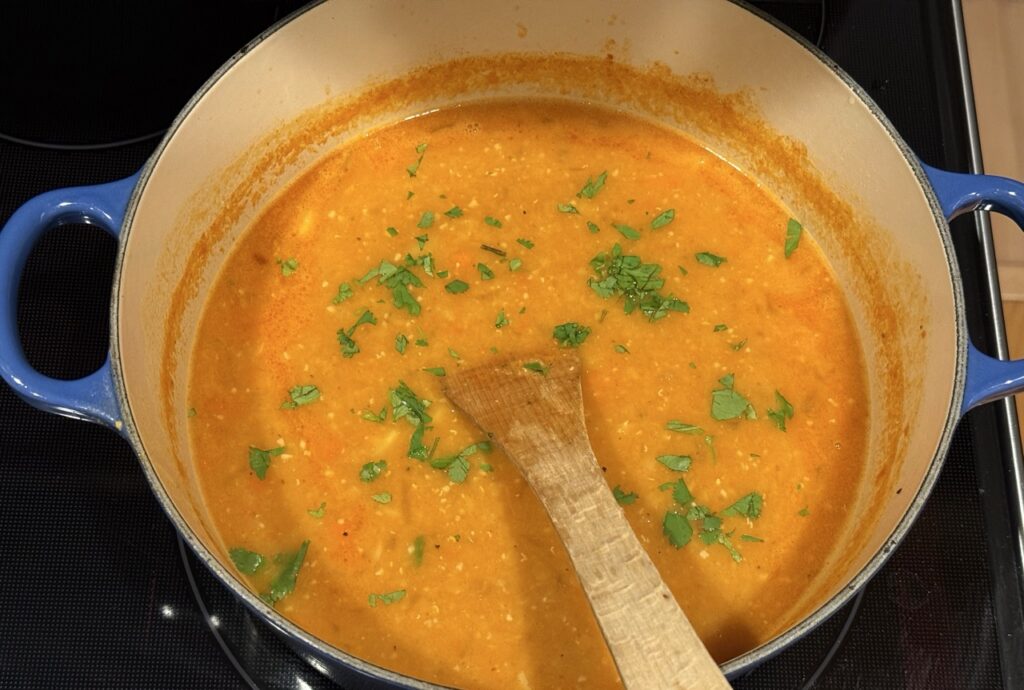
After cooking, I took out the hambone and removed any meat, which I added back to the soup.
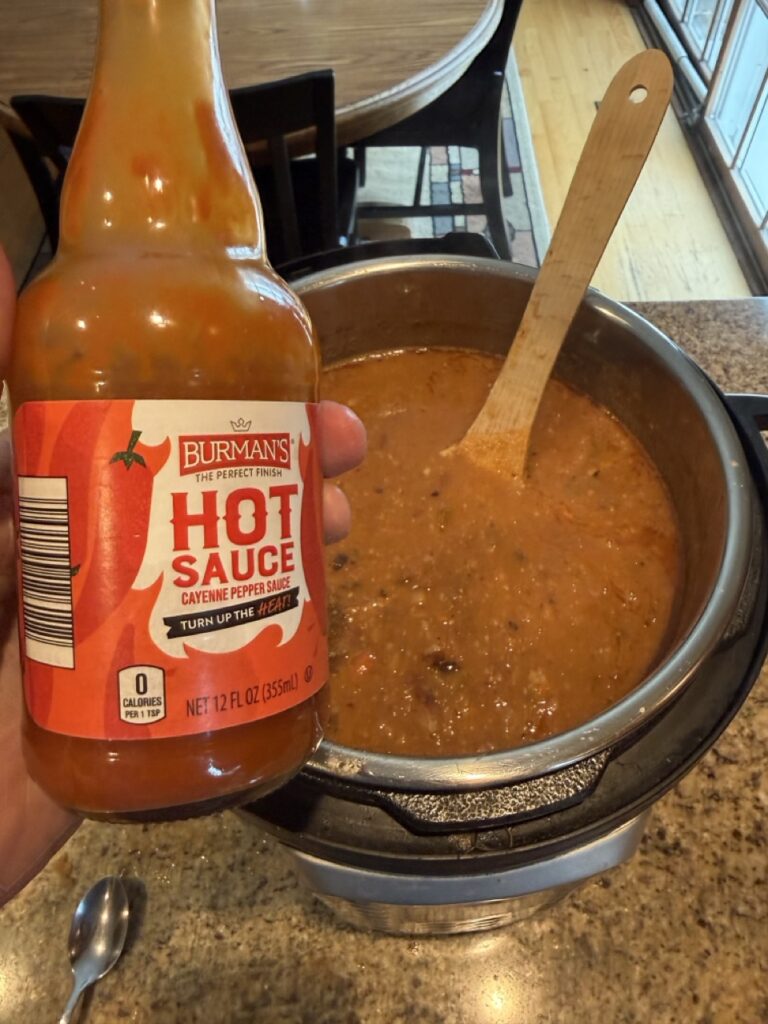
I tasted for seasoning, and no salt was needed. I did add a few shots of hot sauce (optional). I used a stick blender to blend some of the beans to thicken the soup. You could also mash the beans using a wooden spoon, or just leave the soup as is.
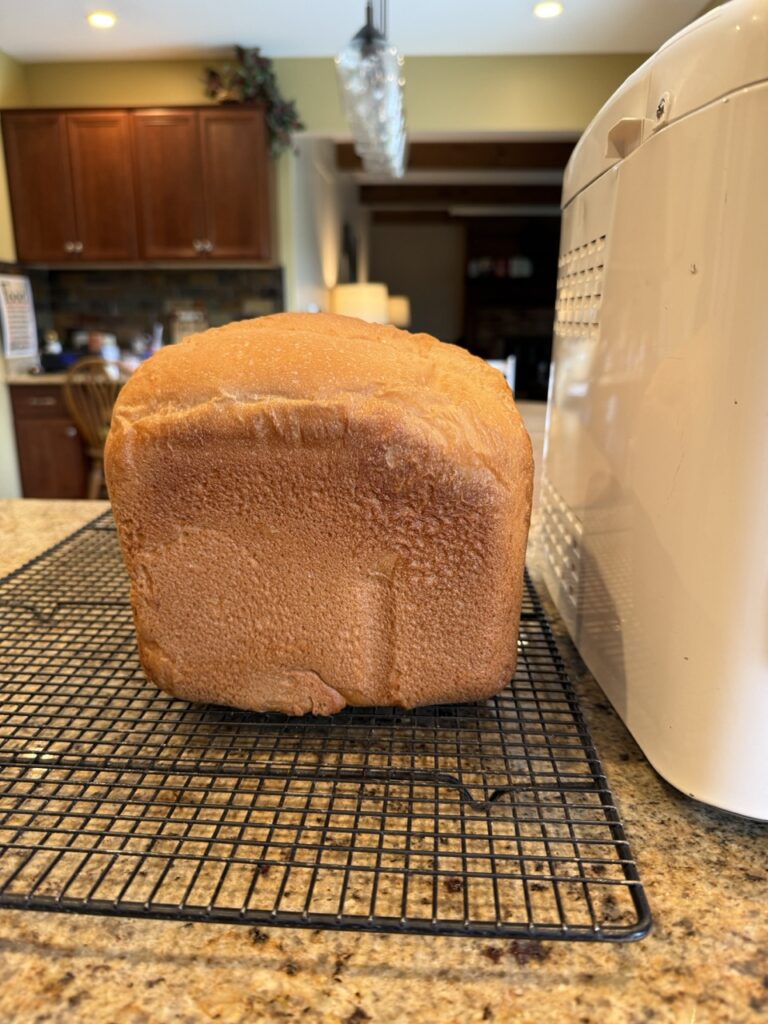
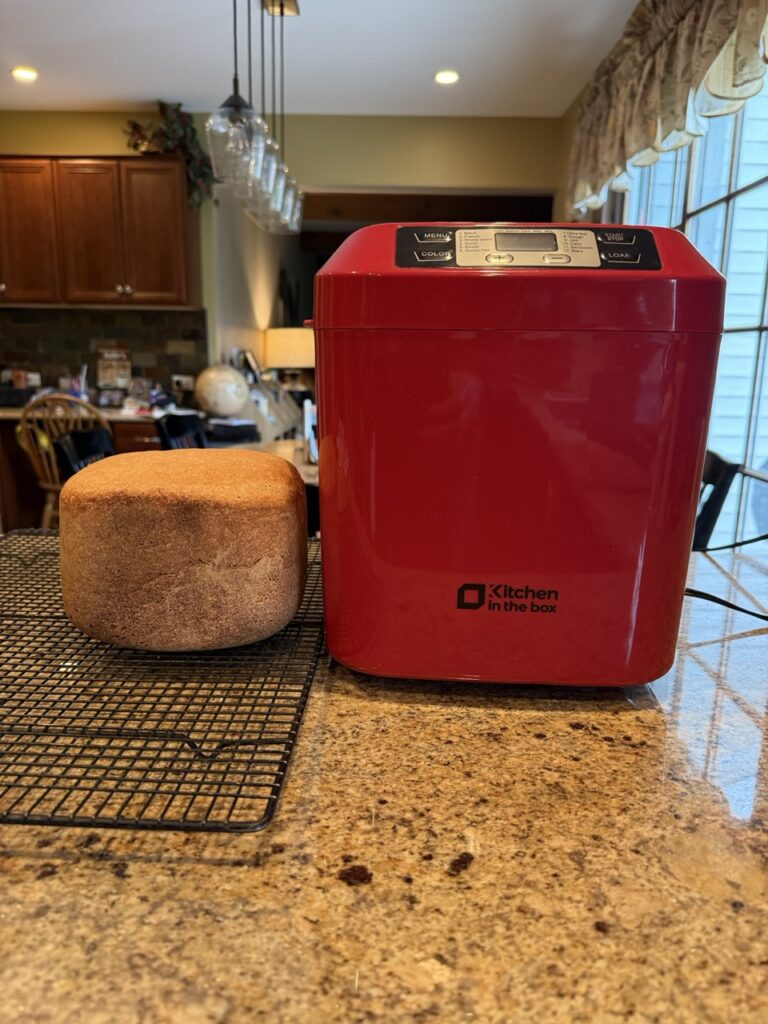
Here is the soup, plated and served with some of my homemade whole-wheat bread. The bread was made with a thrift-store bread maker that cost me $6.99. Why an avocado garnish? It was going ripe, and I needed to use it up. Necessity is the mother of invention! I also added a little grated Parmesan cheese. The soup was extremely filling and really delicious. There will be leftovers for several lunches and for freezing for a future meal.
Making food from scratch is much more economical than eating ultra-processed foods. Additionally, the food tastes so much better. I put together the bread’s ingredients in less than 5 minutes, pressed a button, and had a fresh loaf 3.5 hours later. The soup took less than 10 minutes to prepare, and then the pressure cooker took over automatically. Easy peasy.
Times are tough, but cooking from scratch and shopping at Aldi can save you both money and frustration. If you don’t have a pressure cooker, you can make this soup on the stovetop; it would just take longer (4 hours?). I’m pretty sure you could also make this soup in a slow cooker on low for 8-10 hours. If you go with either of these two methods, you will need to soak your beans overnight.
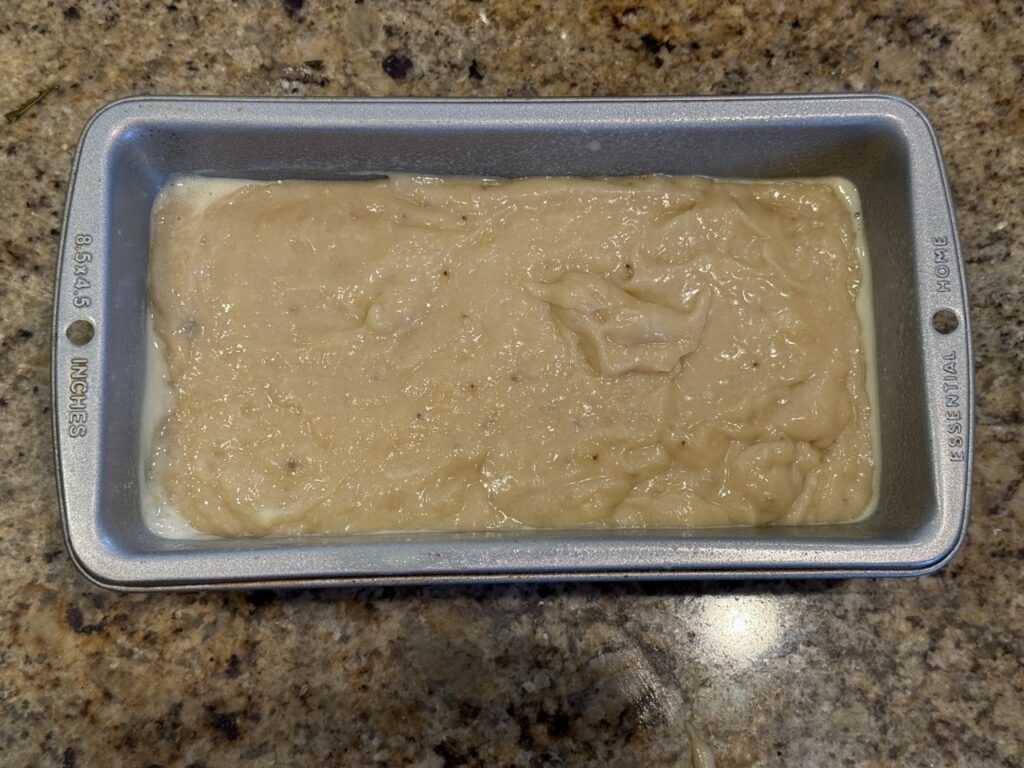
Earlier this year, I published a post on making banana bread using the classic Betty Crocker recipe. That recipe makes two loaves and uses buttermilk.
There are dozens of banana bread recipes, so I thought I would post another one. Why? Because this one is as simple as it gets and uses the most basic of ingredients. It is very likely that just about anyone who cooks will have the ingredients to make this single-loaf recipe.
In our home, bananas can be discarded when they are overripe. Turning them into banana bread transforms trash into treasure. A nice, thick slice can serve as a to-go breakfast. If you are single, it is easy to make a loaf and then freeze individual portions for breakfast, dessert, or a mid-afternoon coffee break.
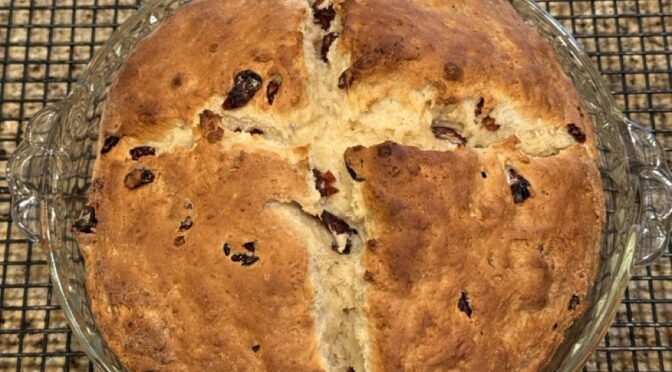
You can dress up this recipe in a variety of ways. I added a little vanilla. Other add-ons like a handful of chocolate chips, walnuts, or dried cranberries are delicious. How about a dash of cinnamon or pumpkin pie spice? Want your own signature bread? Brown the butter or use brown sugar instead of white sugar. Want to make the recipe as simple as possible? Just follow the standard recipe. This recipe is from AllRecipes.com. Ready? Let’s go!
Oven Temp: 325F or 160C
Screenshot
Mash the bananas. I’m using a hand mixer, but you can use a mixing spoon if that is all that you have.
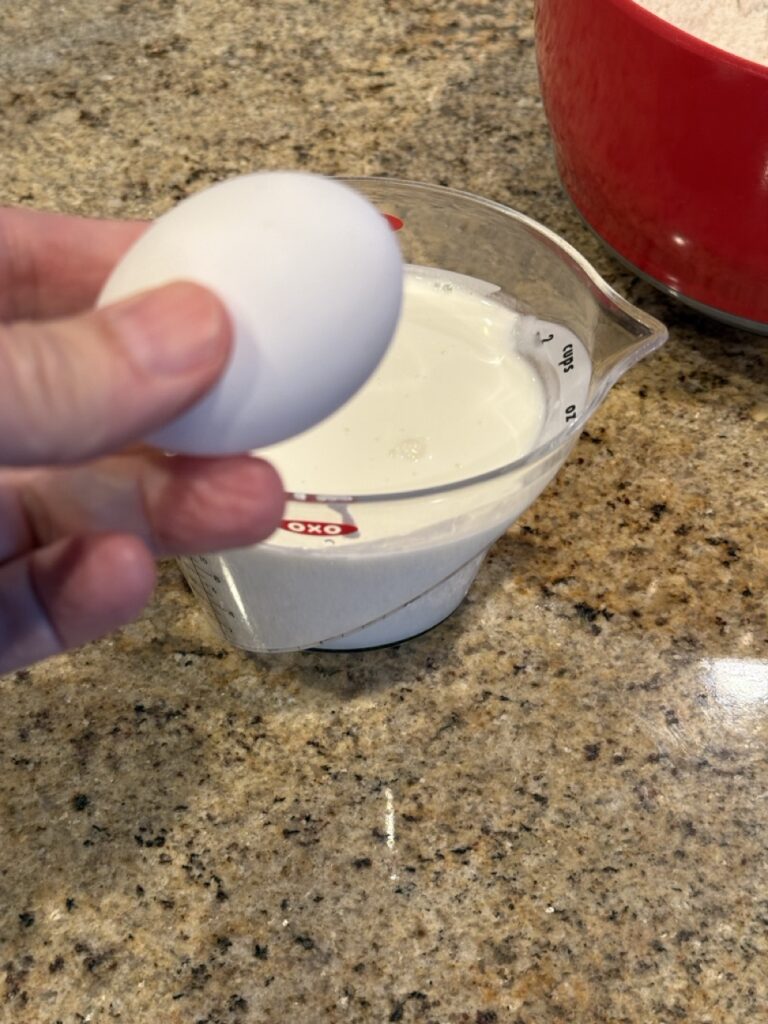
Add the melted butter, sugar, and egg. I’m also adding around 1 teaspoon of vanilla.
Mix it all up.
In a separate bowl, mix the flour and baking soda. Note: Use baking soda, not baking powder; they are two different products.
Add the dry ingredients to the wet ones.
Mix just until combined. You will have a thick batter. Then add the salt.
Scrape down the sides of the bowl and mix in the salt.
Pour into a greased 4″ x 8″ baking pan. If you have a slightly larger loaf pan, that is OK; the loaf will just be a bit flatter. Bake at 325F for 1 hour. My oven can run hot, so I checked it after 45 minutes. The bread looked baked, but inserting a knife into the center showed it was still raw inside.
The top was already browning, and to prevent it from burning before the center was done, I covered the pan with aluminum foil and returned it to the oven.
I set a timer for 10 additional minutes and checked again… still raw in the center. It actually took about 25 additional minutes before it was fully baked. Here is the finished bread cooling on a cooking rack. It is important to test the bread to make sure that it is done. Normally, my oven bakes things a bit faster, but in this case, it took a bit longer. By checking the center with a knife, I made sure that the bread was completely baked.
There you have it, the simplest banana bread recipe that I know of. Remember, you can do any of the above additions to make it even more special. Don’t have an oven? I have a friend who makes a delicious banana bread in his rice cooker! If there is a will, there is a way.
Inflation is crazy, and my heart skips a beat when I go grocery shopping. Yet cooking at home still offers significant savings compared to eating out in any form. I’m a huge fan of one-pot meals because they are simple to make, tasty, and often provide leftovers for later.
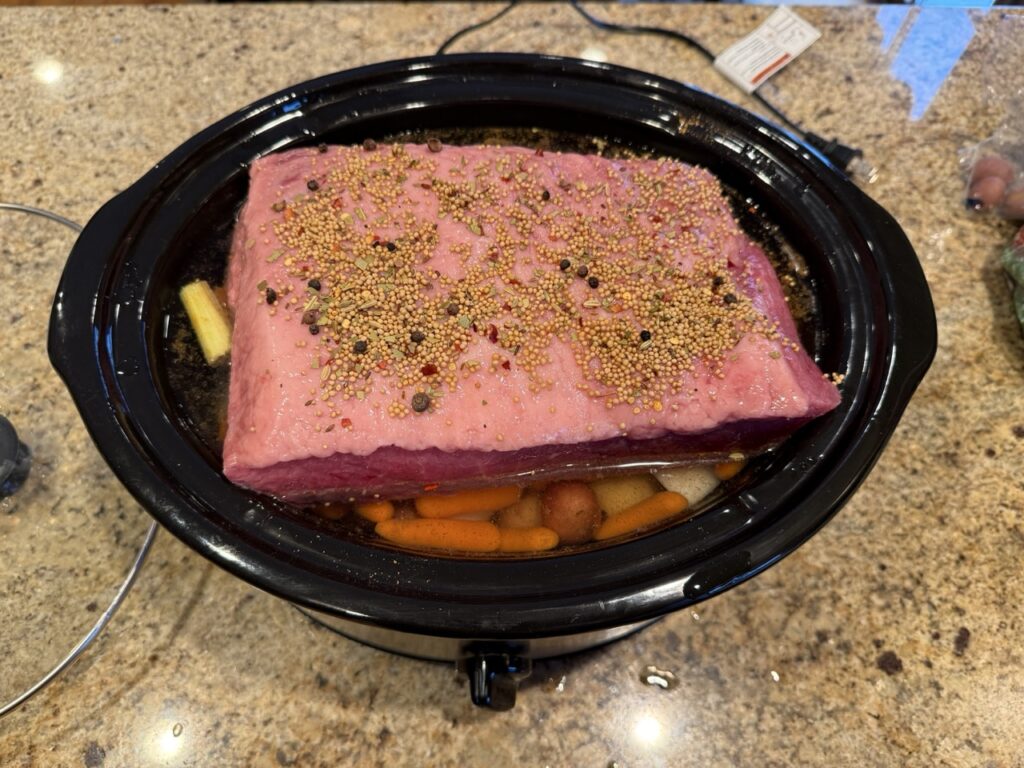
Both my sister and sister-in-law do me a favor. When they serve a ham for a holiday event, they save me the remnants and the ham bone. I vacuum seal them and freeze them for future soup meals.
Today, I’ll be making a ham and lentil soup. The recipe is from AllRecipes.com, but I’m doing a looser version. Soups and stews are flexible, and a little artistic license has little impact on the end result.
I like lentils because they cook quickly and they don’t require pre-soaking. This Instant Pot recipe called for an 8-minute cook time with a natural release of at least 10 minutes. My lentils were old, so I wound up cooking them for around 15 minutes. You could make this recipe on the stove in a large pot, such as a Dutch oven. However, you would need to extend your cooking time to around 30 minutes, or until the lentils are tender. Not a big deal.
Lentils are nutritional powerhouses. They are high in plant protein and fiber. They are loaded with minerals. They are high in iron, so they can help with certain types of anemia. They help regulate your blood sugar and strongly support a healthy gut. Lastly, they are dirt cheap to buy and last forever on your shelf.
Lentils come in a variety of colors, and each has a slightly different cooking time. Most stores carry brown lentils, but there are also green, yellow, red, orange, and black varieties. Each has its own characteristics, but I successfully substitute whatever variety that I have on hand. One pound of brown lentils is often under $2 and contains around 2 and 1/4 cups. Most recipes use one cup of dry lentils, so you can see how economical cooking with lentils can be.
This recipe uses leftover ham that was gifted, about $1 worth of dry lentils, and some inexpensive vegetables, and it makes a ton of soup. Let’s get into the recipe!
I’m not going to follow the amounts exactly; instead, I’ll do my usual approximations.
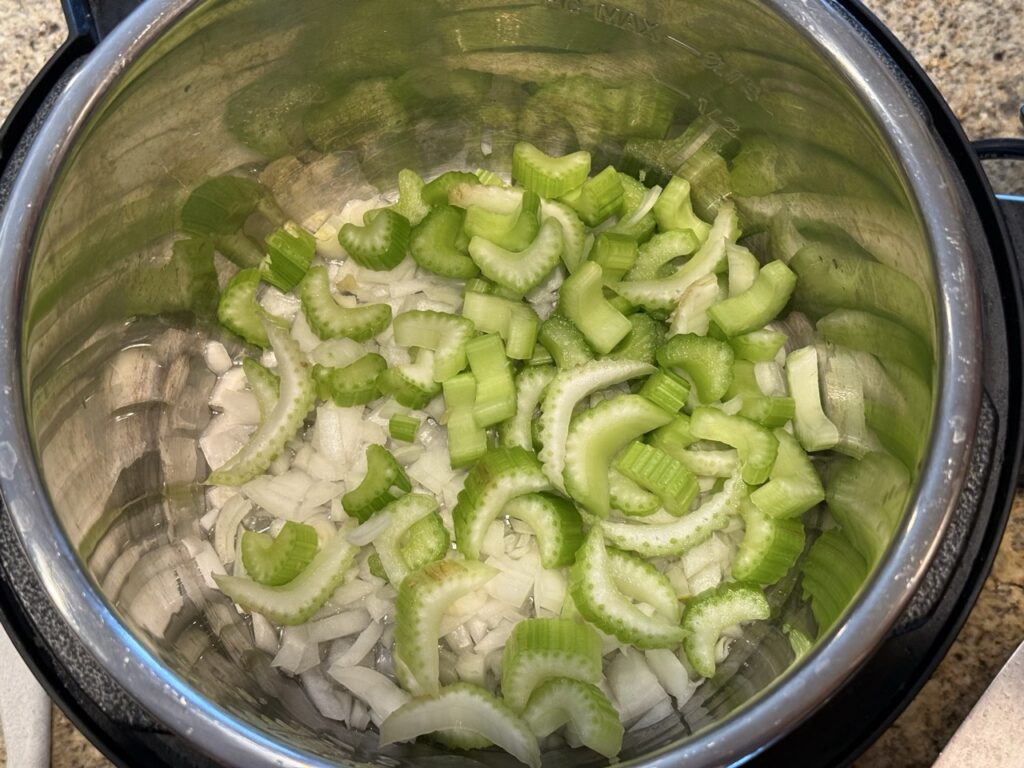
I sautéed a chopped onion and a couple stalks of celery in some oil for around two minutes.
I added about 3-4 sliced carrots and sautéed the mixture for about 5 minutes.
I then added a generous spoonful of jar garlic. You could use real garlic or even powdered garlic.
Here are the spices that I used. I used about 1/2 teaspoon of each ground spice and a couple of small bay leaves. I briefly cooked the spices with the vegetables (about 30 seconds). If you don’t have all of these spices, use what you have. Oregano is a good one to have around, as it is useful in many dishes. Don’t use too much oregano, as it can impart a soapy taste to some dishes, if used excessively.
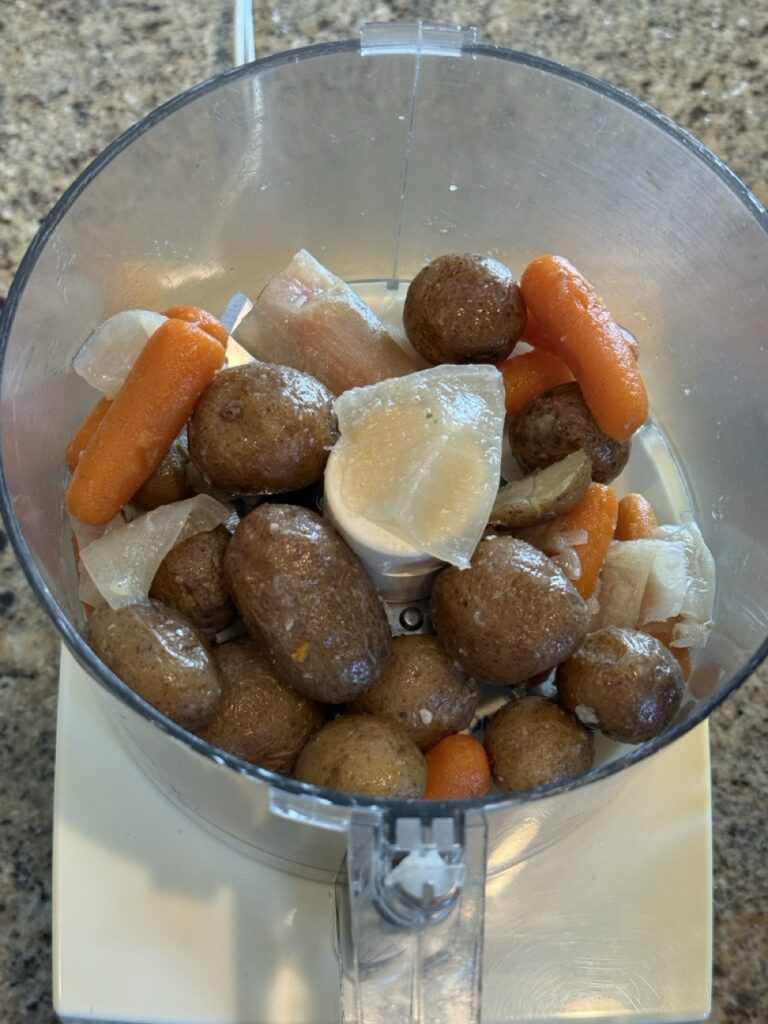
This is the hambone from my sister. I cut off the remaining meat and chopped it up. There was quite a bit of meat remaining. Less would have been fine. I could have cooked a few strips of bacon instead of the ham, then sautéed the vegetables in the bacon fat. It is easy to substitute similar for similar! The ham was added to the soup.
I added around 8 oz of tomato sauce, 4 cups of chicken broth, and I cup of water. If possible, use low-sodium chicken broth. I used bouillon. The soup was a bit salty from the bouillon and ham, but still delicious. You could also use water instead of chicken broth.
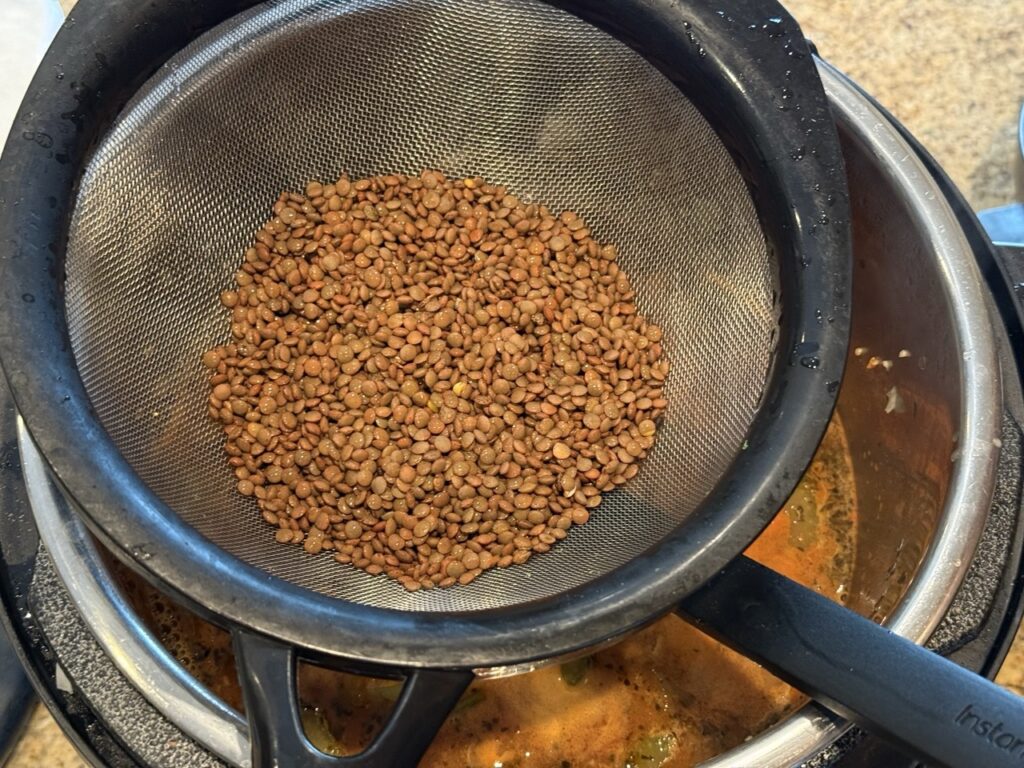
Add one cup of dry lentils. I like to rinse my lentils as they can sometimes be dusty.
Pressure-cook on high for about 10 minutes. I added an additional 5 minutes (15 minutes total) as my lentils were old (I bought them in bulk and have been using them for over a year). Let them release naturally for at least 10 minutes before depressurizing the Instant Pot. My electric pressure cooker isn’t an Instant Pot, but they all work the same way.
You can smash some of the lentils to make the soup thicker if that is what you like. I also added a little cornstarch dissolved in water to thicken ours. However, that is totally optional. Now taste and add around 1/2 to 1 teaspoon of pepper and salt to taste. I didn’t need any salt as my soup was already pretty salty from the ham and bouillon.
A little acid helps liven the flavor. I’m using around a tablespoon of sherry, but you could use some lemon juice or even a splash of vinegar.
I also added a few squirts of hot sauce (optional). This is the Aldi clone of Frank’s hot sauce.
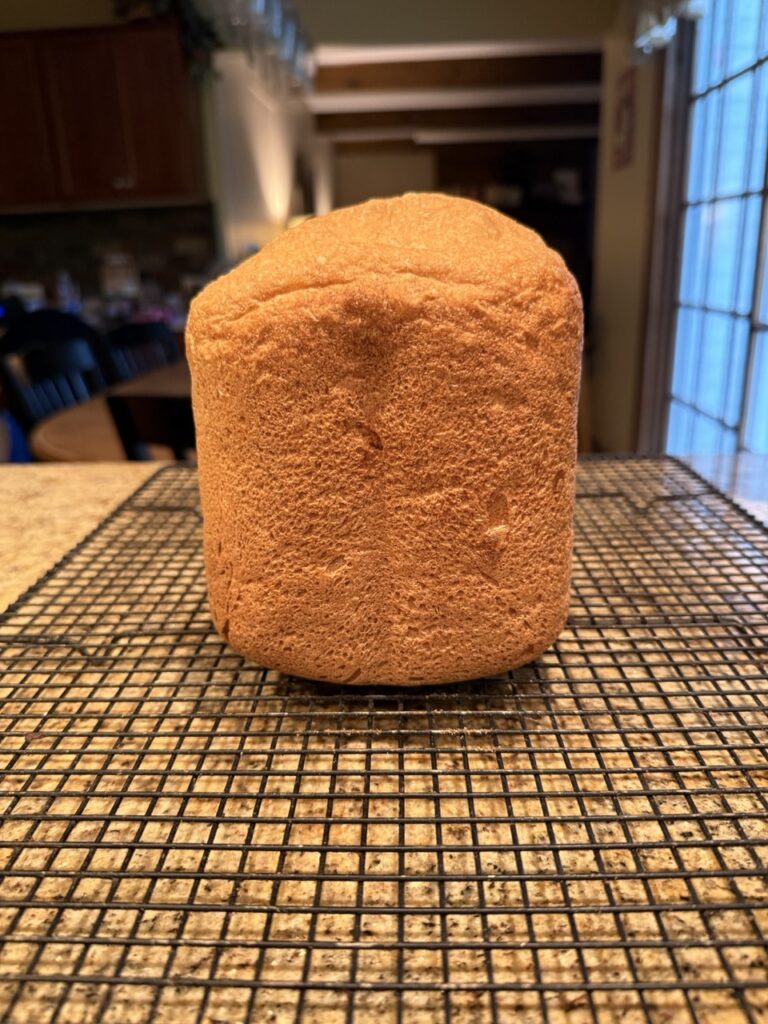
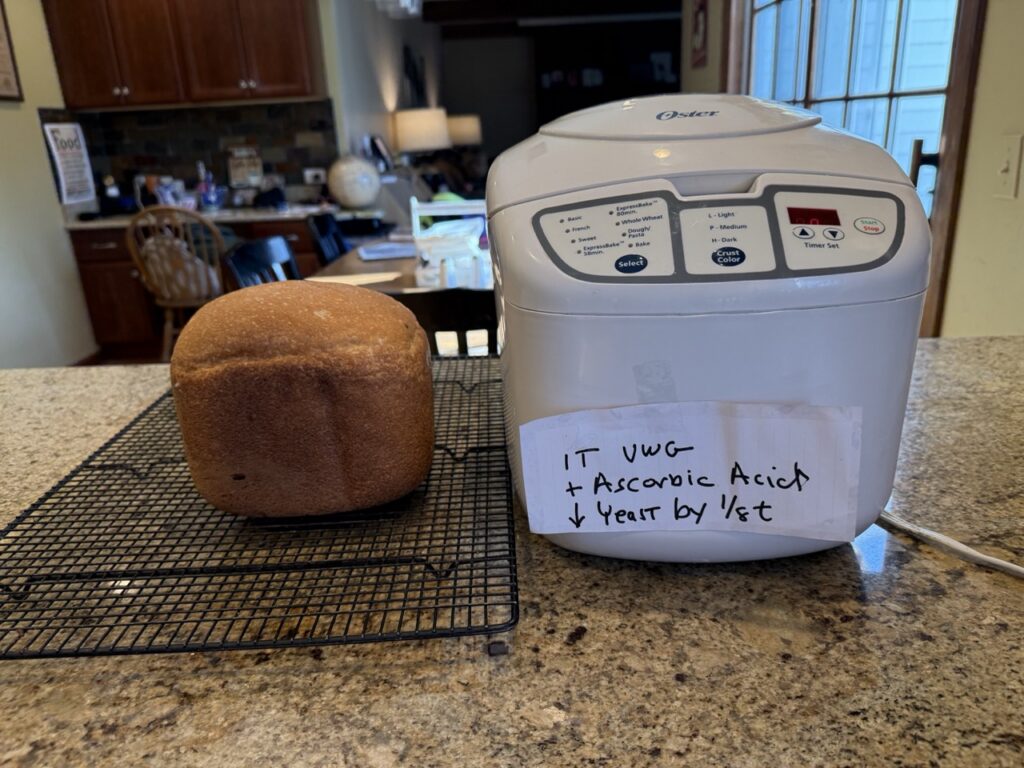
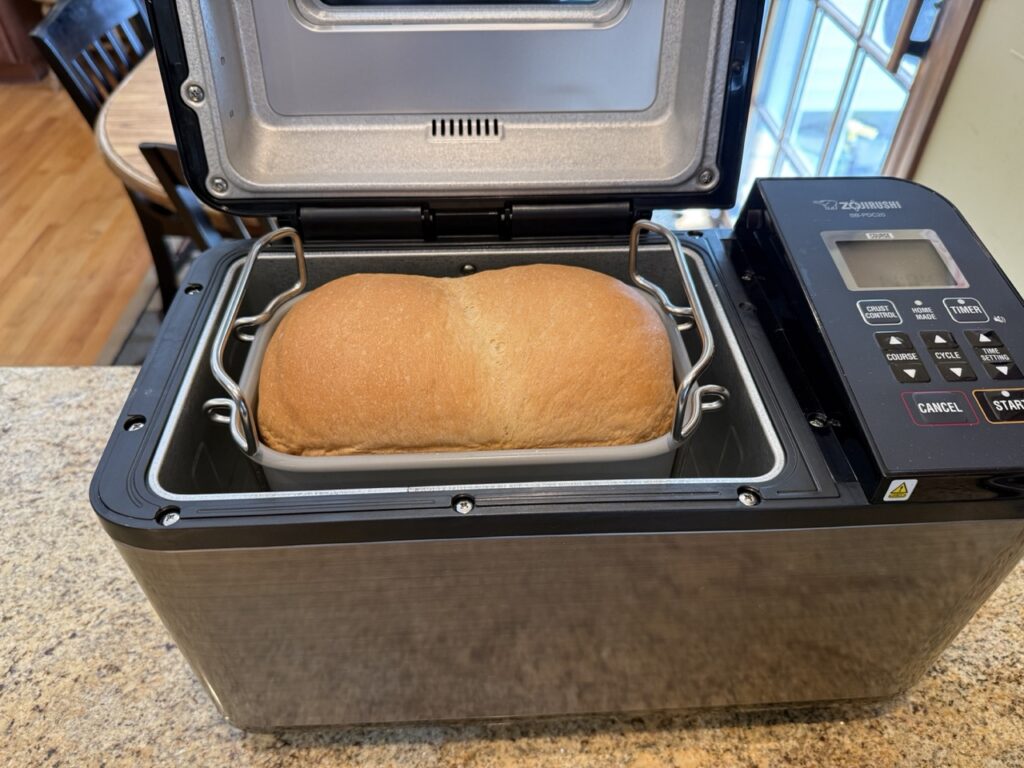
I made a small loaf of whole wheat bread in my bread maker. I just tossed in the ingredients, and 3.5 hours later, I had this delicious warm loaf.
Dinner is served! Hearty and filling ham and lentil soup that was extremely inexpensive to make. I’m serving it with a little sour cream, but that is optional. My wife and I ate our fill, and there is so much left over that we have an extra meal, and I’ll still have plenty to freeze for later. The homemade bread made the meal special, and it was much tastier than anything from the grocery store.
Times are tough. There doesn’t seem to be an end in sight for rising prices. These increases impact consumers on all levels, but some can be temporarily avoided. It is possible to delay the purchase of clothing or hard goods, such as furniture. However, other items need to be bought regularly, including food, cleaning, and hygiene products.
I recently wrote many posts on ways to save money, from easy recipes to savings tips for seniors. Today, I’ll talk about actual ways that I put these habits into practice. I am not a frugal guru; I still spend money needlessly. However, over the years, I have adopted many frugal habits and learned how to make them a seamless part of my life. With a little planning, time, and care, they have become natural parts of my day. I don’t feel like I’m giving up anything. They do not feel like sacrifices, and I think that is the secret to implementing them. These changes have occurred over the years and have often happened for reasons other than penny-pinching. Usually, they were a more practical way of approaching life’s problems. They took hold, and the rest is history.
Part of this transformational process is to abandon ad culture, which constantly pressures all of us to try something new or stick with a brand name. It is important to go back to basics and to focus on needs vs wants. That is especially true of wants artificially created by marketing, including those pushed by influencers.
Rule One: Buy what you need, not what you want. In the digital age, we are constantly being profiled. Advertisers know who we are, what we like, and how much we are willing to spend. As a person who has been susceptible to marketing, I know how easy it is to be influenced. One of the most effective ways is through para-social relationships. If you regularly watch an influencer on social media, it is normal to have some sort of connection with that person. However, that connection is completely artificial. Yet their messaging can be a powerful motivator to buy something. My best advice is to avoid product reviews unless you really need something, and to avoid influencers who are constantly selling something, whether it is a “course” or any product. Manufacturers pay influencers big bucks to gush about a new skin care routine or vitamin drink. Frankly, most (if not all) are BS. If you don’t watch, you won’t be influenced. Years ago, my sister-in-law was trying to figure out what she wanted for Christmas. She felt like she didn’t need anything, so she started to look at all of the Christmas-focused ads. Suddenly, she wanted everything! That is the power of advertising.
Rule Two: Unnecessary stuff won’t make you happy. When we buy something new, there may be a bit of excitement and a dopamine rush that makes us feel good. However, it is temporary and artificial. This rule excludes things that you really need. When I moved into my own home over 30 years ago, I bought my first washer and dryer. Having my own washer and dryer did make my life better, made me happy, and still does. When I turned 50, I “treated” myself by buying a Mercedes. I felt great that first month. Then it was just another box on wheels, and once the warranty expired, it became an incredibly expensive toy to maintain. I eventually sold it and bought a Honda, which, in every way, was a better car.
In 2008, I sold my Mercedes and bought this little Honda. It was a fantastic purchase. I eventually gave it to a family member, who still uses it to this day, eighteen years later!
Rule Three: Remove emotion and bias when making any purchase. Another car example. We had a 12-year-old SUV that I wanted to last forever. However, the engine suffered a catastrophic failure, and, along with other repairs it needed, it was clear that it had reached the end of its life. We had to buy a new car, but what? If we really wanted to, we could have purchased a luxury car. However, see Rule Two. My wife and I were more interested in a reliable car that met our particular needs. The most cost-effective choice would have been to buy a 3-year-old car with around 50-60K miles. However, we wanted a new vehicle for other reasons. We narrowed our search to three brands: Honda, Toyota, and Subaru, and found models in all three brands that were suitable. Our most important needs were based on safety and reliability. We found a Subaru that was a dealership loaner with only 4K miles on it. It was technically new, but classified as certified pre-owned, which extended its warranty beyond that of a new car. We approached the sale the way someone would purchase underwear. In other words, no emotion. If the salesman didn’t give us what we wanted, we would walk. With that said, our wants were reasonable. We refused garbage add-ons, like nitrogen-filled tires. We didn’t place value on things like the color of the car. We didn’t get excited about the purchase. We simply wanted the best price. We also chose a car that we could afford. In the end, we got over $8,000 off a “new” car with a free extended warranty (the certified car thing). The dealer wanted to sell us a “dream,” but we didn’t want a dream; we just wanted a vehicle. By making an emotionless decision, we maintained as much control as possible when dealing with a car salesman.
When we needed to replace our car, we decided to go with one that met our needs and offered the best value. We knew that a car was just that, and not a tonic to make us feel good about ourselves.
Rule Four: Give up brand loyalty if reasonable. Sometimes it is better to buy a brand-name product. However, that is true only if the brand name offers a better cost-to-quality ratio. Our 20-year-old washer and dryer were on their last legs. There were so many modern-looking front loaders available. However, research indicated that most of them were junk and would fail in 3-5 years. We decided to go with standard Speed Queen machines. These are the machines that you see in laundromats. They were more expensive but have an estimated lifespan of around 20 years. We also went with their simpler models that had standard controls. Why? Our laundry needs are pretty simple, and fewer options mean fewer points of failure. In this case, buying a brand name made sense.
However, there are other examples where you are paying for that brand’s marketing, rather than its quality. In those cases, we have no brand loyalty. We usually buy our toothpaste at Costco, which always has a sale on one brand or the other. If Colgate is on sale, we buy Colgate. If Crest is on sale, we buy Crest. I think I prefer Colgate’s taste to Crest’s. However, both brands get my teeth clean. The taste factor isn’t enough to make us spend more.
Rule Five: Little savings add up. When I was a medical resident, I had $20/week to spend on groceries, and I used cash. I was acutely aware of what I bought because it had to last the week, and I didn’t have a cash buffer. If one loaf of bread was twenty cents cheaper than another loaf, that is what I bought. In today’s world, many people use credit cards when buying things. Using artificial forms of currency separates the consumer from the product’s actual cost. It is easy to buy the imported Parmesan cheese for only a few extra dollars, or that winter coat for $50 more than you wanted to spend. By separating purchasing from real money, stores have made it easy to overspend, and that trend is escalating with buy now, pay later (BNPL) options like Klarna. That unwatched streaming service is only $9.99 a month, so you put off canceling. Those brand-name canned tomatoes are just 30 cents more than the house brand. That fancy shower gel is 20 bucks more than Sauve, but it smells so nice. You deserve it, right? Nope, not if you want to become financially secure. There may be some products that really matter to you, even if a cheaper option is available. If that is the case, go ahead and buy them. However, if you need to upgrade everything, then you need to re-evaluate.
This shower gel is $100 for less than 12 ounces. Really??
I will go out for coffee when socializing with friends, but that is a treat. I always make my morning coffee. It costs pennies, not dollars, for a cup, and it is delicious.
Rule Six: Eating out in all forms is now a special occasion event in our house. Eating out has gotten so incredibly expensive, including at fast-casual and fast-food places. We used to eat out all of the time. Not anymore. Most restaurant food quality ranges from average to poor, and the cost just doesn’t make sense. That goes for specialty shops like cupcake and cookie establishments, too. It feels criminal to buy a box-mix cupcake with fancy icing for $5, and then the person handing it to me wants a 20% tip. Do we ever eat out, or even buy a crazy expensive cupcake? Yes, we do, but rarely.
Heck, I can make my own fancy cupcakes for a fraction of the cost, and they actually taste better, too!
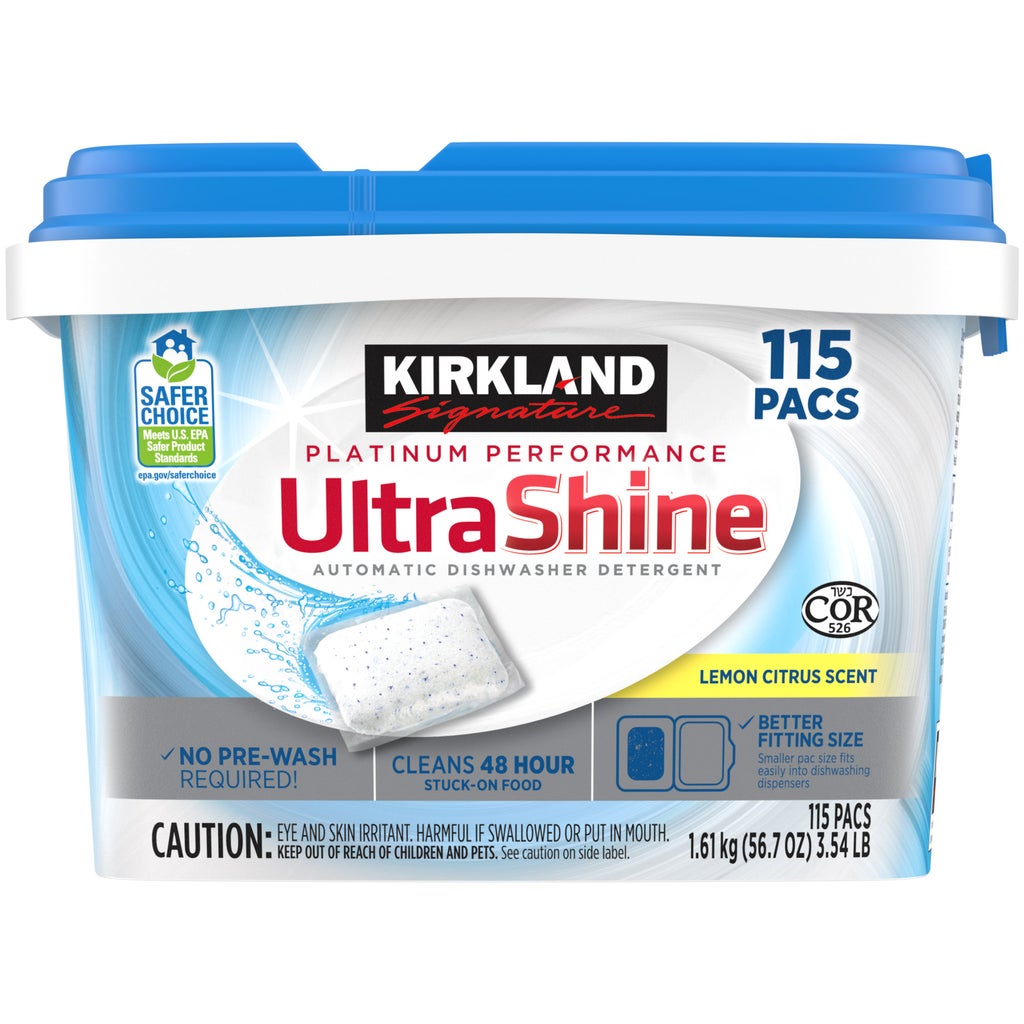
Rule Seven: Buy house brands when feasible. If you have read my posts, you know that I love Aldi. However, there are certain products that are not worth buying there. Once, I purchased their TP. Let’s just say you want TP to be strong enough so your fingers don’t punch through. However, we strive to buy house brands when possible. We find Kirkland TP (Costco) is sufficient. Tide laundry detergent is the best, but it is also the most expensive. We live sedentary lives and don’t have messy young kids, so we don’t need all of the enzymes and conditioners that Tide has. We are perfectly happy purchasing laundry detergent that is a tier or two lower, like Kirkland brand or All. The same can be said for dishwasher detergent. Powder is the most cost-efficient, but we like the pods. Kirkland pods don’t have all those fancy colors, but they work as well as the brand-name prettier stuff and are much less expensive. That is what we buy.
Kirkland laundry detergent is less expensive than Tide, but works just as well for us.
Kirkland dishwasher pods don’t have all of those fancy colors of brand name products, but who cares when it works just as well.
Rule Eight: We have simplified the cleaning products that we use. COVID brought shortages in everything, and we couldn’t get common cleaning products. Prior, I had a cleaner for every purpose: granite cleaners, stainless steel cleaners, cabinet cleaners, toilet bowl cleaners, you name it. During COVID, I would go to the store and find the shelves bare of essential items, so I had to adapt. Guess what? I didn’t need all of that junk. I add a scant teaspoon of dish detergent to a 24 oz spray bottle and fill it with water. It is a great general cleaner for all surfaces. I use a squirt of dish detergent to clean my toilets. If it is good enough to clean the dishes that I eat off of, it is good enough to clean the vessel where I poop. I have dramatically reduced the amount of paper towels I use in lieu of reusable microfiber towels. If cooking oil splashes on a piece of clothing, we found that a drop of dish detergent applied before dropping it in the washer does the job. When we couldn’t get liquid hand soap, I pulled out some old foaming containers. Did you know that 20% liquid hand soap and 80% water will make foaming soap when placed in a foaming pump? Bonus, there is no dripping soap to gel on your sink!
My go-to surface cleaner is a scant teaspoon of dish detergent in 24 oz of water. Works great!
I use reusable microfiber kitchen towels whenever possible to reduce my paper towel use. However, I always use paper towels when dealing with a greasy spill. Once you get grease on a microfiber towel, it is almost impossible to wash out.
Rule Nine: We cook from scratch whenever possible. When you start cooking from scratch, you may think it is more expensive than going out, since you need basics like cooking oil, spices, and the like. However, once you have established these products, it is significantly cheaper. If you have never cooked, it may be intimidating at first. Just keep at it, and it will become simpler over time. Cooking from scratch, in our definition, means we can use some prepared products. We often use frozen vegetables, which can be less expensive than fresh ones. I’m not opposed to using a can of cream of mushroom soup as a quick substitute for a cream sauce when making a casserole. We still buy chicken nuggets because my adult son likes them as a snack. I did a bunch of chores before I started to write this. I’m tired, so tonight we will have a frozen pizza for dinner. Being frugal should not be a punishment. Remember, balance in everything.
Homemade copycat Panera squash soup, a salad, and homemade bread. A very nice meal!
A nice Sunday dinner. Chicken made in the Instant Pot.
My daughter has her own place. She will often make a family-sized dinner and then divide up the meal into dinner-sized portions for the rest of the week.
Hmm, it looks like I’m getting ready to make some sort of cheesy pasta dish in the Instant Pot.
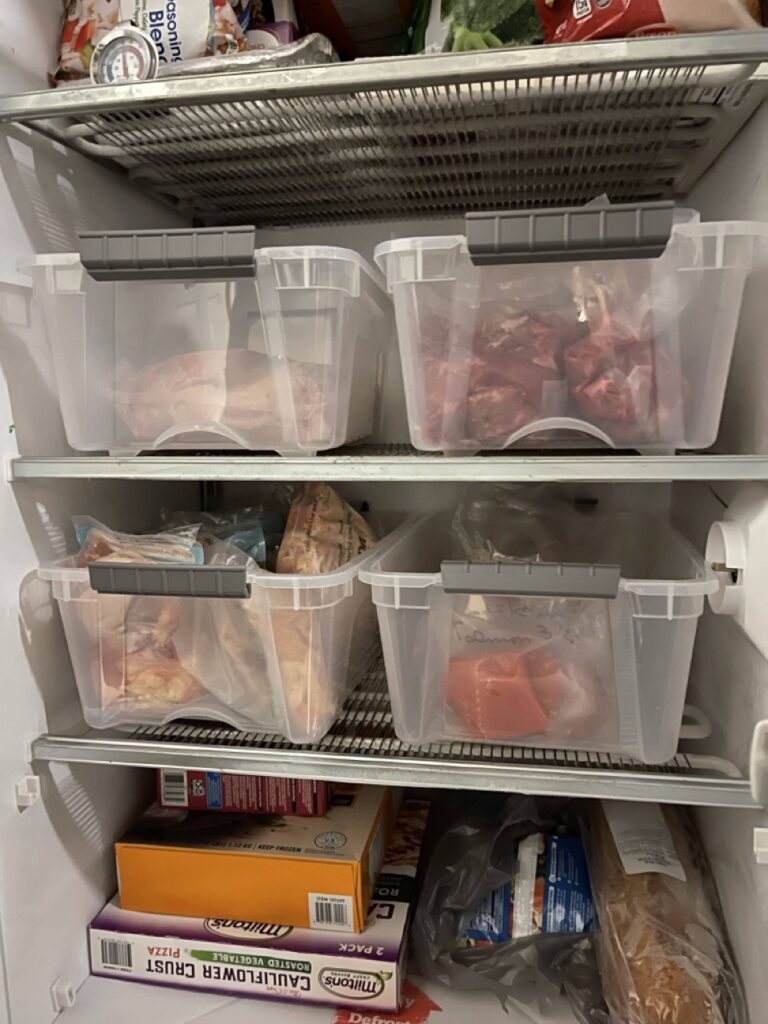
Rule Ten: We have a small stockpile of basic food items, like spaghetti and frozen chicken. We also have a deep freezer. I usually treat my family to a beef tenderloin for Christmas dinner, but I decided to end that tradition as they now cost $175 at Costco. My sister-in-law told me that a local market was having a spectacular sale, and I picked one up for $75. That isn’t frugal, but we are talking about a once-a-year treat. I vacuum sealed the meat and froze it. It will be fresh and delicious when I thaw it for Christmas 2026. Deep freezers use very little electricity, especially if you have a manual-defrost model. Having stuff on hand makes us much less likely to buy fast food or make imprudent grocery purchases. It also lets us buy things when they are on sale.
We have had a deep freezer for decades. It is a great way to stock up on food when an item is on sale. Deep freezers use very little electricity.
Canned goods have an amazingly long shelf life. Perfect items for so many impromptu dishes.
Rule Eleven: You need very few tools to cook. A pot and pan, a decent knife, and some utensils, and you can make a thousand different dishes. I like watching videos of working-class people in China using a hotplate and a water boiler to make delicious meals in their makeshift, tiny apartment kitchens. Likewise, I enjoy similar videos from folks in the States who make real food using only a mini-fridge and a microwave. Setting up a kitchen can be extremely expensive or very cheap. I know some who spent 100K on a kitchen remodel who don’t cook. My mom had an ancient fridge/stove and no counters (she prepared food on the kitchen table). She was a fabulous cook who fed seven people every day. My adventure/camper van has an induction burner and a microwave, and I often make full meals in it.
You need very few tools to cook. Here I’m using a Dutch oven, which can be used to make 1000 and 1 different meals. However, any large pot could be used. Soups, stews, and casseroles are the budget stretcher kings.
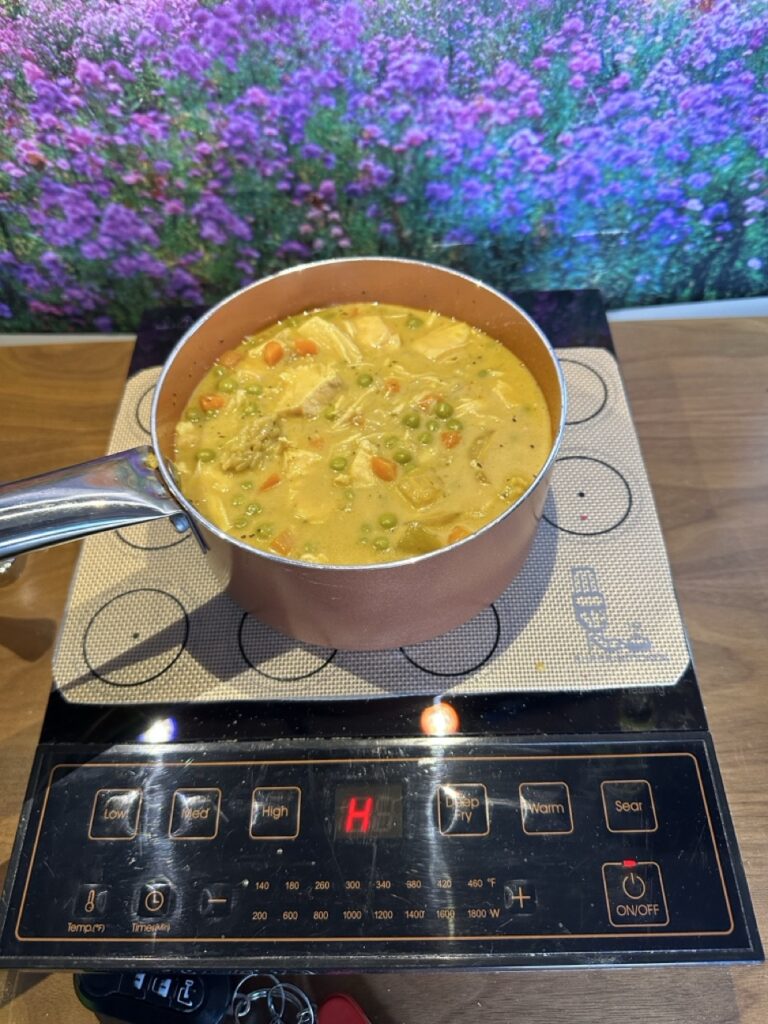
You can make amazing meals using a simple hot plate. Here I’m making a coconut curry in my adventure van.
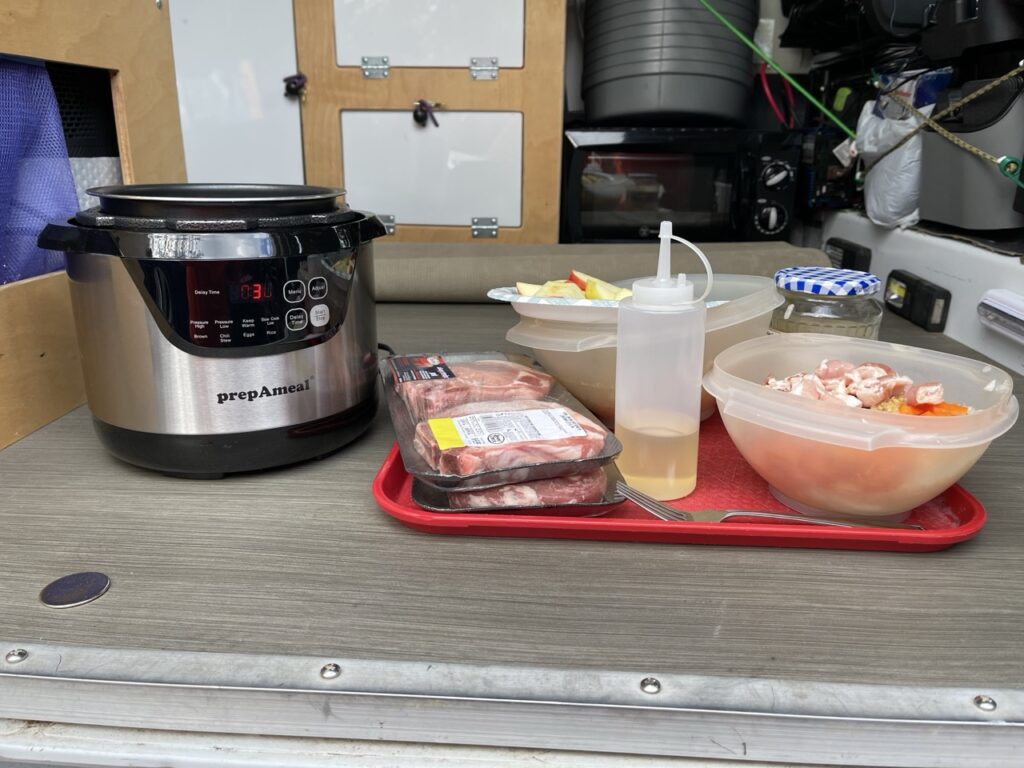
Here I’m making a pork chop dish in my mini electric pressure cooker while camping in my adventure van. You can often find small appliances at thrift shops for pennies on the dollar. Just make sure that they work before you buy them.
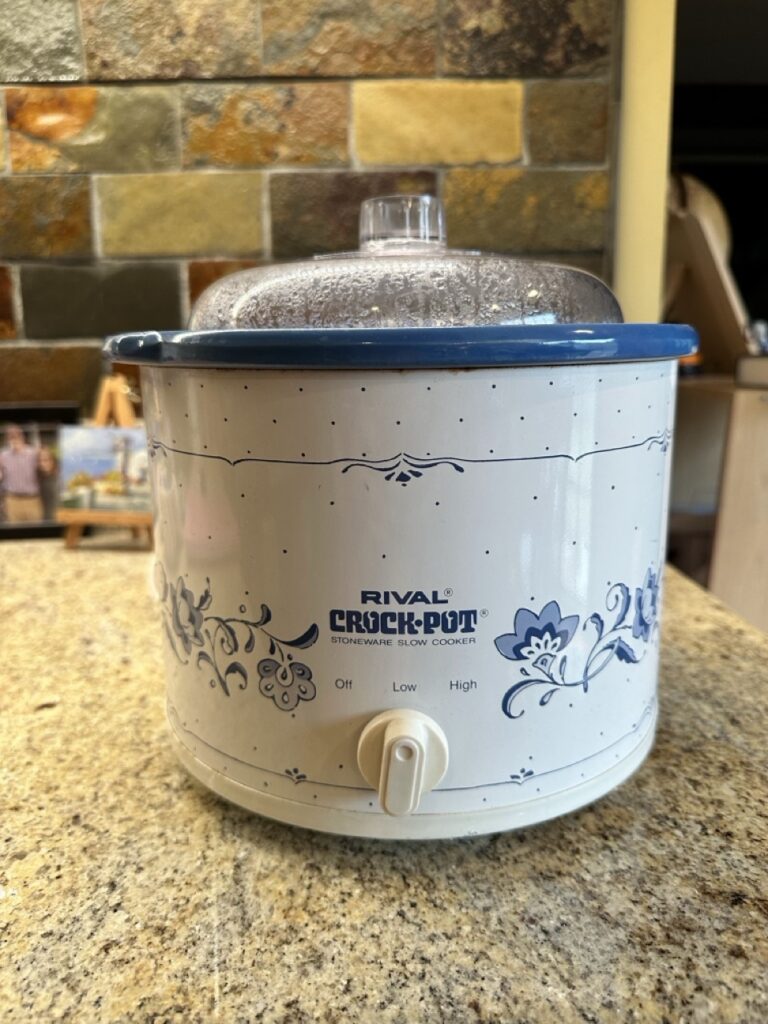
Rule Twelve: It is OK to expand your kitchen equipment if you can afford it. True confession, I love kitchen gadgets and appliances. Crazy, I know. I have just about anything you can think of, but don’t forget that I have been cooking for 50 years, so I have had plenty of time to accumulate a lot of stuff. The items that I think are most valuable are a slow cooker, an electric pressure cooker (Instant Pot), a vacuum sealer, a microwave, and a bread maker. Your mileage may vary. Having small electrics speed up my cooking. I can toss some ingredients into a slow cooker and come home to a hot meal. With the Instant Pot, I can cook something in 1/3rd the time that it would normally take. These small electrics are also very energy efficient and use considerably less energy than a standard oven.
Slow cookers are very inexpensive and super versatile. Toss in some ingredients in the morning and come home to a delicious dinner in the evening.
I’m a huge fan of electric pressure cookers (AKA Instant Pot). Here I’m making a one-pot spaghetti. Next to the ingredients is some homemade herb bread that I made in a bread maker, another fantastic gadget.
I have saved thousands of dollars over the years using a vacuum sealer. I buy food in bulk and then freeze it for future meals. Pro tip: You can buy generic vacuum-sealer bags for much less on Amazon and other online retailers.
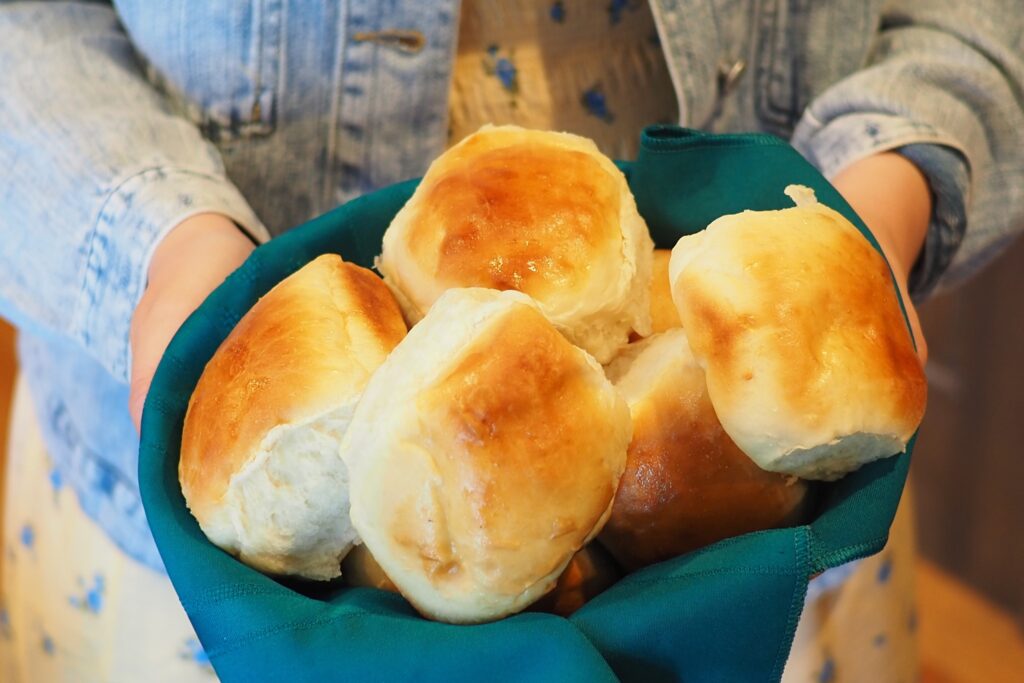
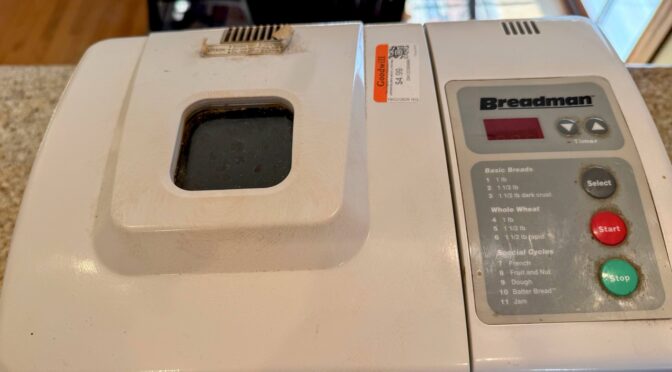
I make most of my bread, rolls, and buns using a bread maker. You can pick up one at a thrift store for next to nothing. I have a few and have gotten them for as little as $4.99. Making your own bread is not only less expensive, but it is also better tasting. Plus, you can modify your bread to your particular tastes. I make all sorts, from white to whole wheat to cheesy herbal, and more.
Here I made some dinner rolls using the bread maker. I kneaded and raised the dough in the machine, then formed it into rolls, which I baked in the oven. You can use this technique for many different bread products, from pizza dough to challah.
Rule Thirteen: I do most of my shopping at Aldi and Costco, but for different reasons. I’m a huge Aldi fan. Overall, their food is less expensive than Walmart’s. If I want tomato sauce, there’s only one brand: theirs. This leads to less decision fatigue. The stores are small, so it is easy to get in and out. Costco has many bulk items at a good price. However, I tend to overspend at Costco and sometimes buy products I don’t use up completely. I need to be more careful at Costco. I do shop at other stores, but only for those items that I can’t find at Aldi or Costco.
Aldi is not only cheaper, but it is also easier, as there is less decision fatigue and the small stores are quick to go through.
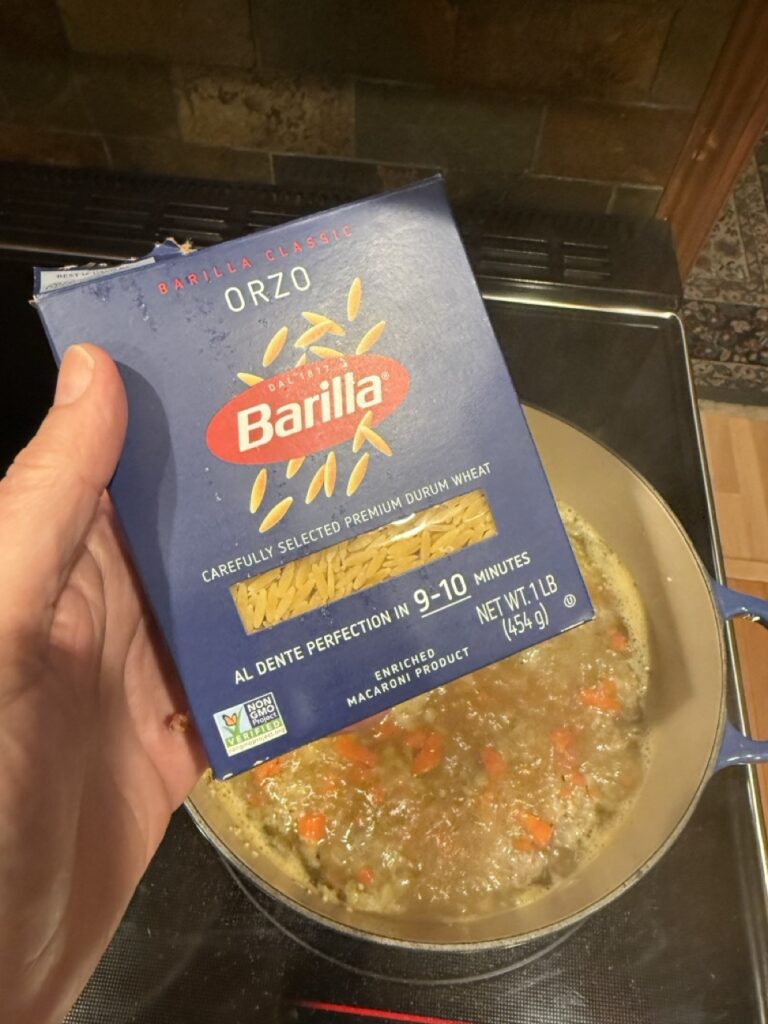
Rule Fourteen: I often substitute ingredients. If I don’t have noodles, I’ll use another pasta, rice, or potatoes in a homemade soup. I’ll substitute ground turkey for hamburger in chili. I’ll substitute frozen vegetables for fresh in a casserole. I’m not cooking for a king, I’m just making tasty food for my family.
I’m making some chicken soup and using whatever starch that I have on hand. In this case, it is orzo.
Rule Fifteen: I have a very simple hygiene routine. OK, I’m a guy, and that makes things easier. Women are constantly sold the idea that a product will make them look 20 years younger. That is not the case. Most hygiene and cosmetic products are more similar than different. One way for a manufacturer to make more money is to differentiate products into new, and often unnecessary, categories. How many different face products does one need? Most dermatologists will tell you that the best product you can use to prevent aging skin is sunscreen, and the best products that you can use on your skin are the mild ones that are colorless and have a light fragrance or are fragrance-free.
Expensive makeup may be in a trendier hue or blended a bit more to make it slightly smoother. However, most of the expense is from marketing costs and hype. I am in no position to tell women what makeup routine they should do. However, I’m here to say that most men do not like the look of elaborate makeup. We are used to light makeup and have been conditioned to believe that a little makeup is normal, but when makeup becomes elaborate, it makes a person look fake. It is not attractive. Many men refer to this as clown makeup (or use more negative terms), and it is a turnoff.
I always wear cologne and discovered that the most expensive part of a bottle was the sprayer, then the cap, then the bottle. The actual ingredients that make you smell nice are the least expensive. Let’s look at some of the hygiene changes that I have made.
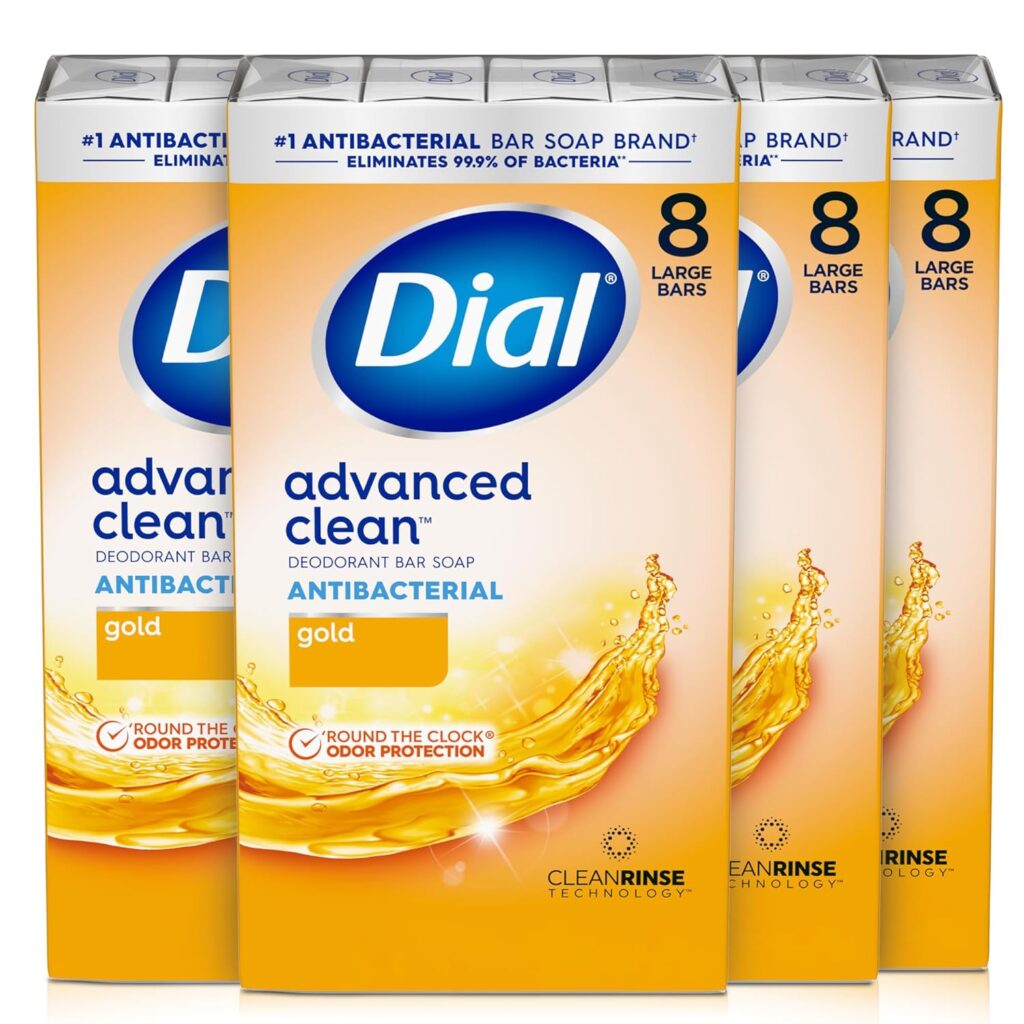
I used to use shower gel, but had a nostalgic moment and bought some bar soap. I discovered that I prefer bar soap, which is also more environmentally friendly. A YouTuber compared inexpensive Dial bar soap with inexpensive Suave shower gel and found that bar soap was about 4.5 times less expensive. Those costs go up further when you buy more premium shower gels.
I like these very gentle soaps, which are often on sale at Costco for around $13 ($0.24/ounce). However, Amazon sells the exact same soap for almost $38! That is no bargain.
Regular anti-perspirants make me itch, and typical deodorants don’t work very well (including natural ones). Decades ago, I discovered “deodorant crystals.” This bar will last me years. I apply it to my slightly damp armpits after my daily shower.
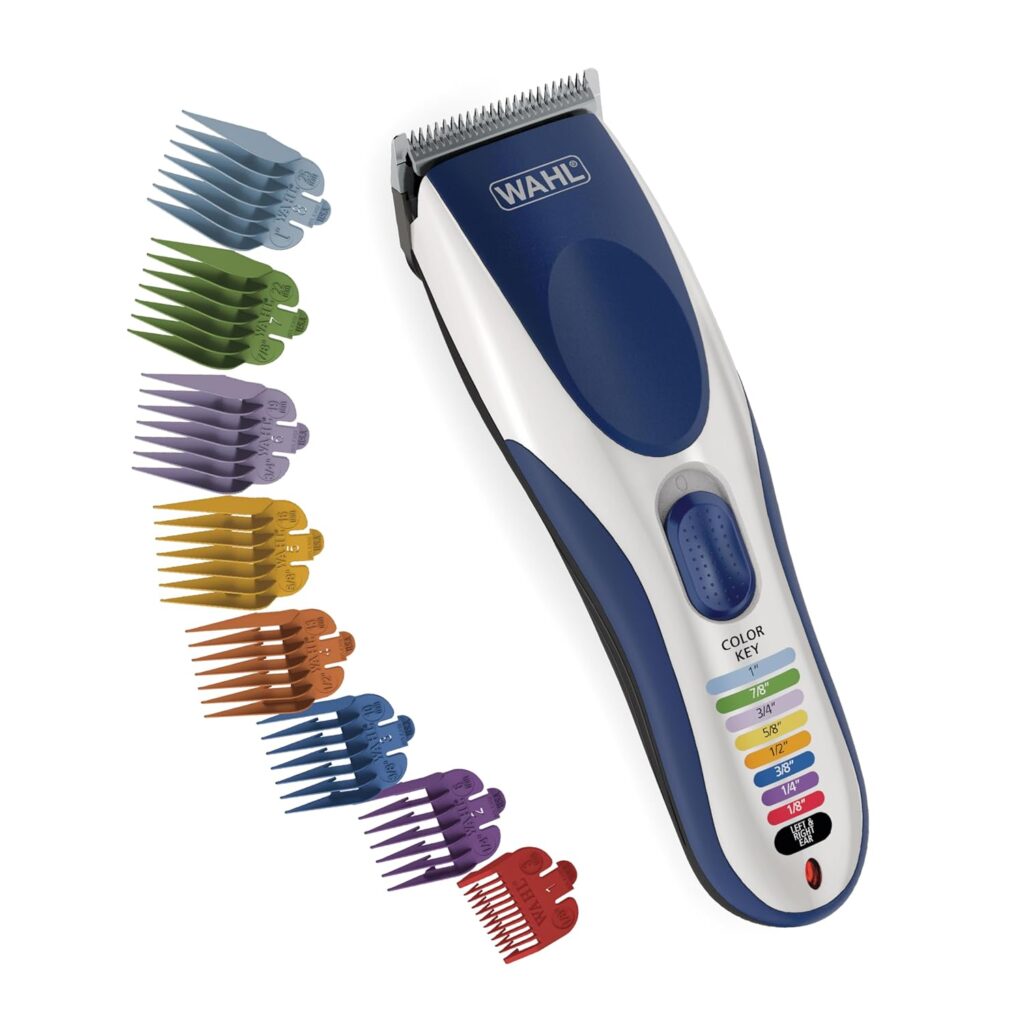
Years ago, I became frustrated with having to wait for a haircut, and I went out and bought some clippers. My haircut is very simple since I’m pretty bald, and I can cut it in less than 5 minutes. My friend tells me he pays around $50 for a haircut (including tip). These clippers cost less than $40.
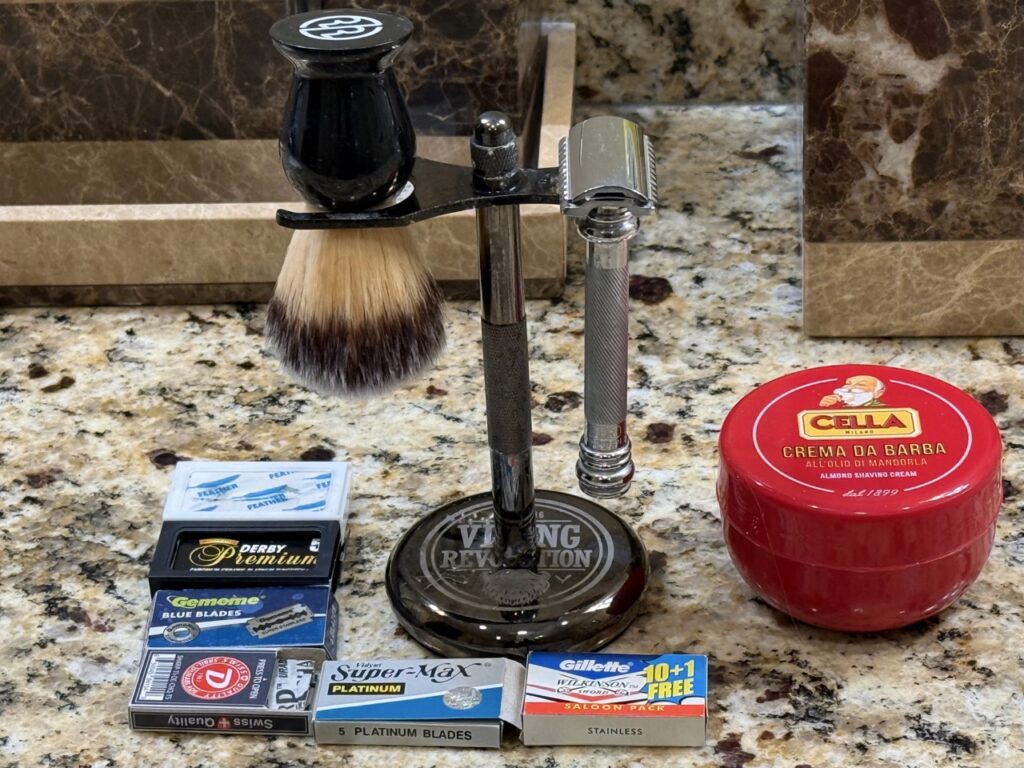
I started shaving during the era of shaving systems. Three-blade, four-blade, five-blade systems, it was never-ending. Each brand had different models, none of which were compatible with the others. I would buy a handle and several packs of blades. When I ran out, I never remembered what handle I had, so I would repeat the process, and those blade cartridges were $3-4 each!Decades ago, I invested in a high-quality, old-fashioned, double-edge razor (Merkur brand, around $30-$40). It looks as good as it did the day I bought it. It uses standard double-edge razor blades that cost between $0.05 and $0.10 each. It shaves better than my old expensive systems, and the blades are universal. You can use a double-edge razor with regular shaving cream, but it is fun to use a brush and some real shaving soap. Pro tip: You have to angle this type of razor at around 30 degrees. Use extremely light pressure or none at all, or you will cut yourself. I almost never cut myself, but at first, I did because those multi-blade systems distribute pressure across all the blades, so you need to push down when you shave. If you do the same with a double-edge razor, you are applying all that pressure to one blade. Don’t do that! If you are interested in trying a DE-razor, watch some shaving videos on YouTube, as they will walk you through this shaving method.
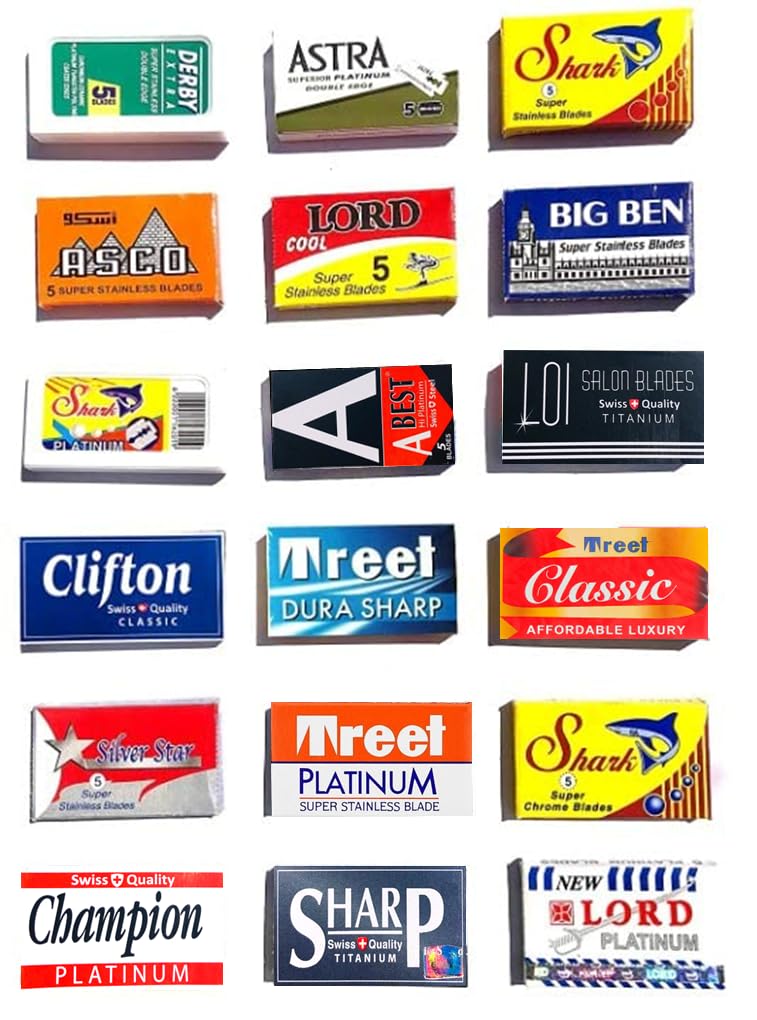
Most Double-edge razor blades are made in other countries, not in the US. That is because these types of razors are still popular worldwide. You can buy sample packs to find the blade you like best.
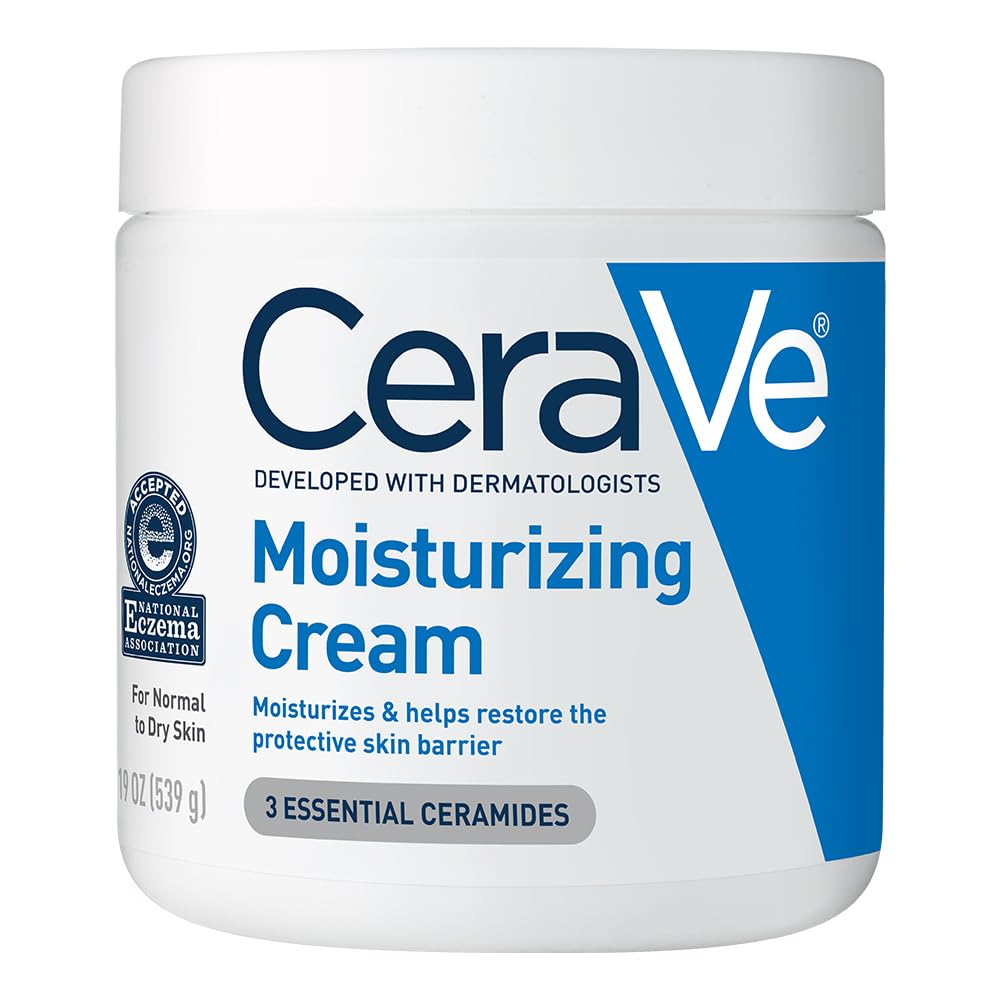
I have dry skin, so I always use a moisturizing cream after I shower. This stuff is great and lasts a very long time. The secret is that I put it on before I dry off. A little bit goes a long way, and by the time I’m finished applying it, I’m dry enough that I don’t even need to towel down.
Rule Sixteen: You DON’T deserve it if you can’t pay cash for it! A line in advertising is that you “deserve” their product. This is a manipulation, so don’t fall for it. If you can afford something and really want it, it’s OK to splurge. However, if you have to pay for it using credit, you need to re-evaluate your decision. This goes for everything from buying a car to going on that “once in a lifetime” Disney vacation. Don’t be a sucker for advertising hype. If a little bit of pleasure leads to months or years of financial pain, it is a very poor bargain.
There you have it, the real things that I do. You may find that they work for you, or you may need to find your own system. Once you have it, it becomes a way of life. Most of these methods are more environmentally friendly, too!
Peace
Mike
Note: Images are my own or taken from product pages on the internet. They are being used for educational and entertainment purposes only.
Lately, I have been writing a lot about bread makers in this blog. I’m sure I’ll be veering off into other topics, but this is where my interests are at the moment.
These are the questions I have been asking myself:
Is it better to buy a used bread maker or a new one?
Are premium bread makers worth the upcharge?
Do premium bread makers make a better loaf?
How have I explored these questions? I have used many, many different bread makers, some new, many used. I have made hundreds of loaves of bread of all kinds over almost 40 years (actually 37 years) of using bread makers.
I have read countless threads on Facebook, Reddit, and other sites. I have watched many YouTube videos from first-time users, experienced users, professional chefs, and even shopping channels. I have also watched as many bread maker teardown videos as I could find, including some in foreign languages.
I was trained as a research scientist before I decided to switch teams and go to medical school. I’m also a chronic comparer. I have always loved comparing things to see how different designers and engineers approach the same problem, often with different objectives. Sometimes the objective is to produce the best product possible; sometimes, it is to produce a good product the cheapest way possible; and sometimes, it is to design a product that will last just long enough to satisfy the customer while promoting the purchase of a replacement product. This last category has been classified as the ensh*tification of a product. Ensh*tification seems to be a recent trend in everything from cars to washing machines.
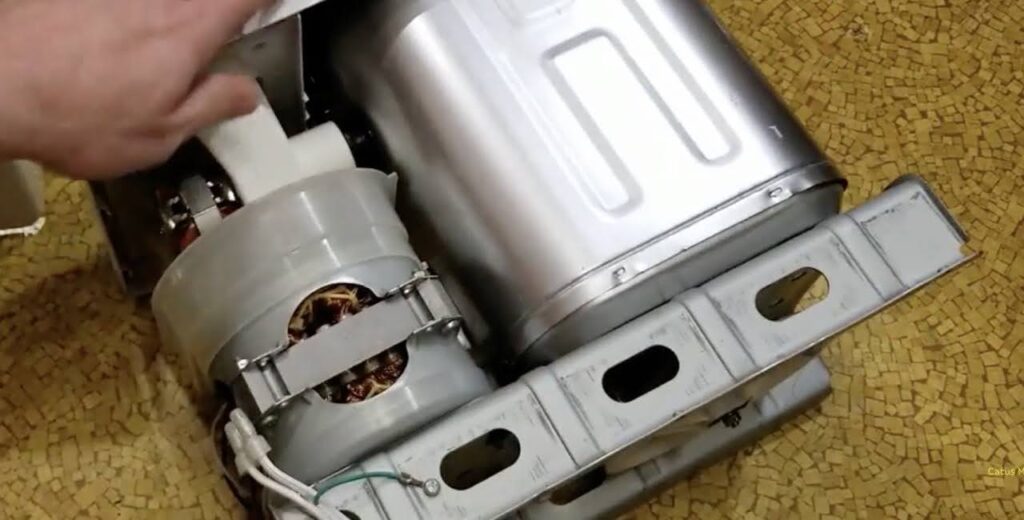
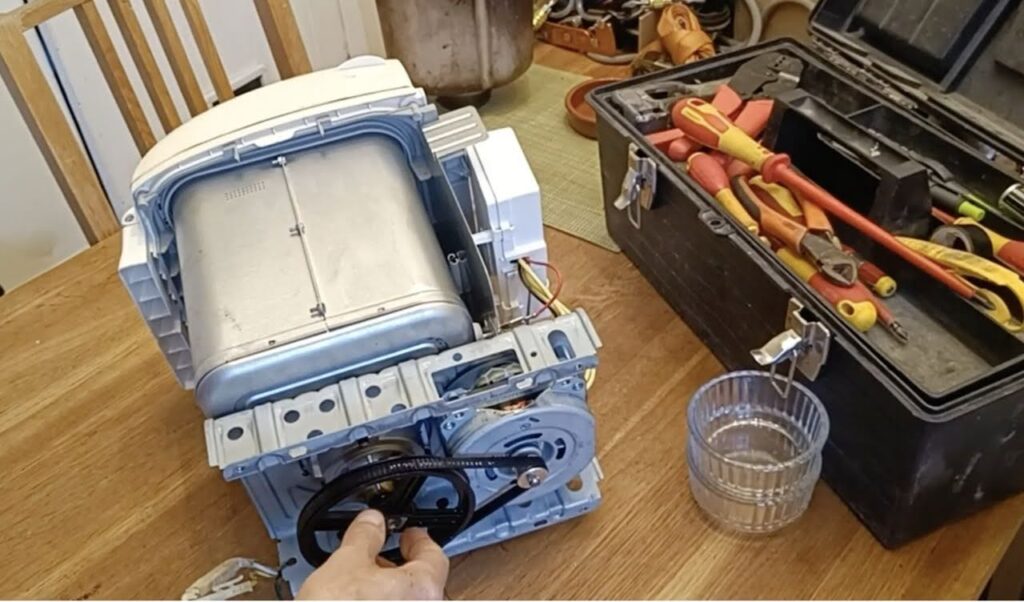
This is a teardown of an Oster bread maker from the early 1990s. Oster was a popular mid-priced appliance brand.You can see the quality of this appliance in the solid, well-designed chassis, the large, well-protected motor, and the thick oven chamber.The average bread maker in 1990 sold between $100-$300, with premium models selling for as much as $400. Four hundred dollars in 1990 is equivalent to $992 in 2026.
Here is a teardown of the very popular Oster 5838, introduced in the early 2000s. It still has a decent motor, but it is no longer protected. There is custom housing for the electronics, so that is good. The chassis is well-engineered, but it is clearly smaller, thinner, and cheaper than the 1990 Oster example. The case is now plastic, instead of metal. Still a great machine, but its design has been scaled down.
Here is a teardown of a BM1333, an ODM machine sold under many different brands. I have used this machine, and it makes decent bread. However, the chassis has been reduced to the bare minimum, the electronics are not protected, and the motor looks small and cheap. With that said, you can often find these bread makers in the $50-$70 range in 2026. That would be between $20-$30 in 1990s money!
Can I offer you absolute answers for the above questions? Sadly no. Despite using many bread machines, I don’t have the resources to examine all of them, let alone multiple copies of each model.
Any information is impacted by a phenomenon called “confirmation bias.” Humans tend to accept information that supports their beliefs and reject information that contradicts them. Before I retired, I couldn’t tell you how many people wanted me to prescribe an inappropriate treatment because some enthusiastic influencer heralded it as “the miracle cure that doctors don’t want you to know about.” In most cases, I was able to explain to the patient why a particular treatment wasn’t in their best interest, but a few were so convinced that they assumed that I was part of the conspiracy. Alas! I mention this because no matter what I present, some will reject it because it contradicts what they want to believe. So be it.
That said, you should use this information as only part of your decision-making process, as it does have flaws. There is only so much information I can glean indirectly. I can tabulate on YouTube which bread machines are getting their drive belts replaced or their leaking bread pans fixed, but these are only indirect indicators, since the majority of bread makers are simply discarded when they stop working, and I am only seeing those being fixed. Once a bread maker is in the trash, its history goes with it.
DIY teardown videos do allow me to indirectly assess the quality of the components used by their visual appearance. How big is the motor? Are the electronics protected? How good is the overall construction? How thick is the drive belt? …and so forth.
I have also looked at repair parts sites to see what replacement parts they offer. They wouldn’t be selling drive belts, bread pans, and dough paddles unless people were buying them.
To summarize, the ways I evaluate these products affect the confidence in my conclusions. However, they are still useful, if not absolute. Consider this information as a potential data point for your own purchase journey.
Lastly, I’m not accounting for the psychological reasons of choosing one machine over another. I’m a practical guy who believes that form should follow function. To use a car example, I would much rather have a good ol’ reliable car than an ultra-expensive head-turner that costs 4 times as much but doesn’t improve my trip to the grocery store. However, there are those who insist on driving their kids to school in a G-Wagon or a loaded Escalade. It is all good, I’ll do me, and you do you.
Observation 1
Most unboxing and first-time breadmaker users will rave about their first loaves. However, I would consider many of their results sub-par, with a high percentage of their breads being either overproofed or underproofed.
What these videos have in common:
-The users are inexperienced.
-The users don’t check on their dough ball.
-The users sometimes don’t measure properly
-The users almost never weigh their ingredients.
Observation 2
Experienced bread makers seem to produce pretty good-looking loaves no matter which bread machine they use. This seems to apply to many types of bread. There are many of these experienced bakers on YouTube. However, two stand out for making a wide range of breads with consistently excellent results. They are Dorinda from the channel Butterfly Meadows Homestead and Robyn from the channel Robyn On The Farm. Dorinda uses an inexpensive KBS 17-Program machine, but has also used other machines. Robyn mostly uses a Zojirushi Supreme machine, but sometimes uses other machines as well.
What they have in common:
-They know what a dough ball is supposed to look like and check the dough ball.
-They are very familiar with how their ingredients work, and they seem to stick to those ingredient brands that they are familiar with.
-Their many years of experience have seemed to give them an intuitive skill in the art of making bread.
Observation 3
The construction of newer economyal machines seems cheaper than that of older ones. More plastic and thinner plastic are being used. Many newer machines are significantly lighter than older machines.
Implication
-Plastic is cheaper than metal. That doesn’t directly affect the machine’s quality. However, it may imply that other components may be of lesser quality.
-A mid-range bread maker from the mid-1990s would cost (in 2026 dollars) $300-$400. You can buy a brand-new bread maker (with some hunting) for around $40-$70 in 2026. How is that possible? Likely due to standardized designs, cheaper components, and less R and D (one model with many secondary brands).
This Tesco BM10 machine teardown illustrates how newer, less expensive bread maker designs have reduced costs by using lower-cost components and design shortcuts.Look at how thin the wires are.
Observation 4
There are a number of videos where individuals replace a shredded drive belt on newer, less expensive machines. Often, these machines have been used consistently multiple times a week for several years. Some older machines have easy access to the drive belt. It seems that most newer machines (including expensive ones) require extensive disassembly to accomplish a simple belt replacement. I have not seen any belt-replacement videos for expensive machines (like a Zojirushi); however, belts for such machines are sold, suggesting that someone must be replacing them.
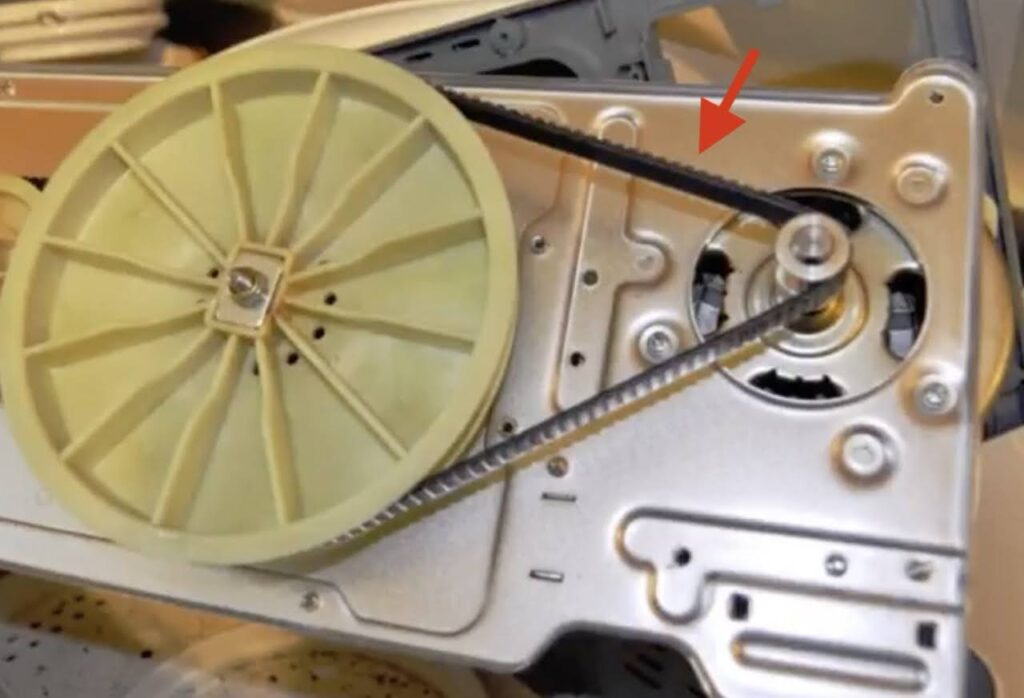
Here is a drive belt from an economy machine. Check out the arrow, this belt is pretty thin.
The forces on the drive belt are tremendous when kneading dough. This takes its toll on a thin drive belt.
Here is the drive belt on a Zojirushi (premium) bread maker. It is much more robust. Could it also fail? Of course, but it is likely to last much longer than the belt shown above.
Implication
-Some less expensive machines do seem to use cheaper drive belts, which can be a point of failure.
-When the information is provided, it seems like these machines were well used and did provide years of service before their belts failed.
-I could find no DIY videos of belt replacements in premium machines, but replacement belts are being sold, suggesting that some are failing to some degree.
-It is likely that someone who invests in a premium machine is serious about their bread making, and that group as a whole is more likely to regularly use a bread maker than someone who casually picks up an inexpensive machine. This would be a factor to consider when comparing the reliability of an inexpensive vs. a premium machine.
Observation 5a
All the articles and videos on what is the best bread maker are flawed in many ways (mine too). Some are outright commercials with influencers gushing about a particular bread maker that they were given for free by the manufacturer. Some of the top five videos appear to be AI-generated and just repeat the selling points from a manufacturer’s product page. Better reviews are also limited by the number of machines that they compare. Many will throw in a Zojirushi Virtuoso, which often gains the top prize, but they don’t compare it with the lower cost Supreme (which, in many ways, is the same machine with a few less bells and whistles-and yes, I have both). When the American Test Kitchen compared the two, they preferred the Supreme because of its simpler controls, so you have that.
Observation 5b
When some reviewers test machines, they use the same recipe across all machines for consistency. This makes sense, but it also has problems. If you look at recipes from various bread machine manuals, you may be surprised to see that different machines are designed to use different amounts of yeast. A large white bread recipe from a Welbilt AMB6000 bread maker requires one tablespoon of yeast using the basic setting, while an even larger white loaf from a Panasonic SD-R2550 uses only ¾ of a teaspoon of yeast. It would be very difficult to adequately compare these two machines using the same generic recipe.
-If a machine isn’t compatible with a particular recipe, it will produce a loaf that is inferior to a machine that is compatible with that same recipe. That could bias a reviewer’s opinion.
Observation 5c
When some reviewers test machines, they use the specific basic white bread recipe from the manual for those particular machines. Each machine is judged on a different recipe, but a recipe that the manufacturer felt was best for that machine. This makes sense, but it also has problems. Case in point: I sometimes make bread at my sister’s house using her older Breadman Plus breadmaker (a good machine). In one instance, I made a very nice loaf, but my sister thought that it was rather “meh” in flavor. On another day, I used a different recipe in the same machine, and she thought that that loaf was fantastic. Both looked the same. What was the difference? The second loaf had twice as much sugar!
-Different recipes will have different flavor profiles, which can bias a judge’s opinion.
Observation 6
I have observed that older used machines are more likely to over-proof bread, and some will also over-brown a loaf.
Here is an Oster 5838 (mid-range) breadmaker from the early 2000s. It can still make a great loaf of bread, but I had to do a little tweaking to convince it to do so. I’ll sometimes take a photo of my adjustments to a recipe so my retired brain doesn’t have to remember my alchemy.
-Some of the machines that I use are close to 30 years old. It is shocking that a 30-year-old home appliance would even work. When a machine is both overproofing and over-browning, the thermostat may be off. This can often be corrected by using a little less yeast and the light crust setting on the machine.
-What if a machine is overproofing, but not over-browning? If you have been baking for a long time, you likely have noticed that the difference between active and instant yeast has narrowed over the last 30 years. If a machine were calibrated for the active yeast of the 1990s, it could possibly overproof using 2026 yeast. The solution is to cut back on the yeast, typically starting at a ¼ teaspoon reduction.
Observation 7
There does seem to be a reduction in the quality of bread machine components over time. Tear-down videos of older breadmakers show very robust components, especially the motors. Tear-downs that I have seen of newer Panasonic and Zojirushi machines also have robust components. Teardowns of current economy machines vary; some have robust motors, while others have smaller, cheaper-looking motors.
-The motor is a visual item that I can assess on a video. It is likely that if a manufacturer is using a cheaper motor, they are economizing in other ways, for instance, by using lower-quality components on the unit’s computer board. Cheaper components will fail more quickly than higher-tolerance ones.
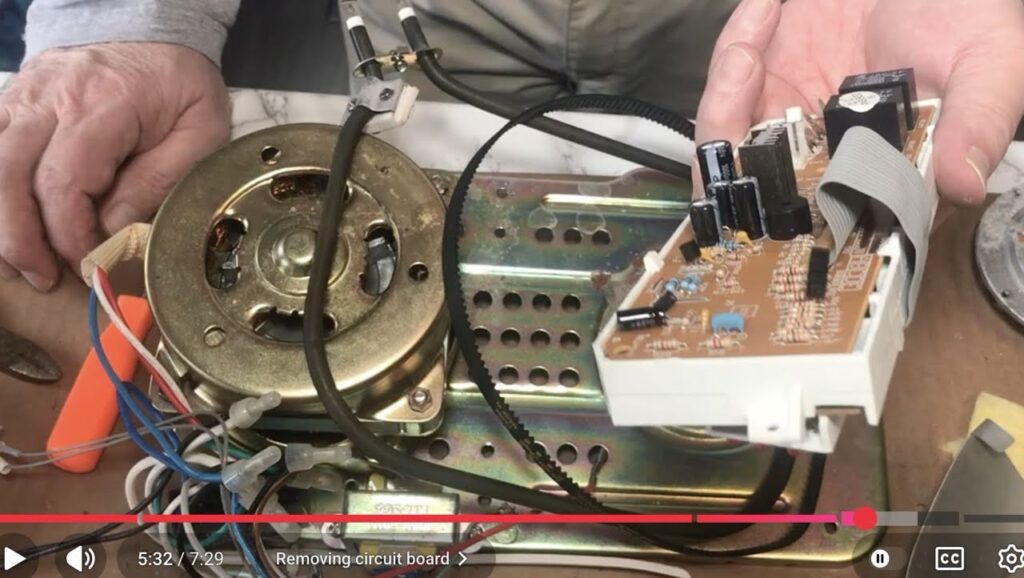
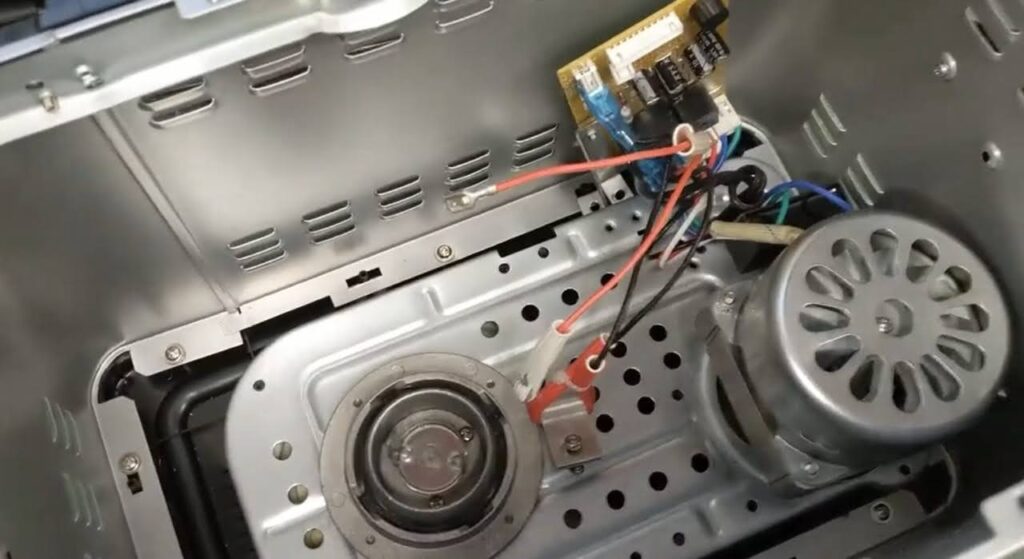
This is a teardown of a Panasonic SD 256 introduced somewhere around 2010. Man, look at this quality. Strong motor, fat drive belt, beautiful chassis, highly protected electronics, and so on. This is why you are paying hundreds for this machine, and it why you pay hundreds for other premium machines. Cheap bread makers can make excellent loaves of bread, I have used dozens of them. But a premium machine is built to last. That is why I can still use a quality machine from the early 1990s in 2026. It is unlikely that I will be able to use a cheap 2026 machine in 2056!
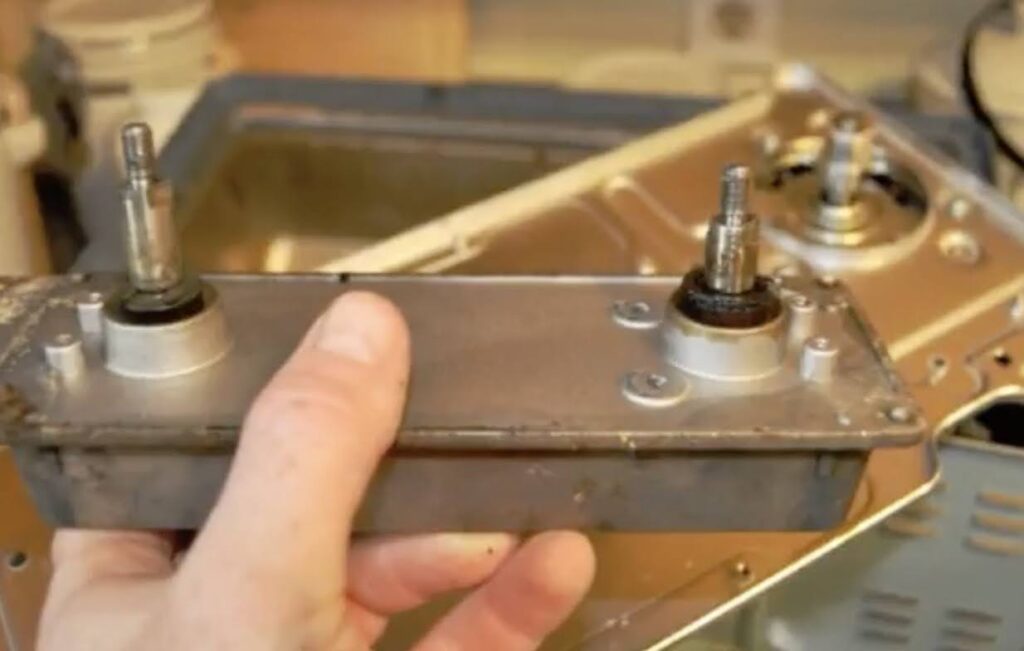
I don’t want to leave the Zojirushi fans out. Here is the drive mechanism for a Zojirushi unit. It looks solid enough to be used in a Mac truck. This is also a premium product.
Observation 8
Bread pans seem thinner in economy machines than in older or premium machines.
-This doesn’t seem to impact the final loaf. However, I’m concerned that the non-stick coating may also be thinner, which could affect a bread pan’s longevity.
Observation 9
With heavy use, bread pans can fail, often leaking, and bread paddles can strip.
-This occurs with both economy brands and premium brands. This is normal wear and tear, but it should be considered if a used machine appears to have been well-used.
Observation 10
With economy brands, drive belts fail more than with premium brands based on the number of repair videos on YouTube. In premium brands, drive mechanisms can fail, as shown in YouTube videos.
-It would appear that premium brands use higher-quality belts, but mixing systems in these machines can be subject to malfunctions.
Observation 11
There has been a race to differentiate bread makers based on the number of functions. Newer bread makers are becoming more versatile by offering options like yogurt-making and stir-frying.
-Although some may find some of these additional features useful, they are not part of the core bread-making functions.
Observation 12
Some machines seem to be more flexible and adaptable to outside recipes. Other machines are picky with recipes.
-Most premium machines that I have tested tend to be a bit more flexible when using different recipes. However, there are a number of economy machines that are also flexible. The KBS 17 function machine comes to mind. A premium machine manufacturer invests in R&D to tweak their machines for specific regions.
The yeast potency from one region of the world may differ from that used elsewhere. A bread machine calibrated for an Asian market may not work as well as one specifically programmed for a US market in that market. However, with a little experimenting, you can get most bread makers to behave.
Observation 13
Bread pans can be deceptive. Many economy 2-pound horizontal bread makers produce a 1.5-pound, normally shaped loaf or a 2-pound, oddly tall loaf. Premium horizontal pan machines (both 1- and 2-paddle models) tend to have bread pans that are slightly larger, producing a more normal (but still not classic) two-pound loaf.
Here is a 2-pound loaf from a mid-priced Cusinart bread maker. This is a perfectly fine loaf, but it is oddly tall. However, if you make a 1.5 pound loaf in this machine you will get a more traditional looking bread.
Here is the teardown of the above Cusinart machine. The design and quality are not bad, certainly better than the BM1333 shown at the top of this post. However, it is not nearly as good as a premium machine, which is reflected in its lower price.
-I find that it is more realistic to make a 1.5-pound loaf in many economy machines if I want a normal-looking loaf. I have better success making 2-pound, aesthetically pleasing loaves in premium machines, as the larger pans create a more traditionally shaped loaf. Note, there are a number of two-paddle economy machines on the market that will give you a more normal-shaped 2-pound bread, too.
Observation 14
A trend in breadmakers is to have more and more bread programs.
-This seems to be a way to differentiate models, but it may have limited utility. There may be a difference between a basic cycle and a whole wheat cycle, but how much real difference is there between a whole wheat cycle vs. a whole grain cycle?
Observation 15
Older machines may lack features common in newer ones. I have used older machines that don’t have a nut/fruit “ding” reminder or even an end-of-cycle alert. Some older machines may not have a power-failure feature, which restarts the machine from where it left off during a brief power outage.
-All of these issues have workarounds, but they are less convenient.
Observation 16
There are a few videos and posts in which professional bakers tested a very limited number of machines. They typically cite that the premium machines make a technically better loaf of bread. However, that difference is marginal.
-They are often basing their opinion on the structure of the loaf, but still say that the economyal machines produce a pleasant, acceptable loaf.
Observation 17
Reseller platforms like eBay and even Facebook Marketplace appear to inflate the price of used bread makers. When shipping is added, some can be as expensive as a new, fully featured machine.
-It is imperative to be a savvy shopper when buying a used machine. Many bread makers have a long lifespan, but they were never built to last through the ages. A very old machine with an inflated price tag and a high shipping fee is no bargain.
The Bottom Line
Consider the above observations and your own research to formulate the best decision for you.
It is surprising how well old thrift store machines can work. You can often find a bread maker for less than $10 with a little hunting. I wrote about what to look for in my last post. Read that article for more information. Taking a reasonable risk on a machine that costs $20 or less is… well, reasonable.
Facebook Marketplace or eBay are often the places to find used premium machines, as they seem to have evaporated from thrift stores. However, expect to pay considerably more than $20. It is reasonable to pay about 50% of the retail price for a used premium machine in very good to excellent condition.
Panasonic makes excellent machines, but resellers don’t view them the same way they do a Zojirushi unit. You may be able to find a good older Panasonic at a thrift store at a great price.
I have seen ancient Zojirushi models being sold on eBay for insanely high prices. Zo’s are built very well, but they are still built to consumer standards. Buying a very old model from many years ago is only worth it if you can score one for a good price.
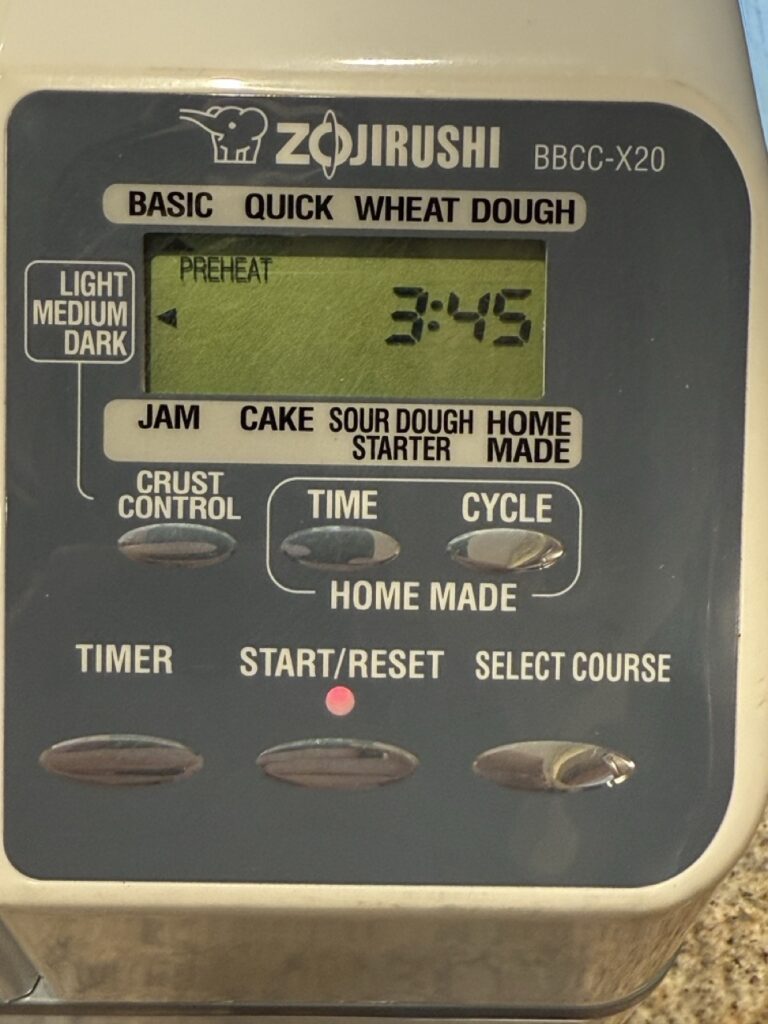
I have used both versions of the Zojirushi Virtuoso (Virtuoso and Plus) and the Supreme models (X20 and C20). They are all great. Unless you have exceptional needs, the Supreme model offers better value, with performance similar to the Virtuoso in many instances.
There are a number of economy machines that work very well and bake great bread. Many of these machines are made by ODM (original design manufacturer) companies and sold under different brand names. For instance, the BM1333 bread maker is sold under the Kitchen In The Box, Rosewill, Tesco, K-Mart, Aumate, Anko, Lotus, Gamit, and likely other brand names worldwide. Identical but rebranded machines that can vary considerably in price. Shop around for the best value.
Since many economy brands use ODM machines built by different ODM companies, it is possible to find a brand with one model that is excellent, with another model only being so-so.
There are some objective criteria for what constitutes a good loaf of bread, but taste criteria are often personal preferences. When experts compare high-end machines with economy machines, they may objectively prefer the high-end loaf. But that is often based on the bread’s physical structure. However, the same experts often say that the economy machine produces a good loaf, just not as excellent as the premium machine. Most of us would not notice the difference.
I believe this Welbilt ABM 6000 machine was marketed in the mid-1990s based on its display/control panel characteristics. This bread maker is built like a tank and produces absolutely beautiful bread in 2026.
Here is a slice of bread from the Welbilt; it is as technically good as a slice from one of today’s premium bread makers, and it was delicious. Excuse my socks being in the shot!
So, what should you buy?
If you are on a budget or just toying with the idea of making your own bread, consider a thrift-store machine. The investment is low. I have used many of these bread makers, and if you follow my purchasing guidelines from my previous post, you are stacking the odds in your favor. I have been able to get every machine that I have ever tested to make a decent loaf of bread, with one exception: a DOA (dead on arrival) machine that I returned to Amazon. However, I have had to tweak some recipes to achieve acceptable results with some models.
If you already have an old machine, consider resurrecting it from the basement before buying a new one. It is a great place to start and may be all that you need. Additionally, it is easy to replace a stripped kneading paddle or leaky bucket, and if you are moderately handy, you can probably change out a drive belt if needed.
If you are a more experienced baker looking to check out bread-making machines, consider one of the many excellent economy machines. Many make wonderful bread.
If you know you are committed to bread-making and want a machine that will likely last, go with a premium brand such as Zojirushi, Breville, or Panasonic. Different brands have different features, but they all seem to be built like tanks and shriek quality.
If you want to go with the Zojirushi brand and make typical breads, consider the excellent Supreme model. It is more similar to their top-of-the-line Virtuoso line than different.
If you want to go with the Zojirushi brand but only the best will do, or if you have special wants like a built-in gluten-free program, consider the Virtuoso Plus. It is top-of-the-line, but you will be paying for that status.
If you only use your machine to knead and ferment dough, and then bake your bread in the oven, most any working machine will do the job, from a $5 thrift-store find to a $500 premium brand.
If you only use your machine for kneading and fermenting dough, you may want to consider a Chinese dough maker. Depending on their bowl size, they can make enough dough for 2-4 loaves at a time. These machines are inexpensive and function similarly to bread makers but without the specific programs and baking features.
Here is a decent loaf from a BM1333 bread maker. The machine isn’t built to last through the ages, but it is very inexpensive. It can introduce you to using a bread maker, and it will likely work for several years or more.
This Osipoto bread maker is inexpensive, but it does a very good job making bread. It also seems to be a bit more flexible when using recipes derived from sources outside of its instruction manual.
You don’t hear as much about Breville bread makers in the states, but Breville makes premium products. This single paddle machine has a bread pan that is a bit larger than those on economy machines so its bread has a more traditional look. This loaf was excellent and delicious!
Here is a wonderful loaf of bread made in a premium Zojirushi Supreme. Less expensive bread makers can also make an excellent loaf of bread. The increased cost of the Zojirushi is warranted due to the significantly better build quality.
Here we have the top-of-the-line Zojirushi Virtuoso Plus. As far as I can discern, the mechanics are the same as a Zojirushi Supreme with the addition of a top-heater, a different control interface, and a micro-switch. It is also possible that additional memory has been added to allow for more custom programs, or as Zojirushi calls them, “courses.”I have both the Virtuoso Plus and the earlier Virtuoso. If you want the niceties of the Plus, but at a bargain price, consider a used Virtuoso.Beyond the interface, the main difference between the two is the additional courses. In my opinion, some of the additional courses are a bit… hmm, gimmicky. However, your opinion may be different. As always, you do you.
Peace, and happy bread making!
Mike
Images are either my own or screenshots from YouTube creators. All images are used for educational purposes only.
I am a big fan of bread makers. Why? I love machines, and I love food! When bread makers came out in the 1980s, I was in line and purchased a Sanyo that made 1-pound loaves. It was very basic, but I thought it was amazing. Soon, manufacturers were making machines that made 1.5-pound loaves, then 2-pound loaves. Some machines offered programs for different types of bread, like whole wheat. Still others went from vertical to horizontal pans, while still others adopted a two-paddle system, and so it went. I was very curious about these innovations, and so I explored them.
The popularity of bread makers waned in the late 1990s, and that was actually a boon for me. People were dumping their bread makers at thrift stores, and they could be had for pennies on the dollar. With patience, I could pick up a perfectly good machine that originally cost several hundred dollars for less than $5. Editor’s note: see my post from March 26, 2026 for a very comprehensive guide to buying a used bread maker.
I have used many, many bread makers. I have given some away, returned some back to thrift stores, and sold some at garage sales. With that said, I still have way too many of them that I can’t part with. If you are a practical person, you are likely shaking your head and thinking, “You only need one bread maker!” I’m not always practical, as I like to compare things to see how one engineer or designer rethought and reimplemented an idea. That’s just me. However, since I have used so many bread makers, I have gained a broad knowledge of the machines and of baking bread in them. All bread makers are extremely similar, but their nuances can impact the end user’s experience. Your friend may give you a recommendation based on their particular machine; it may be a great suggestion or not pertinent to your gadget. This post is based on a crazy guy who has used dozens of machines. I have baked many wonderful loaves, but I have also had my share of less-than-wonderful ones, too. Let me share my experiences with you.
The biggest problem that I have had to conquer has been overproofing. This is likely because the older machines (some 30 years old) I frequently use may have thermostats slightly out of calibration. Additionally, over the decades, yeast strains have likely changed, with active yeast and instant (bread machine) yeast becoming increasingly similar. A machine programmed for a yeast strain from the 1990s may overproof a bread dough using a 2026 yeast strain. I wrote a detailed post on how to deal with overproofing on March 9, 2026. Check that post out if you are dealing with overproofing issues.
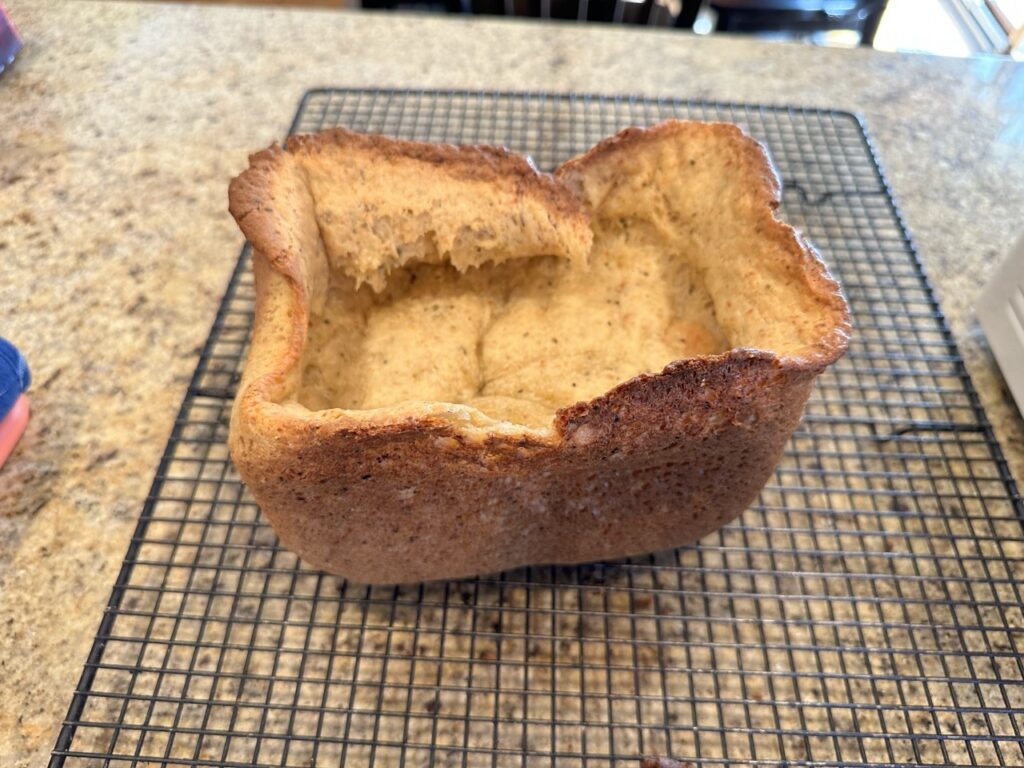
This is NOT underproofing. This is a severe case of overproofing where the yeast expanded so much that it actually popped the top of the loaf during baking.
This post will explore the opposite problem, underproofing, or what to do when you bake a brick instead of a loaf of bread. Underproofing is often easier to deal with than overproofing, so that is the good news.
Here is a severe case of underproofing. However, it is more common to have a “too short” loaf, where you don’t get the expected rise.
Is underproofing the bread machine’s fault?
In almost all cases, the answer is no. The only exception would be a bread maker so broken that it would need repair.
Let’s look at some problem areas and solutions
Solutions:
The operator error issue
We all make mistakes, and sometimes those mistakes can lead to baking a brick instead of a nice loaf of bread.
Solution: The solutions are obvious here. If you left out the paddle, insert it next time. If you used the wrong program (pressed jam instead of basic loaf?), use the right one next time. You get the picture.
The recipe issue
All bread makers follow a similar pattern of operations, but they are not identical. A recipe that works well in one machine may not work as well in another. This makes it tricky when using a recipe developed by an individual. Cookbook writers often test recipes across multiple machines, so their recipes tend to be more reliable. However, with AI, many bread-making cookbooks use recipes that are basically borrowed (stolen?) from internet sweeps. I’m leery of books that tout “New For 2026!!” and list a specific bread maker brand in the title. They will often include a folksy author’s name and even an AI-generated photo.
I purchased one of these books, and it was an absolute mess with some of the worst editing that I have ever seen. It felt like the “author” told an AI bot, “Find bread maker recipes and turn them into a book.” Formatting was abysmal, there was no consistency between recipes, and some were clearly very wrong.
Solution: All bread makers will come with a recipe booklet. If you bought a used bread maker, you can likely find that machine’s manual/recipe PDF online. An established brand will provide you with tested recipes. I did find some brands that used OED-distributed machines that had terrible recipes, for instance, listing regular flour as an ingredient in gluten-free bread, so they can be poor, too. With that said, start with your machine’s basic white bread recipe. If you have success, you can examine that recipe to discover its secrets. I have seen some machines that use only 1 teaspoon of yeast for many of the basic recipes, and others that require a packet of yeast (2.25 teaspoons). Obviously, the amount of yeast will make a difference.
If you want to go the cookbook route, there are some classics (pre-2004) books that have very adaptable recipes. Invest in those. Are there good recipes developed by individuals? Absolutely! I have used many of them. However, start with the white bread recipe from your owner’s manual first, so you know that you are doing everything right before you venture into the unknown.
The “I’m smarter than the recipe creator” issue
I sometimes see folks on YouTube “adjusting” a recipe. They may substitute one type of sugar for another, or change the ratio of white to whole-wheat flour. Perhaps, they believe that twice as much butter would be nice, or maybe buttermilk might work better than regular milk. Sometimes they are successful and create a whole new bread. Sometimes they are not. Bread makers run on very rigid programs and are more intolerant of recipe change than making bread by hand.
Solution: Stick to the recipe as precisely as you can. You may find that a recipe variation is incompatible with your machine, even if it works well in your friend’s machine. For whatever reason, some bread makers are more tolerant of recipe changes than others. Know your gadget!
Once you successfully bake a recipe, feel free to modify it to your liking. You will quickly discover what works and what doesn’t work at that point.
The environmental issue
Most breadmakers will turn on their heating element during proofing; however, if you are making bread in a cold environment (let’s say below 60º F/16 °C), most breadmakers won’t compensate adequately.
If your bread maker is in a very drafty place, it can also negatively impact bread proofing.
The solution: Move your machine to a more environmentally friendly spot.
The measuring issue
You hear about this time and time again. If you are making bread by hand you can often compensate for poor measurements. However, that is not the case with a bread maker as it uses a fixed program.
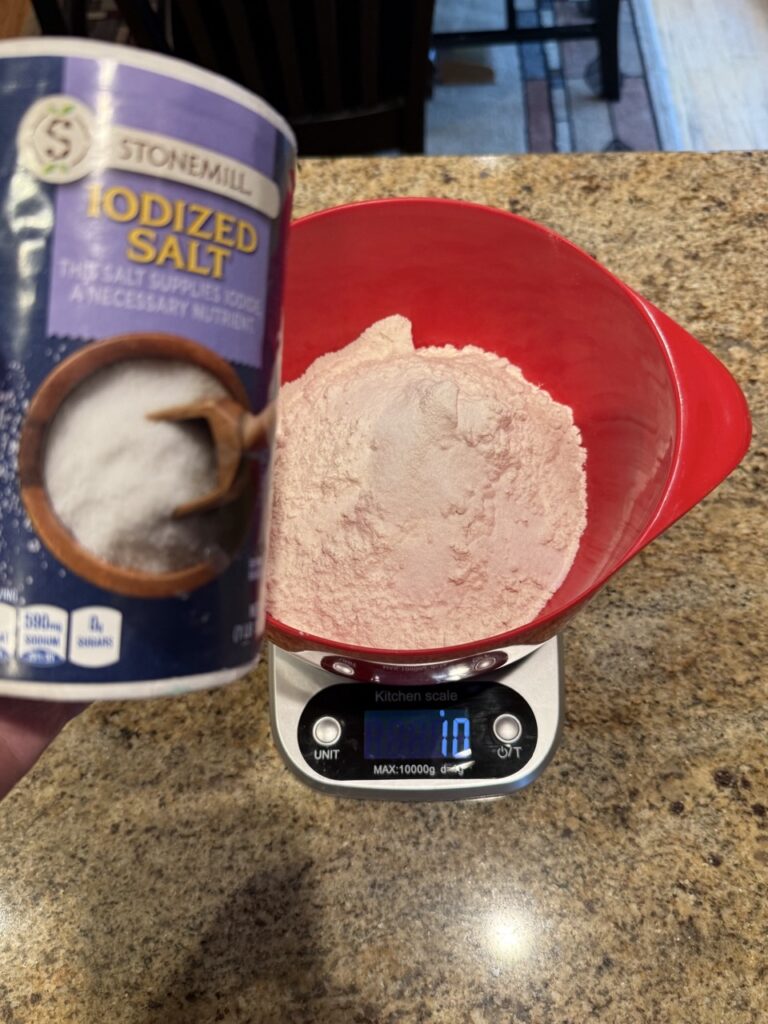
The solution: If at all possible, weigh your ingredients (especially your flour) instead of using standard measuring cups. I always weigh my flour, and it is easy to convert cups to grams: 1 C of flour is around 120-130 grams. I will often weigh my other ingredients as well. However, I use standard measuring spoons for the yeast and salt. Most scales are not very accurate below 10 grams, and salt and yeast are typically below that amount. Naturally, I level off the measuring spoons just like someone would level off a measuring cup.
The yeast issue
Most of us know that very old yeast eventually dies. However, it is possible to buy a brand-new block of yeast, which can be bad if stored improperly in the warehouse or transported incorrectly.
The solution: Yeast is extremely easy to test. Sprinkle some into ½ cup of warm water, along with a pinch or two of sugar. Wait about 15 minutes and check if the mixture is frothy. If it isn’t, your yeast is bad.
Although active and instant yeast have become more similar over the years, you should use the type recommended for your machine until you are very comfortable with its workings. Once you have successfully proofed bread, you can experiment.
I always store my yeast in the freezer (not the refrigerator). I’m using yeast that is over a year old, and it is still doing its yeastly work.
If you are feeling desperate or particularly wild and crazy, you may want to try a small bump in your yeast, let’s say a 10-25% increase, or try around ¼ of a teaspoon extra. Do this at your own risk.
The ingredient issue
When it comes to ingredients and underproofing, yeast is your number one culprit. However, other older ingredients, especially flour, can also affect your final product.
Solution: Flour is cheap; when in doubt, buy a new bag to test. You can also try a different brand of flour.
The type of bread issue
Different types of bread require greater yeast lifting power. Whole-grain breads or breads with a lot of heavy ingredients won’t rise as much as basic white bread. That is normal.
Solution: Adjust your expectations and/or seek out recipes that have been created to achieve maximum rise in a whole-grain/heavy loaf. A 100% whole wheat loaf won’t rise as much as white bread, but if you are baking bricks, you need to make adjustments.
The dough ball issue
Even if you weigh your ingredients, you may still need to make a micro-hydration adjustment to your dough. A dough with insufficient liquid will be too stiff and won’t rise properly.
Solution: During the first knead, check your dough. It should form a smooth, slightly tacky ball. If it forms a rough, ragged ball or several balls, it is underhydrated. Add one tablespoon of water and wait around 30 seconds. Repeat as needed until you achieve the desired consistency. Naturally, you can have dough that is too slack; in that case, you do the same with flour. However, over-slacked dough is a cause of over-proofing, the opposite problem that we are talking about here.
The salt issue
I often hear people talking about the different salts that they insist on using when baking bread. Sea salt, mineral salt, “real” salt, Kosher salt, table salt, so many salts! Here is the truth: they are all the same sodium chloride. Will you get any significant extra minerals using special salts? No, the levels of extra minerals are insignificant. If you believe otherwise, congratulations, you have been played by excellent marketing. However, different salt types do come in different grain sizes depending on how the sodium chloride has been processed. Table salt is very fine, Kosher salt and sea salt are much coarser, and some finishing salts have absolutely huge crystals. The size of the crystals determines how much salt you can pack into a teaspoon measure. The finer the crystals, the more you can pack. Salt not only adds flavor to bread, but it also modulates yeast growth. Too little salt and you will get yeast overgrowth and overproofing, too much and you will inhibit the yeast and produce a brick.
Solution: Salt is cheap; use the type of salt recommended by the recipe. If it says “salt,” use table salt. If it says Kosher salt, use that. In most cases, I recommend using standard measuring spoons for salt instead of weighing it. Kitchen scales are awesome, but have a higher error rate when measuring very small amounts, let’s say below 10 grams. What about those scales that can measure in 0.1 gram resolution? Well, I guess they would be better, but they are far from “lab accurate.” When I was a research scientist (yep, I did that before becoming a doctor-I guess I couldn’t make up my mind!) I used lab-grade scales that cost hundreds of dollars. You can only expect so much from a scale that costs less than $20.
I have compared many kitchen scales (I’m one of those kinds of people). Every one I have tested is accurate enough for measuring heavier ingredients like flour, and I’m pretty confident using them for non-critical items that weigh over 10 grams, such as powdered milk. I just won’t use them for salt and yeast. However, you do you.
We all hear not to mix salt with yeast. That is good practice, but probably doesn’t make too much of a difference if the salt is in crystal form on top of the flour, along with the yeast, and you immediately start the baking process. It will all get mixed up and diluted. However, it could make a difference if both the salt and yeast were in solution at the start of mixing. I always separate the two out of habit. It takes no more effort, so why not?
Desperation move: If all else has failed, you may consider making a very small reduction in your salt to see if that helps. However, this would be a last resort measure and could alter your overall end result.
The sugar issue
Yeast is a living organism that produces enzymes that break down the starches in flour into the sugars it needs to grow. Given enough time and the right conditions, it is possible to make an excellent loaf of bread with zero added sugar. Bread is mostly starch, and starch is simply sugar molecules chemically linked together, so don’t get hung up on adding a tablespoon or two of sugar when making a loaf of bread. A little sugar will enhance yeast growth, just like having that candy bar at 4 o’clock may give you that little extra boost of energy. However, too much sugar can have the opposite effect, inhibiting yeast growth for a completely different reason: it can draw water out of yeast cells, dehydrating them.
Different sugary ingredients contain varying amounts of actual sugar. For instance, half a cup of honey contains about 140 grams of sugar, while half a cup of molasses contains only 96 grams. This probably doesn’t make much of a difference when a recipe calls for a tablespoon or two of sugar, but it could impact your loaf when making sweeter breads with higher sugar contents. Remember, your bread machine runs on fixed programs. If you are traditionally baking bread, you can lengthen or shorten proofing times. Your bread machine can’t.
Solution: Use the recommended type of sugar until you successfully make a particular recipe. Then experiment with other sugars if you wish.
Desperation move: If all else fails, consider a slight increase in your sugar. Remember, too much sugar can actually hamper yeast growth and alter the characteristics of your final loaf. Note: It is well established that sugar adds flavor and helps brown the crusts of bread. However, it is less clear if sugar increases fermentation. Virtually every cookbook and breadmaker manual I have read says it speeds fermentation. However, a couple of YouTube videos show that it doesn’t have much impact on the dough’s rise, as the yeast gets all the sugars it needs by breaking down the starches in the flour. Take this information into consideration before you decide to increase the sugar in a recipe in hopes of fixing an underproofing problem.
The water issue
This had a negative impact on my bread-making, and it took me a while to figure it out. I have municipal water that is chlorinated. I’m very happy that this is the case, as chlorine protects my family and me from all sorts of nasty pathogens that could make us sick. However, yeast doesn’t like chlorine, and chlorine in the water can slow its growth.
Solution: Use non-chlorinated water in your recipe. You can use bottled water, but that can be expensive. I use the filtered water from my refrigerator. If your fridge doesn’t have a water filter, you can buy an inexpensive pitcher filter that removes chlorine. These are the filters with activated charcoal. Using non-chlorinated water made a huge difference in increasing my bread rise.
The ingredient temperature issue
Being a living organism, yeast grows very slowly in cold environments and can be killed in hot ones.
Solution: The best practice is to have all ingredients at a normal room temperature. However, you can speed things up by warming your liquids. Don’t get too crazy about this. I warm my fridge-cold water or milk until it is, well… warm. If I can keep my finger in it, it is probably OK. That “warm but not hot” rule goes for all ingredients. For instance, if the recipe calls for melted butter, wait until the butter cools to warm before adding it to your mixture.
Bonus Round!
Are there other things you can do to prevent underproofing?
Dough enhancers
These are commercial concoctions that vary widely in formulation, but many include yeast enhancers. Typically, a small amount is added to your ingredients. You may have greater success trying one of these.
Diastatic malt
This may sound very sciency and chemically, but fear not. Diastatic malt is simply spouted barley that has been carefully dried and ground into a powder. It is different from regular malt powder. The process of making diastatic malt increases the barley’s natural enzymes, which break down starch into sugar. This speeds up yeast growth and yields a darker crust. Only use a little of this stuff. I typically use one-half to one teaspoon per loaf. Too much will cause excessive conversion of starch to sugar, resulting in a gummy loaf. However, if used properly, it can help.
Other agents
Yeast is a living organism, and, like all living organisms, it requires specific nutrients and conditions to thrive. Commercial bakers may add enzymes to convert starches into sugars, yeast needed vitamins, essential amino acid mixtures, phosphorus, and inorganic compounds to supply the nutrients that yeast needs to grow. However, these additions are well beyond the scope of a home baker. However, you may find some of these agents in dough enhancers available to home bakers if you choose to experiment a bit.
There you have it, a guide to solving your underproofing problems. Best of luck to you, and happy bread-making!
Mike
A tale of two breads, made the same day in the same machine.Something went very wrong with the bread on the right, but I corrected the problem to produce the very nice loaf on the left.
If you have been reading my blog, you know that I’m a chronic comparer. I take great pleasure in seeing how a similar item or problem can be approached in different ways. Variation is the essence of creativity; variation sometimes improves a product, and at other times it does the opposite.
My habit of comparing things is lifelong. When I was a pre-school kid, I had no resources, so I collected and compared pencils. You would think that all pencils are alike, but they are not. When I got a little older, I did the same thing with pens. Why pens? For the same reason as pencils. They were inexpensive and varied by brand.
Over the years, I have compared many things. A few years ago, I compared many blood pressure cuffs and found most of them somewhat inaccurate, with the expensive ones not much better than the cheap ones. A note about home blood pressure cuffs: although they’re not as precise as those in the doctor’s office, they still provide valuable information. If your doctor wants you to record your blood pressure at home, please do.
It must sound funny to some readers that a person would devote energy to such trivial pursuits, but my chronic habit of comparing is harmless. It used to bug my wife, as it made little sense to her. To be frank, it makes little sense to me, but I love doing it. My wife now understands how much enjoyment my habit gives me, so she now accepts me for who I am. Interestingly, this strange interest has benefited me throughout my life, as I am able to examine things with a critical eye trained since childhood. It is easy for me to evaluate what is an important change vs. one that is just fluff.
So why compare bread makers? I love gadgets, and few things are more gadgety than kitchen appliances. Most kitchen appliances are simple machines that need to differentiate themselves from one another. Sometimes this is done by improving the unit’s quality. For instance, a stand mixer may have a more powerful motor and an all-metal housing. Sometimes this is done by fluff. Using the same example, a stand mixer may come in a variety of colors.
I have been comparing bread makers since the late 1980s, with my first purchase being a Sanyo that made a one-pound loaf. Bread makers are interesting devices, as they are simple in design, consisting of a motor, a heating element, a thermostat, and a control board with a display and buttons. All bread makers have these components, so why are some new ones $70 and others $500? Partially, this is due to brand recognition, but the price increase is also due to the level of construction, the feature set, and the quality of the components. I’ll talk more about that later.
I have been able to coax just about any bread maker into making a nice loaf, but each has its quirks. However, to quote Father Flanagan, the founder of Boys Town, “There is no such thing as a bad bread maker.” Well, I think I almost got that famous quote right. With that said, some do this with fewer adjustments than others.
My wife knows me and thoughtfully found a used bread maker, which she cleaned up for my birthday. This old Oster had a tendency to overproof, but with a little tweaking and some basic food chemistry, I was able to coax it back to its former greatness. My wife told me that she paid $10 for this gem.
It is surprising how robust bread makers are. I have used many that were sold in the 1990s that are fully usable in 2026. How many other small appliances can say that? Perhaps a KitchenAid mixer, but that is about it.
I picked up this used bread machine for $5.99. It was produced sometime during the 1990s, and it still works great today!
Are the older bread makers built better than the newer ones? I can’t say for sure, but it would seem so on first blush. Many older units are made of solid metal and have a heavy, quality feel. New premium brands continue this tradition, but many newer, less expensive bread makers are lightweights. Does that impact their longevity? There are no MTF (mean time failure) rates available on bread makers for end users to peruse. However, a lighter machine could suggest lighter-duty components, such as the motor and the drive belt.
Since I have been unable to obtain actual statistical data on bread maker failures, I have had to use softer data. This is what I know: In a heavily used bread maker, the first component that is likely to go is the paddle. Paddles are made of aluminum, a soft metal, and with heavy use, they tend to strip. The next component to break is often the bread pan, which has several failure points, including the non-stick coating, the paddle assembly, and the seal around that mechanism.
The motor of a bread maker connects to the paddle assembly via a tough drive belt. I have read reports that lower-cost bread makers’ belts will strip under heavy use, and I have also read that the premium Zojirushi brand is built with an extra-thick, strong drive belt.
I bought up this used Zojirushi at a reasonable price. It is a quality machine that runs like new today.
Replacement belts are available for many bread makers, but installing one requires extensive disassembly. There are several YouTube videos where YouTubers have replaced a belt and restored their broken bread maker.
Naturally, any other component on a bread maker can fail, from displays, to buttons, to computer boards, to the heating element. However, these seem less likely to do so.
How to test a used bread maker.
Ideally, the best thing you can do is to bake a loaf of bread, but that isn’t going to happen with a used purchase. You can run some basic tests to tell you whether a machine is likely to work.
Check for obvious signs of severe wear and tear. Make sure that the baking pan and paddle are present and in reasonably good condition. They don’t have to be perfect.
Plug in the machine. Make sure its display lights up.
Press every button to make sure that they work.
Press the cake/quick bread cycle. The kneading paddle should start up. If the machine doesn’t have a cake cycle, press the dough cycle. This second option can be a little tricky, as some bread machines have a rest period to allow ingredients to reach an optimal temperature, and they can appear inoperable during that time. Note: If you hear abnormally loud squeaking when the paddle is moving, the machine has failed, and move on. On most machines, the paddle starts and stops repeatedly; this is normal. The goal of this test is to see if the motor mechanism works; you only need to run it for about 30 seconds. Cancel the cycle by long-pressing the stop or cancel button, then move on to the next test.
If the bread maker has a bake-only cycle, press it and wait a minute or two to see if the heating element starts to warm. If both #4 and #5 work properly, the bread maker has passed a basic electrical/mechanical test. Long-press stop or cancel to end this cycle and move on.
Look for obvious signs of misuse. The stainless steel on newer bread makers is very thin, so don’t be discouraged by small dents. However, such damage should lower the asking price. However, if a machine has been clearly abused, give it a pass.
Many machines at thrift stores are pretty grubby, but most will clean up well with soap/water and a bit of effort.
It is possible to buy new paddles and even bread pans for selected machines, but some can be pricey, so be aware.
What size loaf should you consider?
A machine that can make both a 1.5-pound and a 2-pound loaf is ideal. But a machine with a maximum loaf size of 1.5 pounds can also do the job. Some machines make only a one-pound loaf. That size can be limiting, but it may be adequate for a single person or a couple with low bread needs.
Vertical or horizontal loaf?
Most modern bread makers produce a horizontal loaf that looks like a typical loaf of bread when making a 1.5-pound loaf, but can make a very tall yet horizontal 2-pound loaf.
Some bread machines have a longer horizontal pan that has two kneading paddles. These tend to produce a more traditional loaf.
Some bread machines produce a vertical bread tower. Cutting perpendicular to the loaf creates a slice that resembles some commercial sandwich breads. I used to have negative feelings about these machines, but I have come to appreciate them. The loaf may not be as aesthetically pleasing as a horizontal loaf, but in many ways, it produces a more practical slice of bread for sandwiches and toast.
What cycles are important to have?
Less than you think. You need a basic/white bread cycle that allows you to choose loaf size and crust color. This cycle can be used to make many types of bread.
Many machines have a whole wheat cycle that may allow for extra kneading or a slightly longer rise time. If your machine doesn’t have this feature, you can still make whole wheat bread using the basic cycle.
Many machines have a fruit/sweet cycle that may bake a loaf at a slightly lower temperature, as sugary breads tend to brown quickly. However, if you don’t have this cycle, you can still succeed with the basic cycle.
A dough cycle is very useful, as most will knead and ferment bread dough, which can then be removed to form and bake in your regular oven. Think pizza, dinner rolls, and the like.
Many machines have a quick loaf cycle that bakes bread in record time. However, a quicker ferment often results in a less flavorful bread with a poorer texture. I don’t think I have ever used a quick cycle on a bread machine.
Many machines feature a dozen or more cycles, but most are slight variations of the above cycles. You may find them useful, but I typically don’t
Many newer machines have a gluten-free cycle that may or may not be useful for making gluten-free bread. I don’t make gluten-free bread, but I have explored this topic, and it seems that some gluten-free users like using the gluten-free cycle, while others use the basic bread setting. If I had Celiac Disease, I probably would opt for a machine with a gluten-free cycle just to have that option.
Extra Features
Some bread makers have features ranging from a fruit-and-nut dispenser to dual heating elements to very fancy displays. Most of these features are unnecessary. You may find some handy, but if you don’t have them, you can still produce a good loaf of bread.
Programmability
Most machines have fixed programs; some machines allow you to change some parameters of a program, some have additional programs that do a singular function, like kneading or baking, and some machines permit you to write a complete custom program that allows you to control every aspect of the bread-making process from start to finish.
If you have a machine that is working up to spec and plan to make standard breads, like white, whole wheat, and raisin. You don’t need programmability.
I have used a number of programmable machines and have made hundreds of loaves of bread, including many specialty breads, without ever needing to customize or write a program. One exception may be a used machine that is slightly off calibration. If you had such a machine, the ability to program various parts of a baking program may be useful. With that said, I have used machines with slight calibration issues and simply adjusted the yeast or made other easy recipe fixes to achieve a good result.
What has my experience been in buying used machines?
The least expensive place to buy a used machine is a thrift store, where you can often score one for under $10. Next would be Facebook Marketplace. There are some great deals to be found on Marketplace, but you will also find resellers who buy thrift store machines and then jack up the price. eBay is also a viable option, but it usually has the highest prices, plus shipping. However, eBay is often where you can find premium used machines, such as Zojirushi models. Amazon sometimes sells refurbished and used machines via affiliate sellers.
This thrift store special looks pretty grubby, but she was less than $5. I had to rescue her!
A little soap, a little water, and a little elbow grease and she is as good as new!
I have purchased machines from all four venues. Thrifted machines are often very grubby, but typically clean up well with some soap and water. Marketplace machines are usually cleaner, and Marketplace often has newer machines than thrift stores. EBay is variable, but typically these machines are cleaned up and tested in a rudimentary way. The one used machine I bought from Amazon looked brand new, but it was the only one that was D.O.A. Luckily, Amazon has a good return policy.
When possible, I follow the above testing rules. I consider machines under $20 to be a casual purchase, and as long as they seem to be working, I’ll buy them. If a seller expects a high price, I expect the machine to be working at factory specs.
What is the number one problem I find with used machines?
The number one issue that I find with used machines is a slight temperature miscalibration. This usually means the machine is running slightly higher than normal, which can lead to overproofing and, sometimes, a darker crust. I wrote an entire post on how to deal with overproofing (see my March 9, 2025 post). You can always use a lighter crust setting if your crust is too dark, or take your bread out 5 minutes before the bake cycle ends.
Once I know a particular machine’s quirks, temperature miscalibrations become a non-issue.
I have seen more minor temperature miscalibration issues with used Cuisinart machines than with other brands. However, I have also seen these problems with a newer KBS machine, a very old Breadman machine, and a very old Oster machine. I can make excellent bread in all of these machines with just minor recipe tweaks. What tweaking? Again, see my post from March 9, 2026, for exhaustive details.
All the thrifted Cuisinart machines I have tried tend to overproof, likely because their thermostats are slightly mis-calibrated. However, with a little tweaking, I can get them to behave.In this case, all I had to do was reduce the yeast by 1/4 of a teaspoon.
Another issue
I have found a few machines (usually newer ones) that seem to have been programmed for a different market. These machines can be used successfully, but they can be a pain, as each type of bread requires some trial and error. These problems have occurred with bread makers from companies that also sell some excellent machines, so it is difficult for me to give advice on brands to avoid.
In-house, OEM, and OED manufacturing
Zojirushi designs its bread makers and has its own manufacturing facilities. Other premium brands design their bread makers, but then have an OEM manufacturer build them. A more recent trend involves OED manufacturers. These third-party companies not only build a product, but they also design it. That is why you may find nearly identical bread makers sold under several different brands. A company may sell an awesome machine alongside a so-so model, as the models may have come from two completely different OED manufacturers.
I bought a nice, lesser-known KBS machine for under $100, and found the exact same machine selling for over $200 under a different brand name at a different store.
What brands to consider?
Premium brands like Zojirushi, Breville, and Panasonic are built very well and may last longer than those from a more price-conscious brand. I have a Zojurushi Supreme BBCC-X20 from around 2008. This almost 20-year-old machine was purchased used and runs like a new machine. I also have a Panasonic SD-150 bread maker that was purchased new in the 1990s, and it works flawlessly in 2026.
Here is a Zojirushi Virtuoso (top-of-the-line) that I picked up for $70. You may think that is a lot of money for a used machine, but these bread makers retain their value. In fact, the price was low. It works perfectly, but it has some superficial dents, which lowered its resale value.
Every once in a while, I see a post from someone who scored a Zojirushi, Panasonic, or Breville machine for next to nothing. However, these desirable machines are often picked up by resellers and up-charged on sites like eBay.com or sold on ShopGoodwill.com. With that said, I have bought a couple of premium machines on eBay at a reasonable (not bargain) price, and you can too if you are patient and catch the right deal. When it comes to eBay, always check the shipping costs, as I have seen sellers list a machine at a reasonable price only to tag on an astronomical shipping fee.
My wife bought me this Panasonic YD-150 new sometime in the 1990s. It works perfectly in 2026.
Two quality brands you can still find at thrift stores are Breadman and Regal. Both of these brands are built very well, and I have found units from the early 1990s that run perfectly.
Oster has been making bread makers since the 1990s. They tend to be more lightweight (more plastic), but users seem to like them. The same can be said of Wellbuilt. I have never tested a Wellbuilt machine, but it is not uncommon to see people using old thrifted ones on YouTube videos. I also watched videos of people happily using thrifted Sunbeam machines. On the surface, their construction appears similar to that of an Oster unit.
There are many other machines from the past from brands like Toshiba, Toastmaster, and even Betty Crocker. My view is that if a machine passes the simple test I listed above and costs under $20, it is worth giving it a try. Your mileage may vary.
A number of newer brands have emerged, many of which seem to be made by OMD manufacturers. I have tried several KBS machines with good results; however, one KBS machine tended to overproof. I bought that machine on Marketplace for $20, and it looked brand new. The overproofing was easily corrected with a simple recipe adjustment. I have also tried the brands Kitchen-In-A-Box and Osipoto with good results.
I picked up this KBS machine on Marketplace for $20. It looked brand new, but it was overproofing, which is likely why the seller wanted to get rid of it. However, all it took was reducing the yeast by 1/2 teaspoon, and it is now making great bread.
So what do I do? I make most of my own bread and bread products. At this point, making bread takes only 5 minutes. I often rotate my machines for no reason other than that I think it is fun. Yes, a bit weird to think that using different bread machines is fun, but no shaming, OK?
The bottom line is that you can very likely find a working bread maker for very little cash if you shop the used market. It is also likely that you can buy a premium used bread maker for considerably less than new if you take your time and do a little hunting.
You likely don’t need all of the bells and whistles that some bread makers offer, as most of us will only use the machine’s basic functions. However, you may want those additional features if you do a lot of experimenting and recipe conversion. The vast number of bread machine users (based on my watching of dozens of YouTube bread-making videos) make one or two types of bread. Many also use their machines to make dough. Those who are regularly making different types of bread seem to be the exception rather than the rule. Lastly, don’t forget that you can start with a decent used bread maker to test your bread-making chops and to see if using a bread-making machine becomes part of your regular routine. If you then get the itch for a new premium machine, you have lost little in the process.
Happy purchasing!
Mike
This is a gag photo that I sent my wife, telling her that I “accidentally” found myself in a thrift store and couldn’t leave this lonely little breadmaker. In reality, I couldn’t pass up its $5.99 price tag.
Now that I’m retired, I have taken over a lot of the cooking. When our kids were small, my wife did 90% of the meal preparation, but I did certain holidays, like Thanksgiving and St. Patrick’s Day. I did the latter because we would make our corned beef and cabbage meal in a pressure cooker, a tool my wife is a bit uncomfortable with.
In the US, we waste almost 40% of the food that we buy. That is an expensive habit now that we have to deal with inflation, the Trump tariffs taxes, and fuel shortages due to the Iran war.
When our kids were young, they might eat part of a piece of corned beef and a small amount of vegetables. This meant that quite a bit of the dinner was left over. I’m big on not wasting food, but what to do? Repeat the meal the next day? A casserole? I went with option “C,” homemade corned beef hash.
I “winged” a recipe, but it turned out well. In fact, homemade corned beef hash has become a tradition that my kids look forward to. I’ll fry up the hash along with some sunny-side-up eggs, toast made from homemade bread, and (on occasion) fried potatoes as a “breakfast for dinner” meal.
This year, my kids will be visiting us the weekend after St. Pat’s Day. My daughter has already told me that she is looking forward to our traditional hash and eggs dinner. I’ll be very busy this weekend, so I had to do a little pre-planning. I’ll explain that in the photos.
As an aside, this year I made our corned beef in a slow cooker. I posted the recipe and wanted to make the preparation as accessible as possible. More people have slow cookers than Instant Pots. The corned beef turned out great, and the only difference that I could tell was the cooking time. Cooking corned beef in a pressure cooker takes around 90 minutes. Cooking corned beef in a slow cooker takes around 8 hours. However, the end products are identical.
Let’s get into this extremely simple recipe.
Here is the leftover corned beef. Don’t trim off the fat, it is an important part of the recipe.
Cut the corned beef into chunks.
It is easiest to make the hash in a food processor. You want a 50/50 mix of vegetables and corned beef. However, the exact proportions are not that important, so just eyeball it. I’m adding the leftover cooked potatoes, onions, and carrots. I’m also adding a small amount of the leftover cabbage. The cabbage is optional, but I like the additional flavor. Add the corned beef chunks to the vegetables, leaving the processor about half full. Then pulse the mixture until it looks like hash. Don’t overfill the processor, or you’ll get an uneven chop.
Our very old food processor is relatively small (7 or 8 cups) so I did the chopping in several batches.
This is the consistency that you want. Remember, pulse. Otherwise, you will turn the corned beef hash into mush.
As you can see, we made quite a bit of hash. Total prep time? Less than 5 minutes.
I made our dinner on Wednesday, and I won’t fry up the hash until Sunday. It would probably be fine in the fridge, but I would prefer it to be as delicious as possible. Therefore, I decided to vacuum seal the corned beef. Doing this will keep it fresh in the fridge at least twice as long. If I froze it, vacuum-sealing would keep it fresh for up to a year (or more).
Here is the hash after vacuum-sealing it. I like to flatten out the bags as they are easier to store. I’m not sure how many of my kids are staying for dinner. If they are all here, I’ll make both bags. Otherwise, I’ll freeze one for a quick future “breakfast for dinner.”
I believe that my kids prefer the hash dinner to the traditional boiled one. Turning the leftovers into hash not only prevents food waste but also creates a completely different meal. And my homemade hash is so much better than the hash-in-a-can stuff. Give it a try!
It is the day after St. Pat’s Day, but my wife was working yesterday, so we are having our corned beef today.
I almost didn’t use the “Save Money” tag, but I still believe it is cheaper to make this dinner at home than to go out to a restaurant. Corned beef has traditionally been a loss leader around St. Pat’s, but this year it was plenty expensive at close to $40, likely due to inflation, the Trump tariff taxes, and now the war with Iran.
Are the tariffs still a thing? I’m not sure, but prices haven’t gone down. During his first term, the US-based Whirlpool Corporation convinced Trump to impose tariffs on foreign washers and dryers, forcing them to raise prices in the US. However, Whirlpool also raised its prices (I think by $200). Guess what, those prices never went down. But I digress.
A corned beef dinner is one of the easiest dinners to make if you have a slow cooker or a pressure cooker. I often make my yearly corned beef dinner in a pressure cooker, but this year I thought I would go the slow cooker route. Why? More people have slow cookers than Instant Pots, so I felt a recipe using a slow cooker would be more useful.
I’m a big fan of slow cookers. You can buy expensive ones, and they are great. However, you can also get inexpensive ones that will do the job. In my post on 55 ways for seniors to save money on food, I mentioned that you can buy a 2-quart slow cooker for under $20. However, the slow cooker that I’m using for today’s corned beef dinner is a 6-quart one. I bought it for less than $25 a few years ago. It’s basic, but it works.
Slow cookers are famous for dump-and-go recipes, and the variety of dishes that you can make in them is amazing. There is nothing like coming home and having dinner waiting for you. If you don’t have a slow cooker, consider getting one. The higher-priced ones will include features such as timers, high-end construction, and a more precise temperature regulation. However, the cheap ones work well enough. If you have cash burning in your pocket, go with a premium brand; if not, go with a simple unit.
The recipe for corned beef in a slow cooker is simple, so I won’t list out the ingredients separately. Instead, I’ll mention them in the photos.
Add some potatoes. Red potatoes cut into chunks are traditional. However, I had these baby potatoes on hand. Wash and remove obvious blemishes, but there is no need to peel them.
Peel and cut up an onion into big chunks. Toss it into the pot.
Toss in some carrots. I’m using a bag of baby carrots, but you can also use peeled regular carrots cut into “baby sized” pieces.
I’m adding a very light dusting of some seasoned salt. You can use salt/pepper or omit any seasoning, as the corned beef is already salty. I also added a spoonful of garlic and a cut-up celery rib. All of these are totally optional. I just had them on hand.
Here is our corned beef, it is pretty large at over 4 pounds. I was going to make only half (and vacuum-seal the other half), but my daughter will be here over the weekend, and she loves the hash I make from the leftovers.
Put the corned beef in fat side up. Sprinkle the included pickling spices over the corned beef.
The jury is out on whether you should rinse the corned beef or not. I choose to rinse it. Fill the slow cooker to the top edge of the corned beef with liquid. Some use broth, some use water plus beer, I’m just using water today. The pot was so full that I could only get the water halfway up the corned beef. That will have to do.
How do I make the leftover hash? I put chunks of corned beef and the remaining potatoes and carrots in a food processor and pulse for a few seconds. I’ll fry the resulting hash and serve it with some sunny-side-up eggs and hot toast made from my homemade bread. Delicious!
Ready to go! Oh, why the cookie sheet? The pot is so full that I added the sheet as a precaution in case of a boil-over. Yes, the sheet is well-used. It has baked thousands of things over the years. If you see someone with a perfectly clean cookie sheet, they just bought it, or they are a cooking influencer with a budget bigger than mine. This cookie sheet will continue to serve us for many more years. Those aren’t char marks, they are love marks!
There is also a debate on whether to cook on high or low. Since I couldn’t add water to cover the entire corned beef’s side, I’m using high. The important part is to cook it for a long time so it is tender. Generally, that is going to be 8 (or more) hours. Usually, you add the cabbage during the last 1-2 hours of cooking.
The slow cooker was simply too full, so I had to resort to plan B with the cabbage. I quartered the cabbage and removed the core. I placed it in a microwave-safe baking dish. It was a bit crowded, but our microwave isn’t huge, so I couldn’t use a larger pan. I added a couple of tablespoons of water and a little salt and covered the dish with cling wrap. You could also use a covered dish if you had one. I microwaved the cabbage for around 9 minutes. This is a personal preference; you can go a minute or two less for crisper cabbage or a minute or two longer for softer cabbage.
Dinner was delicious. My homemade soda bread turned out well, and the corned beef was super tender. I liked using baby potatoes and may continue to use them on future St. Pat’s Days. For condiments, we had mustard and “horsey” sauce, which is mayo with a bit of horseradish. Add a little butter to the vegetables, and we were all very satisfied. And there is a ton of food left over for me to make corned beef hash.
Using a slow cooker made the process extremely simple. It was a simple dump-and-go dinner. Yet it felt very special and appeared labor-intensive. It was not.
Dear Reader, Happy St. Patrick’s Day! I’m Eastern European, and my wife is Swedish, but on St. Pat’s Day we consider ourselves Irish.
On St. Pat’s Day, we follow tradition and make corned beef and cabbage. I enjoy the combination of corned beef, boiled potatoes, and carrots, so it surprises me that I only make this dinner once a year.
I picked up a corned beef at Costco about a week ago and was shocked by how expensive it was. I guess inflation, the Trump tariff taxes, and now the war in Iraq have impacted the holidays too.
Yesterday, I went to the market to buy the other ingredients for dinner and was mostly successful, except for one item: Irish Soda Bread. I love that massive and somewhat sweet biscuit that masquerades as bread. What to do?
Certainly, I could have gone to another store, but I was feeling lazy. Anyway, making this bread is super simple, so I decided to throw one together. There are many recipes for Irish Soda Bread; the following one is simple and doesn’t involve cutting the fat into the flour. Let’s take a look at the ingredients. This recipe is from Alexandra Stafford.
Ingredients
4 C AP flour (510 grams)
2 t kosher salt (12 grams)
1T sugar (13 grams)
1 t baking soda (5 grams)
1 C dried fruit (optional)
1 egg
1 3/4 C buttermilk
2 T melted butter
Preheat oven to 400° C (205° C)
Mix all of your dry ingredients in a bowl. I’m weighing my ingredients in lieu of using measuring cups, as it is easier and creates less mess.
I added some dried fruit. In my case, cranberries, as we have someone in the house who doesn’t like raisins, which are more traditional. Add whatever you like here. For instance, a small amount of caraway seeds is also a nice addition.
You can buy buttermilk, or just make your own. I’m doing the latter. In a measuring cup, place 2 T of vinegar and then fill the cup with milk to the 1 3/4 C mark. Stir and let this mixture sit for around 10 minutes (or so).
I then added the egg to the liquid and stirred it in.
I did the same with the melted butter.
I combined the wet and dry ingredients, making sure to incorporate all of the flour. The dough will be sticky. Don’t overmix.
I put a little flour on a surface (and also on my hands) and turned out the dough. I kneaded it a couple of times to pull it together, but not like you would work bread dough. I then form it into a disk.
Most recipes use a cast-iron skillet, but I’m using a 9″ pie pan. Make sure you grease the pan. I just used some cooking spray. I cut a fairly deep X in the bread. This is important, or the center won’t bake properly.
Bake at 400° F (205°C) for 35-40 minutes. I only baked mine for 30 minutes, and it was done, so make sure to check it. I let it cool on a rack for about 10 minutes before turning it out of the pan and allowing it to cool completely on the rack. I then wrapped it and froze it for the big day.
Making the soda bread was extremely simple and kept me from having to go to another store. If you make a thicker bread, you may want to make the center a bit more depressed in addition to making an X in the loaf. Otherwise, the center may not be completely cooked.
St Patrick brought Christianity to Ireland, and he is also the patron saint of engineers (who knew?). However, most of us celebrate his day with food and fun. Happy St. Patrick’s Day, everyone!