If you have been reading my posts, you know that I’m a person who likes to get into the weeds. I want to know the why and the how of just about everything. My wife has chided me that I have an autistic brain; by this, she is implying that it just doesn’t function typically. Why is it that I can understand the most complicated concepts, yet I often can’t seem to spell the simplest word? Clearly, my wiring is a bit wonky.
This getting-into-the-weeds habit recently hit on the topic of bread makers (I told you I like obscure topics). I pondered how they had changed over the years and why you could buy a perfectly usable machine for under $100, while others cost as much as $500. In my usual fashion, I not only called upon my own experience but also on any additional information I could locate, to the point of examining teardown and repair videos to better understand the mechanics that made one machine cheap and another expensive. To find out more about this subject, read my previous post (April 16, 2026). It is LONG. Why say something in two pages when you can use twelve!
I’m a psychiatrist, and I understand human behavior. Anytime you compare or rate something, it will create conflicting views and even anger in others. People become invested in their beliefs and can take offense at even mild opposing views. Additionally, there is the phenomenon of confirmation bias, in which humans tend to accept information that supports their beliefs while rejecting information that doesn’t, even if the opposing information is equally or more compelling. Lastly, there is the power of social influence: our peer group shapes how we think. A person who only watches Fox News will have a very different reality than someone who only watches CNN. Both will be biased, but in different ways.
I didn’t think many would read my long September 17th post, but I knew that at least a few would. Given the above, I addressed the many factors that impact purchases, including performance, cost vs. value, construction quality, and the psychological pleasure a product provides. Unfortunately, we now live in a world where people view things in absolutes. Gone is the grey zone where just about everything really exists. In reality, two people can have opposing opinions, and both can be right. My wife has a walk-in closet full of winter clothes, and my winter wardrobe consists of 5 flannel shirts. Who is right? We both are.
Most of the replies to that post were positive, with one strongly negative one concerning my opinion that the Zojirushi Supreme bread maker offered a high-quality product at a lower price point than the flagship Zojirushi Virtuoso bread maker. I was told that I was doing a disservice to suggest this. The commentator felt that the Supreme’s top browning ability was grossly inferior to that of the Virtuoso. My experience with both machines did not support her statement.
Normally, I would have attributed the person’s comment to one of the reasons listed above. But there was a twist. She had used both machines; in fact, she stated that she had used a Supreme for 20 years and was never happy with its top browning capabilities. This wasn’t someone basing their opinion on ad copy or on groupthink. Twenty years of baking experience yield many data points. The tops of my breads were adequately brown, hers were not. Who was right? Possibly both of us. Clearly, I had to pursue this question further.
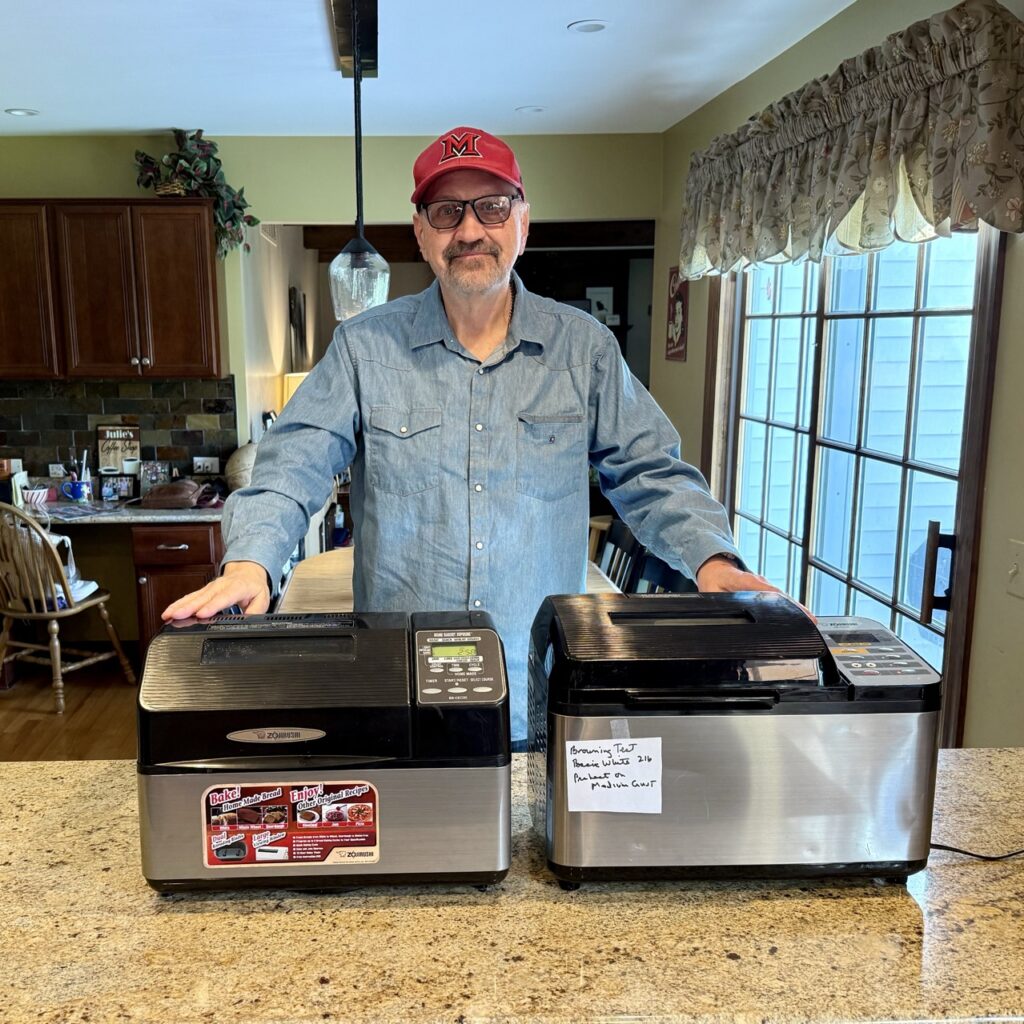
I have made many loaves in both the Supreme and the Virtuoso, but never in a controlled setting. Time to get sciency! Would a controlled bake show a significant difference in top browning between the two models? Would it show a mild difference? How could two observers have such a different interpretation? Dear readers, let’s get into the weeds as we explore history, marketing psychology, and actual data!
History
Bread makers were developed in the late 1980s by the now Panasonic Corporation. Bread makers have not changed much in their basic design from those early days, which is why many early models can still make an excellent loaf of bread.
The invention of the bread maker was made possible by the availability of microcontrollers, which are essentially computers on a chip. Bread makers were among the first home appliances to use microcontrollers, as were high-end microwave ovens. Now, microcontrollers are in almost every home appliance, from refrigerators to blenders, as they have become less expensive and more capable.
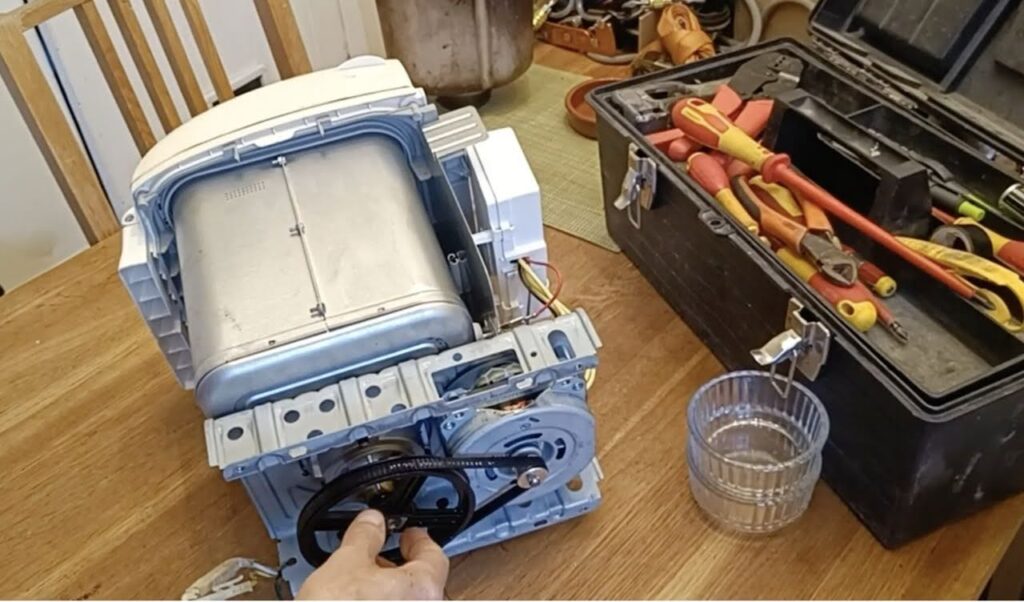
The process of making bread follows a sequence of steps. It would be possible to complete these steps using a wholly mechanical machine. Old automatic washing machines implemented a sequential set of steps using a mechanical timer. However, doing this for a small appliance would have added both bulk and cost. The microcontroller solved these problems.
Early microcontrollers were limited in their capabilities. Programs had to be short. Additionally, electronic displays were expensive, so many early machines had a simple 3-digit LED display with a colon. Over time, both components decreased in price and increased in capabilities, enabling manufacturers to add features at little cost.
When bread makers were introduced, they were considered a luxury kitchen item, since most people bought their bread. However, as they gained popularity, less expensive brands entered the market. This trend has continued to this very day, and it is wholly possible to purchase a machine that makes a decent loaf of bread for under $100.

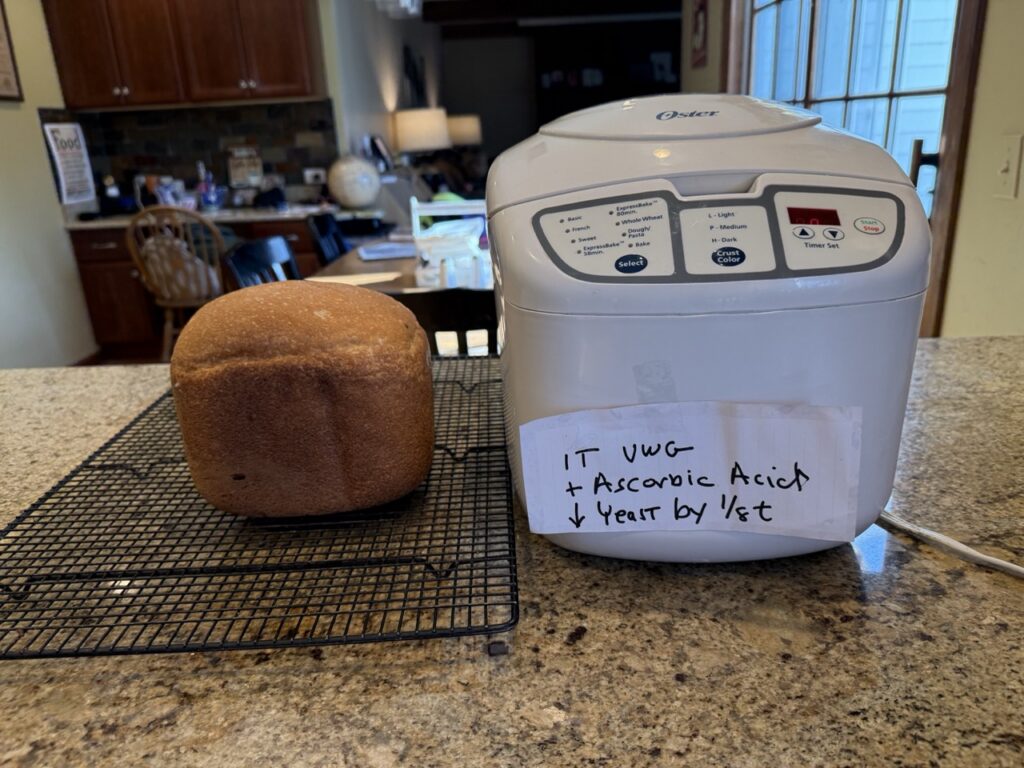
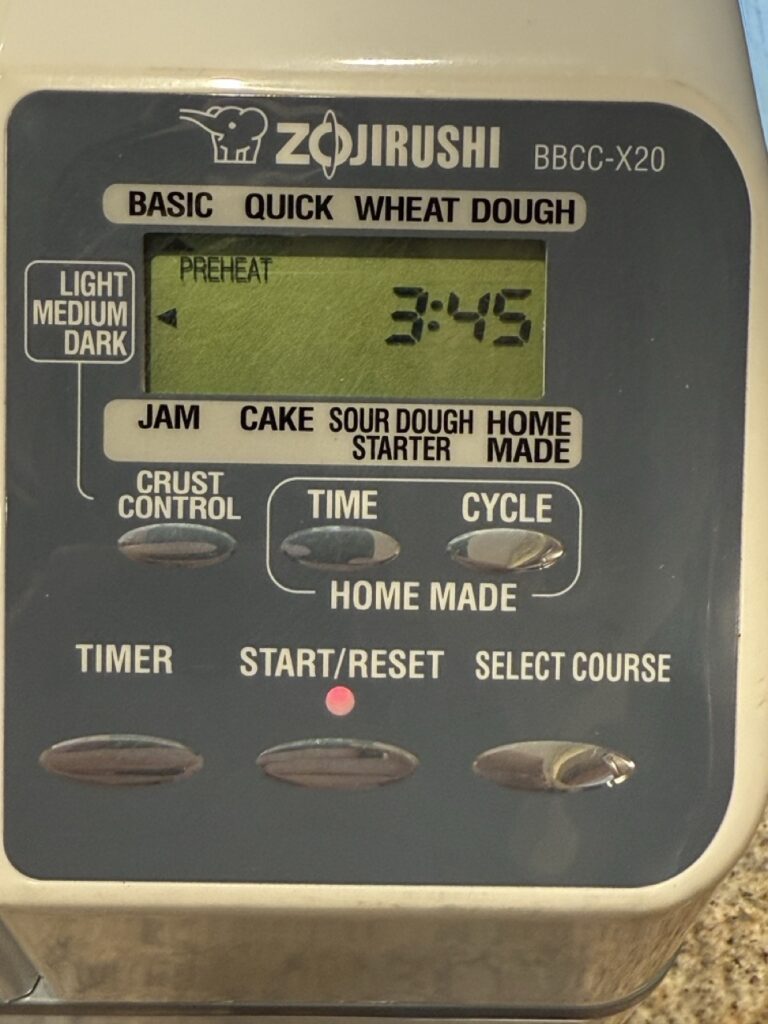
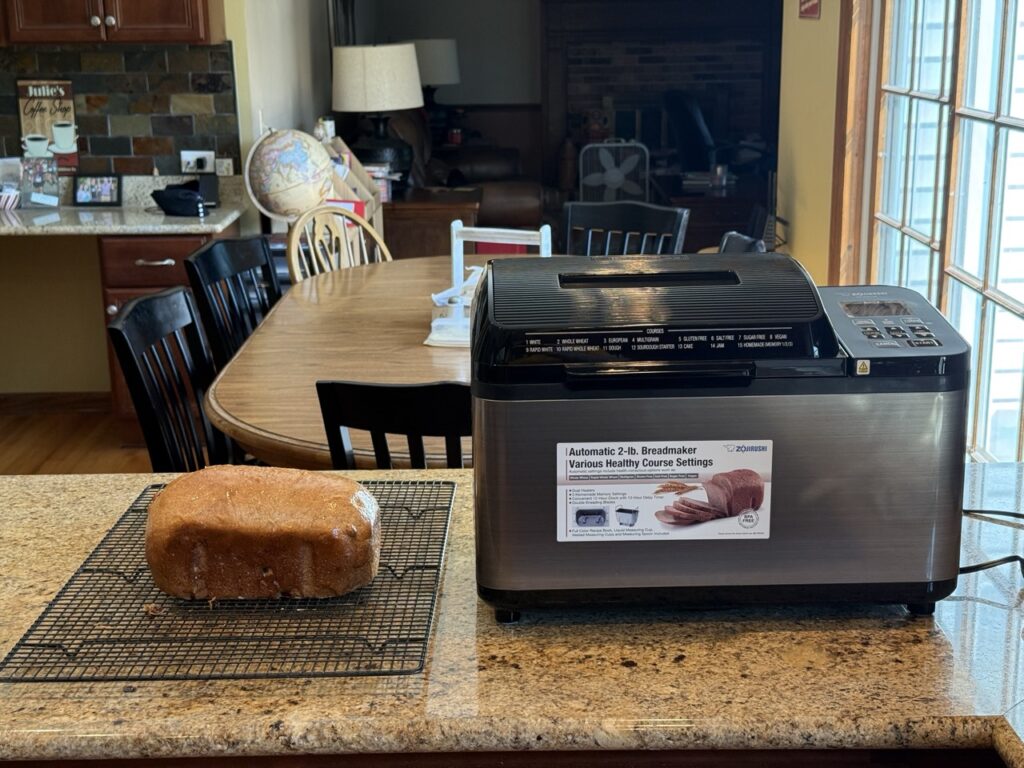
I purchased this fully functional bread maker for less than $50, new. But, can it make a loaf of bread?

Yes it can!
Some newer units have achieved a very low price point by taking shortcuts in manufacturing, consolidating R&D, and using less expensive parts. Over time, the cost of electronic components has decreased, making it cheaper for manufacturers to add value-added features such as additional programs and more informative displays.
Many early bread makers were built to high standards. Ongoing efforts to create more affordable units rely on shortcuts and lower-quality components. However, since the basic design of breadmakers is simple, these units can still work well, but their longevity will likely be lower, and more in line with other current small electrics.
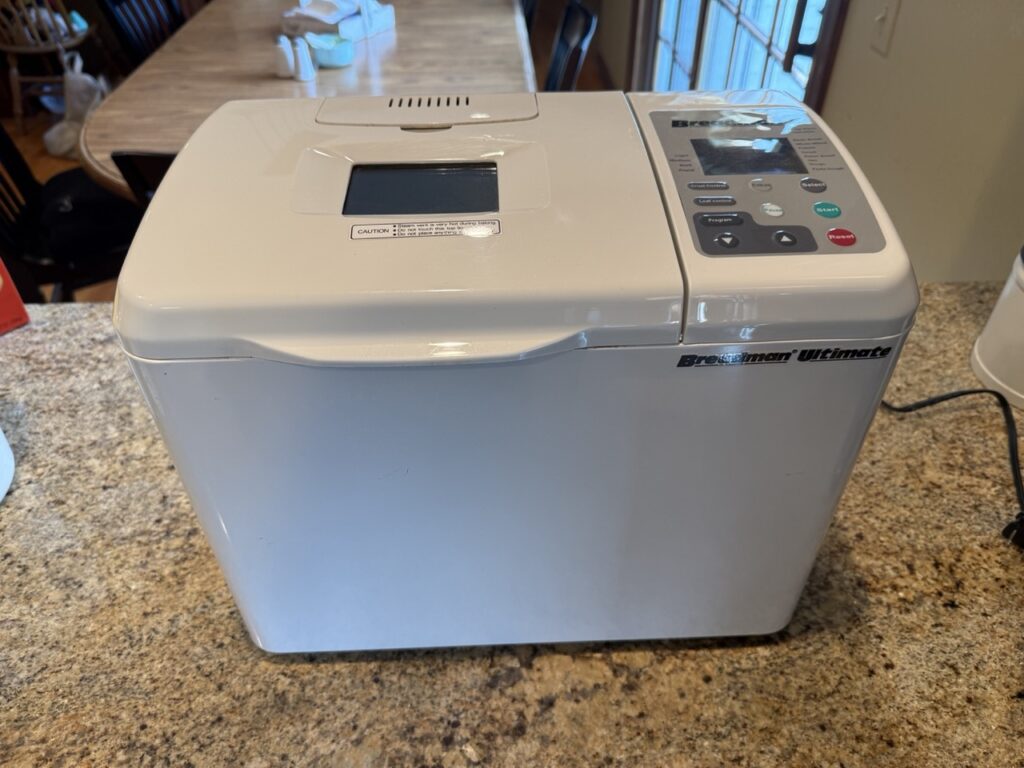
This Breadman Ultimate is from the 1990s. It is built like a tank and offered many advanced features like a fruit and nut dispenser and the ability to modify exisiting programs and to write new programs.
The race to differentiation
Small appliance manufacturers are in business to make money. To make money, you have to sell products. Many options are used to accomplish this goal, and some of those tools are under marketing’s control. Marketing is applied psychology. I could write quite a bit about this, but for now, let’s look at two aspects. The phenomena of “new,” and the phenomena of “improved.” I’m sure you have heard those terms often when dealing with products.
Humans are attracted to both; we are novelty seeking. Bread maker cases can be remade into different or novel shapes or packaged with a different finish, such as stainless steel. These changes would fit into the category of “new.” Additional programs can be added, or bread pans can be re-configured from a vertical to a more traditional horizontal pan. These changes would fit into the category “improved.” It is more important for a product to be perceived as new and improved than for it to really be new and improved. There have been times when these titles have been used to grossly manipulate consumers. Have you ever bought a box of cereal that proudly proclaimed “NEW!” only to discover that what was new was that the box had less cereal in it? That was a new change, but not one that benefited the buyer.

This mid-2000s Sunbeam has a “new” shape very different from the rectangular boxes of the first machines.
Although the design of bread makers has remained the same, there have been tweaks over the years that would fit in new and improved categories. A very common one was adding more programs. Different bread types may do better with different rise or bake times, but how many are really necessary?
Some programs add features that are not bread-related but take advantage of a bread maker’s stirring and heating ability. Examples include jam and yogurt-making functions. Other programs tweak bread-making algorithms. For instance, a whole wheat function may allow for more soaking time or a longer ferment time.
The sweet bread function is present on just about every modern bread maker. Premier Zojirushi bread makers have memory capabilities for different programs, but did not slot in one for a sweet course. Apparently, they felt that this was unnecessary. Another poster (sorry, I can no longer find the post) compared all the Virtuoso Plus’s many courses to the more standard functions of the Supreme. Her finding was that there was little to no difference between breads made with a new course vs. those made with an older course. The only outlier was the gluten-free setting. That makes sense, as gluten-free bread really isn’t a bread; it is more of a cake that uses yeast as a leavening agent.
Manufacturing decision choices
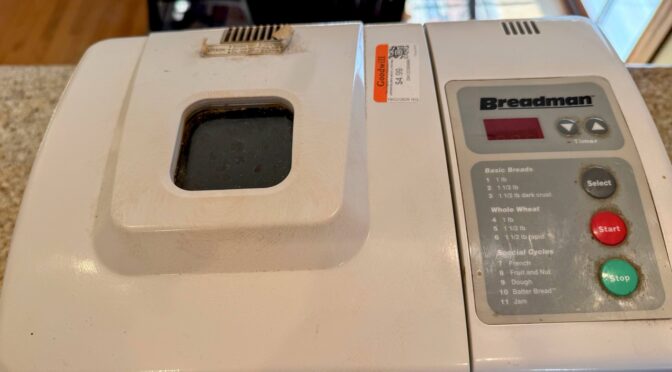
The majority of the original breadmaker manufacturers have either ceased production or opted for cost-cutting measures. Breadman was an innovator in bread makers. The brand is now under its third ownership. I recently tested the Breadman TR520 machine. It makes a decent loaf of bread despite being mostly fantastic plastic. However, it doesn’t compare in innovation or construction quality to the excellent Breadman Ultimate, which I purchased new sometime in the 1990s.

This old Toastmaster still has what it takes to make a good loaf of bread.
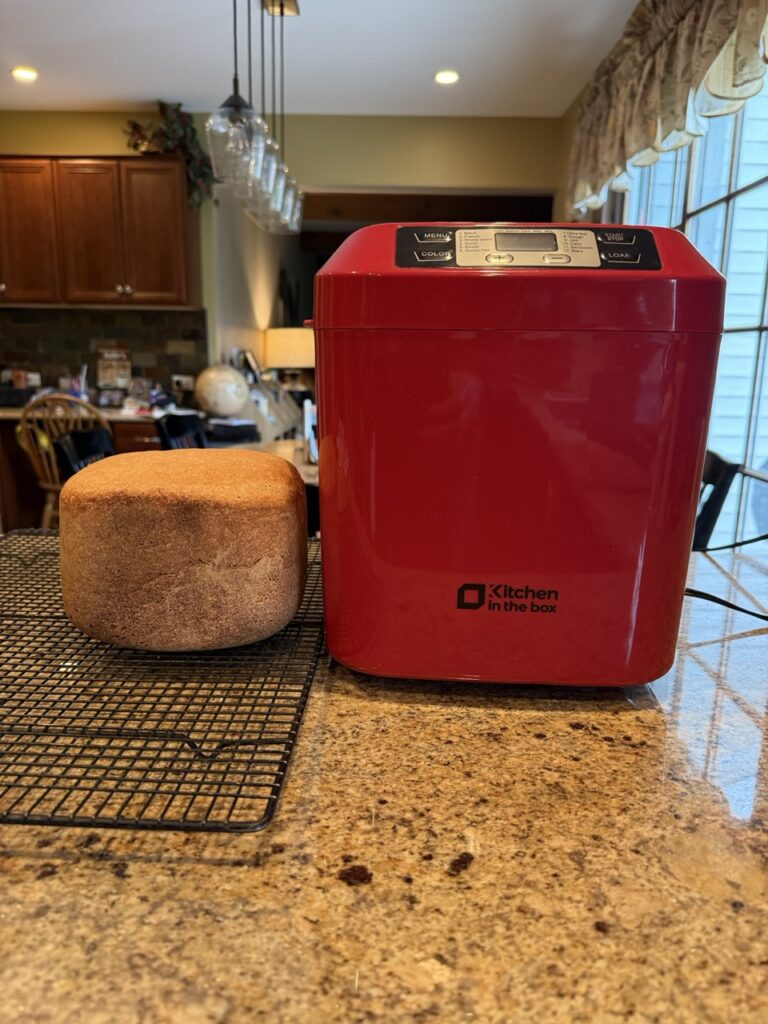
There are many lower-cost Chinese brands on the market that make good bread (I have tested a bunch). How have they been able to do this? Cheaper components, more plastic, and the use of ODM manufacturers. An example of a very inexpensive ODM machine is the BM1333 bread maker, which is sold worldwide under various brand names. In the US alone, I found it rebranded as Kitchen In The Box, Rosewill, and Wolfgang Puck machines. The BM1333 makes a decent loaf of bread, and it is full-featured. However, with regular use, it will likely last only a couple of years before being retired to a landfill (my opinion). For many, that is good enough.

The BM1333 bread maker is sold worldwide under different names. In the US, I found it sold under the Kitchen In The Box, Wolfgang Puck, and Rosewill brands. The inner workings are very basic, but it still can make a decent loaf as the base bread making technology hasn’t really changed.
A different approach
A few manufacturers have decided that quality is the way to go. Notably, they are Panasonic, Breville (branded Sage in Europe), and Zojirushi. From everything I can research, these machines are still being built to the high standards of the bread machines of yore. You are going to pay much more for a machine with high-quality components that was designed by that company rather than an ODM manufacturer. What do you get in return?
Is the bread better? Taste is subjective, but there is some evidence that the loaf structure is better.
Will the machine last longer? Most certainly.
Will it have more innovative features? Possibly, depending on the manufacturer.
What you are paying for is a machine that will probably last longer with regular use, which may offer some advantages to the loaf itself. Yes, premium bread makers are worth the extra money, but not everyone has the extra money. Cheap bread makers offer reasonable options for cost-conscious individuals.

Breville, along with Panasonic and Zojirushi, have continued to make very high-quality machines. Naturally, you will have to pay the price to own one.
What is Zojirushi’s philosophy?
I am not a mind reader, so I can only speculate. Zojirushi has avoided some potentially useful features, like a fruit-and-nut dispenser, while embracing others, such as the ability to write custom bread programs. They have an overall superior build quality. I believe they are targeting the elite customer. That person who has a little cash to burn, who will only settle for the best. A second client would be the serious bread maker who bakes regularly and plans to keep baking for a long time. In other words, a “Buy once, cry once” type buyer.
Everything about Zojirushi bread makers echoes this philosophy, from the size and weight of their machines to the quality of their bread pans to the thoughtfulness of their recipe guide. Unfortunately, Zojirushi buyers represent only a small segment of the market. A segment that will likely keep their machine for a long time. Shunning planned obsolescence puts Zojirushi at a disadvantage.
What can Zojirushi do?
Pivot on its strengths. Use its marketing muscle. Emphasize its premium status. Entice existing customers to upgrade.
Premium brands can command a premium price based on the perception that they are premium. At times, charging a premium price elevates a product in a customer’s perception. A prestigious college will charge an exorbitant tuition, a T-shirt will be tagged at an astronomical price because of a graphic or logo, or a trendy restaurant will command big bucks even though it is serving the same Sysco food as the less expensive eatery down the block.
Companies can intentionally cripple their cheaper offerings to encourage upselling. I bought my first DSLR, a Canon Digital Rebel (300D), in 2003. That camera was the first sub-$1000 DSLR to hit the market. In many ways, it was a clone of the much more expensive Canon 10D. It could potentially do many of the same things as the 10D, but they were intentionally hobbled on the 300D. If you wanted those features, you had to pony up to the much more expensive camera.
I’m not saying that Zojirushi does the above tactics. I’m just noting them as they are common practices that manufacturers do to sell their products.
If you have invested in a Zojirushi bread maker and use it, you are likely happy with it. It will probably last a long time, so the need to replace it will be low, unless there is a compelling reason. Perhaps a design change that makes it look more modern, like a stainless steel case? Maybe adding a few more features, like additional custom programs? So many cheaper brands feature a dozen or more programs for special options like soft bread and sandwich bread. It looks like the good people at Zojirushi took notice, but with a twist. They still don’t have a sweet bread course, but their top-of-the-line model offers exotic options like Multigrain Bread and Vegan Bread. Just between the two of us, how different is the program of the Multigrain Bread course from the Whole Wheat course? And to be honest, I often make excellent bread using water and olive oil, using the Basic Bread course. That sounds like vegan bread to me.
The Zojirushi Virtuoso Plus updated the Virtuoso with a cleaner user interface. It also offered a number of new courses (programs). However, how varied are they under the hood? Your opinion may be different.
I want to emphasize that Zojirushi has valid reasons for charging more for its products than lower-cost brands.
-They do their own R and D instead of relying on an ODM manufacturer. That is expensive.
-As a well-known brand, they do marketing. That is expensive.
-Their components and construction seem to be of much better quality than those on less expensive machines. That is expensive.
-They maintain their own manufacturing facilities, where many other small appliance companies use third-party manufacturers. That is expensive.
-It appears that they have their own recipe testing facilities and don’t just copy and paste recipes from other sources. That is expensive.
-They invest in the entire experience. Even their operating manuals are beautiful. That is expensive.
-They have repair facilities, where when other machines “die,” they are simply discarded. That is expensive.
-They stock replacement parts for their machines. That is expensive.
Are the Supreme and Virtuoso significantly different from each other?
Companies use similar components across different models because it is the most cost-effective approach. Why buy and source two different motors that do the same thing when economies of scale would tell you that it is more cost-effective to use the same component in multiple models?
However, if a product has been on the market for quite some time, a company may make design tweaks. Perhaps a motor shows excessive bearing wear, so a different model gets subbed in. Maybe a heating rod can be found that is equivalent, but at a lower price. How about making a small change in the diameter of the paddle’s mounting post for slightly better torque or durability? Usually, these changes have little significant impact on the end result unless they are implemented to correct a design problem. Additionally, some manufacturers substitute a less durable component for cost reasons or to create a planned obsolescence scenario. There is the famous story of Henry Ford sending his engineers to junkyards to see which parts of his cars were still in good shape. It turned out that the radiators were, so he purposely designed them to fail sooner. However, cheapening products would be contrary to Zojirushi’s philosophy of designing high-quality products.
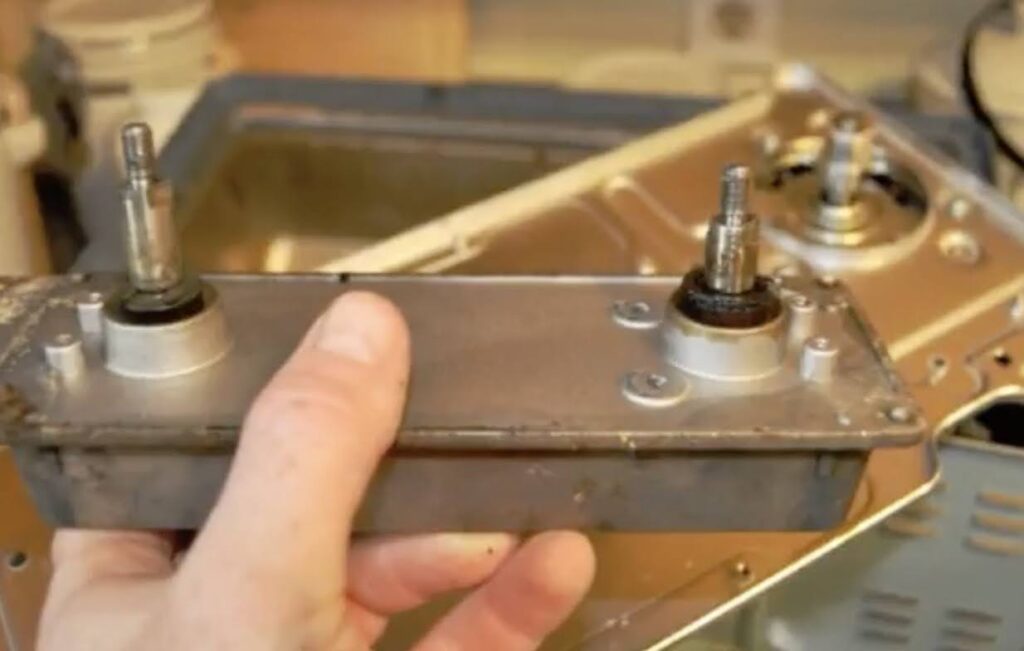
Available specifications suggest a strong similarity between the Supreme and Virtuoso machines. Their motors are the same wattage; their heating capabilities are very similar (600 vs 640 watts); their pan mounting mechanisms are identical; and so forth.
So are you saying that they are the same machine?
No, just looking at the two will show you that they are similar in design, but hardly identical. The Virtuosos is larger and bulkier. The lid is completely different, and the bottom heating element is configured differently. The control interface differs, as do several design and operating tweaks. That said, they are both very high-quality pieces of kit with many similarities.
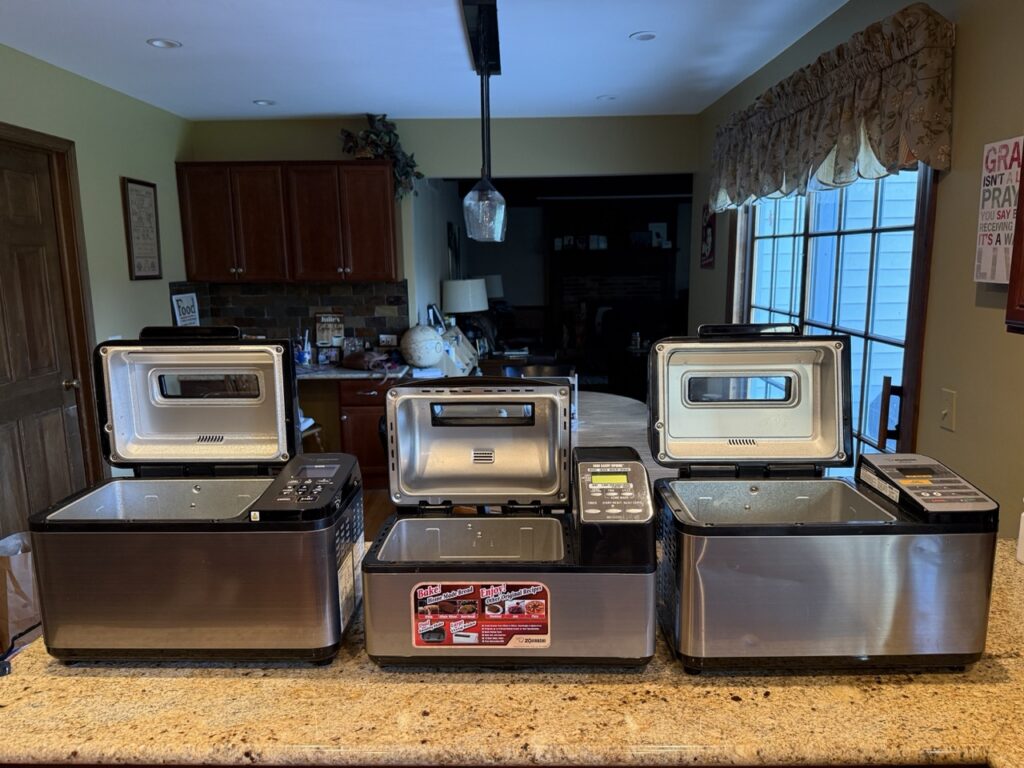
Here is a Zojirushi Supreme flanked by a Virtuoso Plus and a Virtuoso. It is clearly smaller but carries many of the design cues from its more premium relatives.
Mike, can you finally talk about that lid heater?
In my September 17, 2025, blog post, I stated that the lid heater offered a marginal improvement in overall browning compared to bread made in a Supreme bread maker. I didn’t find the lid heater compelling enough to upgrade on its own, in my opinion.
Every bread maker has a way to brown the top of their loaves. All bread makers use an inner metal lid to capture heat and radiate it back to the top of the loaf. Different bread makers achieve top browning through one or more additional methods:
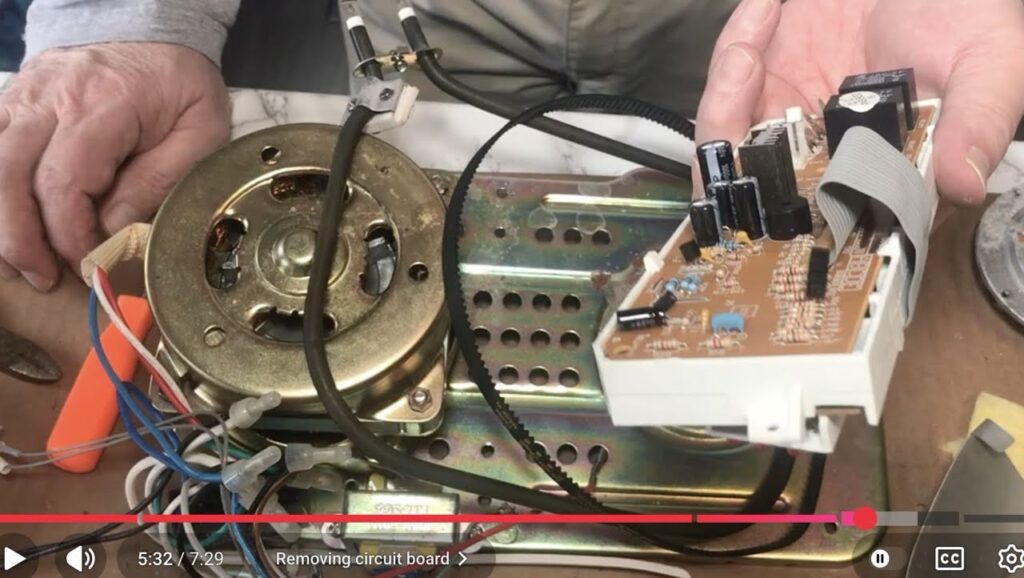
- A single heating element is located at the bottom of a bread maker. Heat from that element rises and is drawn upward by a vent in the lid.

This is an example from the Breadman Ultimate. Clearly, this very simple system can brown the tops of a loaf. This is a very common method for top-browning.
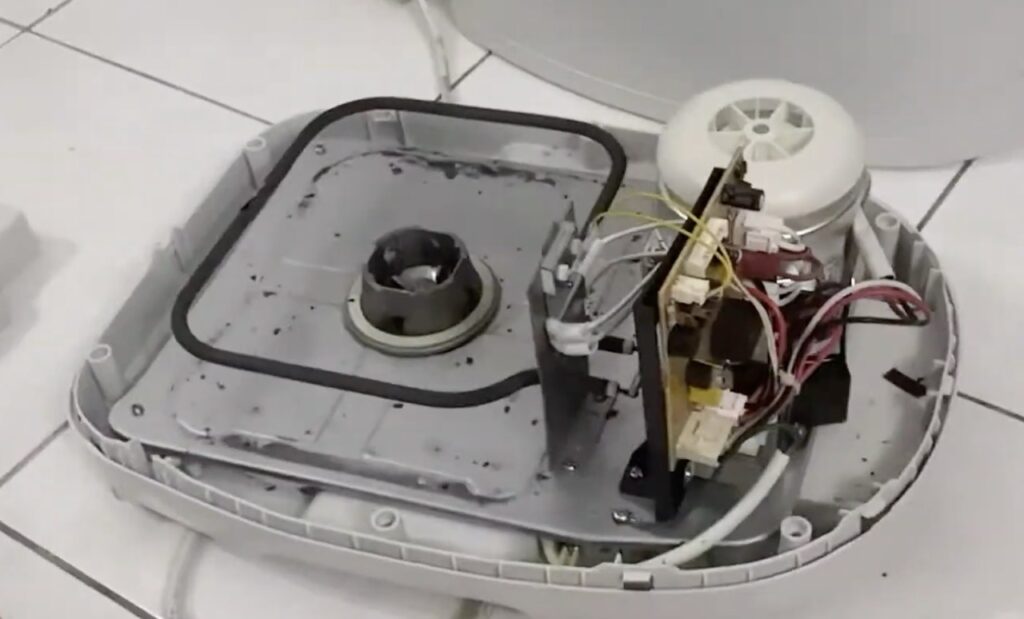
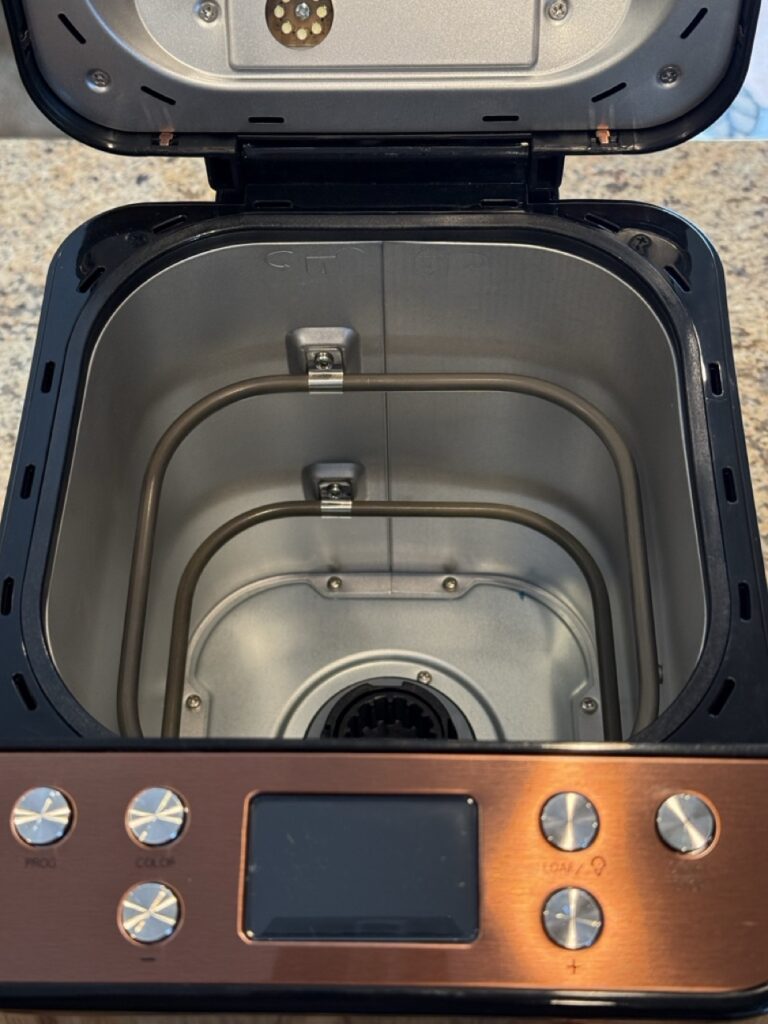
- Slots are opened in the top separator between the oven pan and the outer wall of the bread maker. Corresponding slots are made in the lid of the bread maker. Air heated in this space rises passively and is channeled into the lid. This is the method the Supreme utilizes. It is combined with option #1.

This Panasonic uses slits between its oven and outer walls to direct heat to the lid. This is likely the most common way bread makers brown the top of loaves, and it does a good job. The Zojirushi Supreme also uses this method.
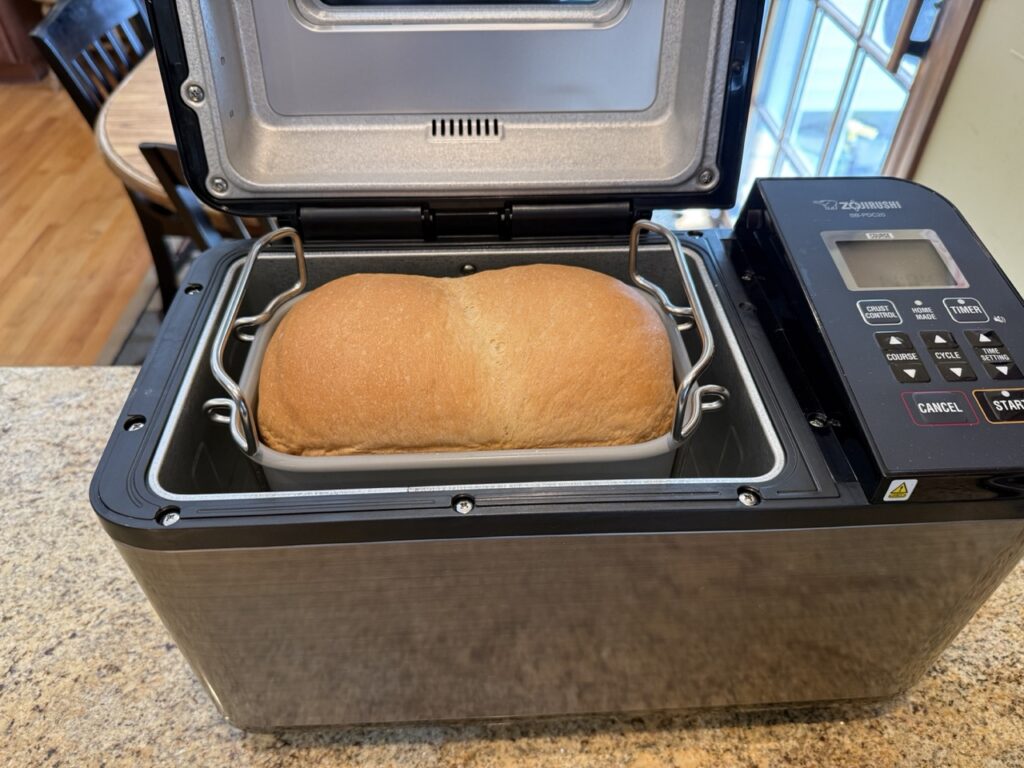
Here you can see the Zojirushi Supreme in action. It has made a beautiful loaf.
- Two separate heating rods are incorporated at different levels of the bread pan to improve temperature uniformity in the bread oven. Additionally, option #1 and option #2 are also incorporated.
This Rosewill unit incorporates twin heating elements. In addition, it also uses methods #1 and #2.
Another beautiful loaf. I don’t see a particular advantage to the baking process/top browning compared to the other methods listed above. However, Rosewill notes that it bakes a bit faster using this two-heating-element design.
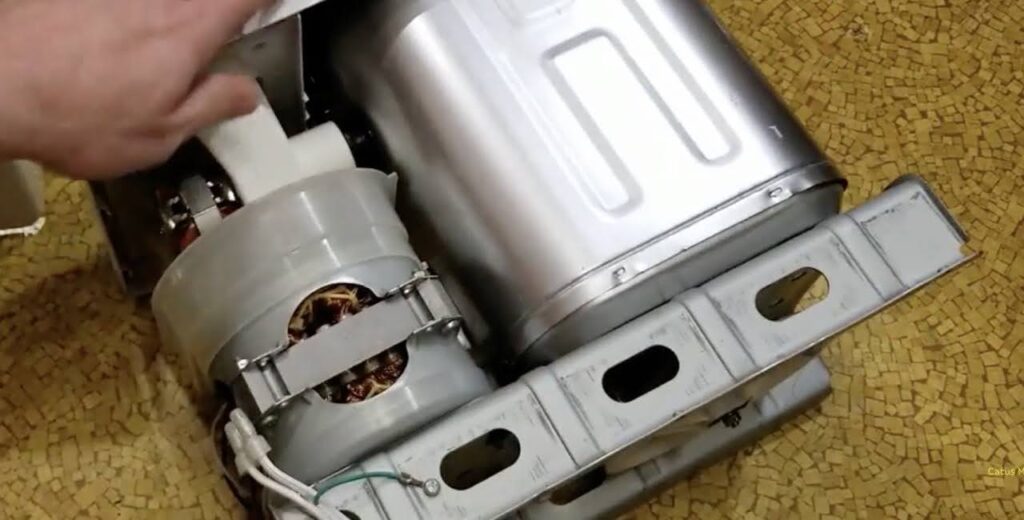
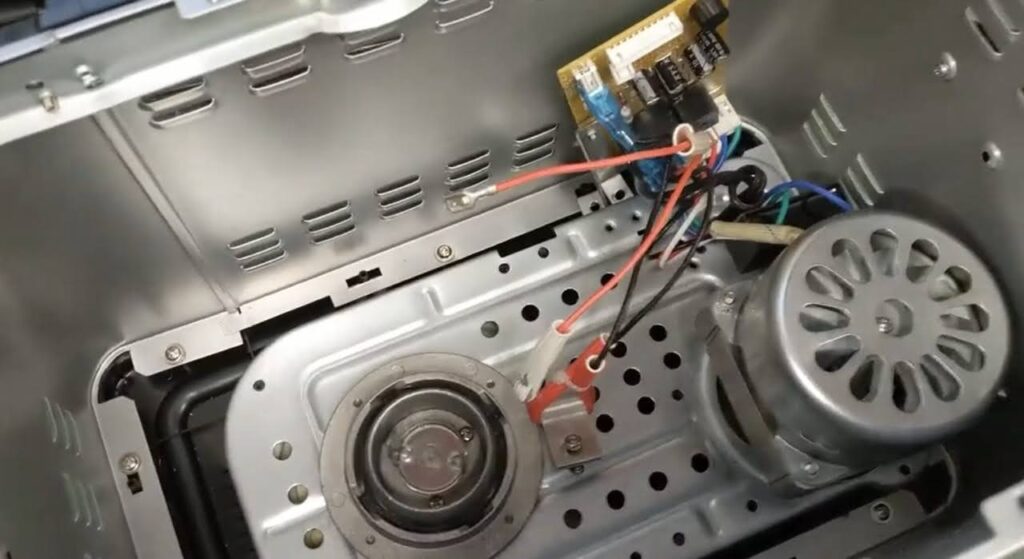
- A small accessory fan is incorporated to circulate and mix the air in a style similar to a convection oven. Additionally, option #1 (and sometimes #2) is used in this configuration.

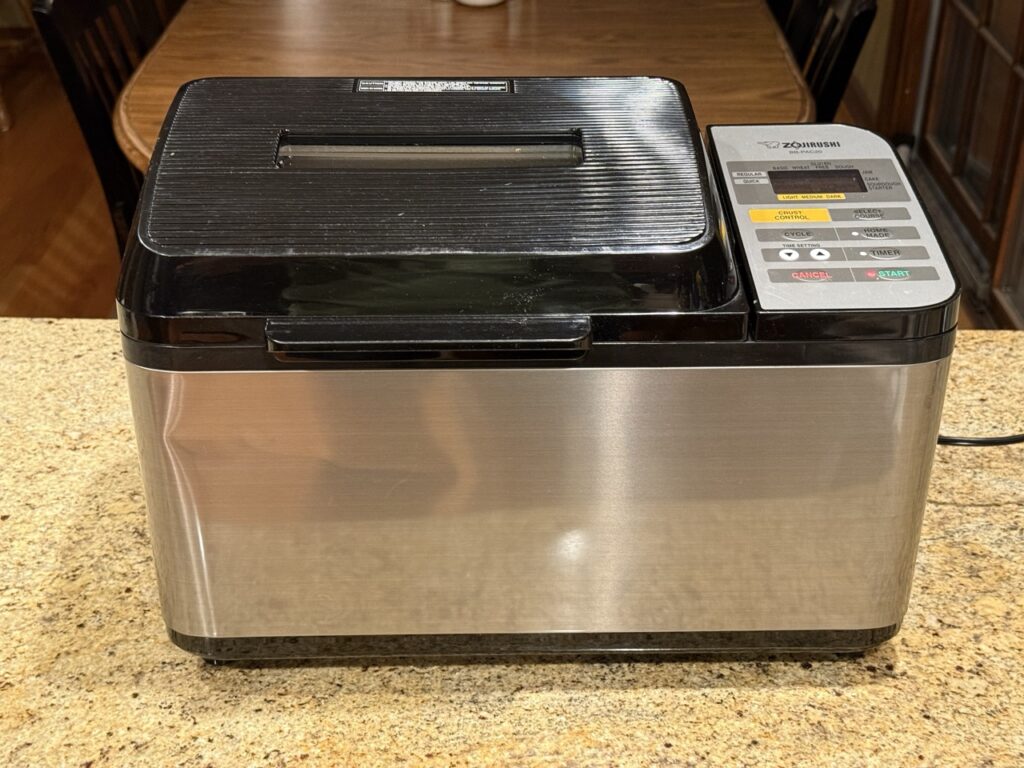
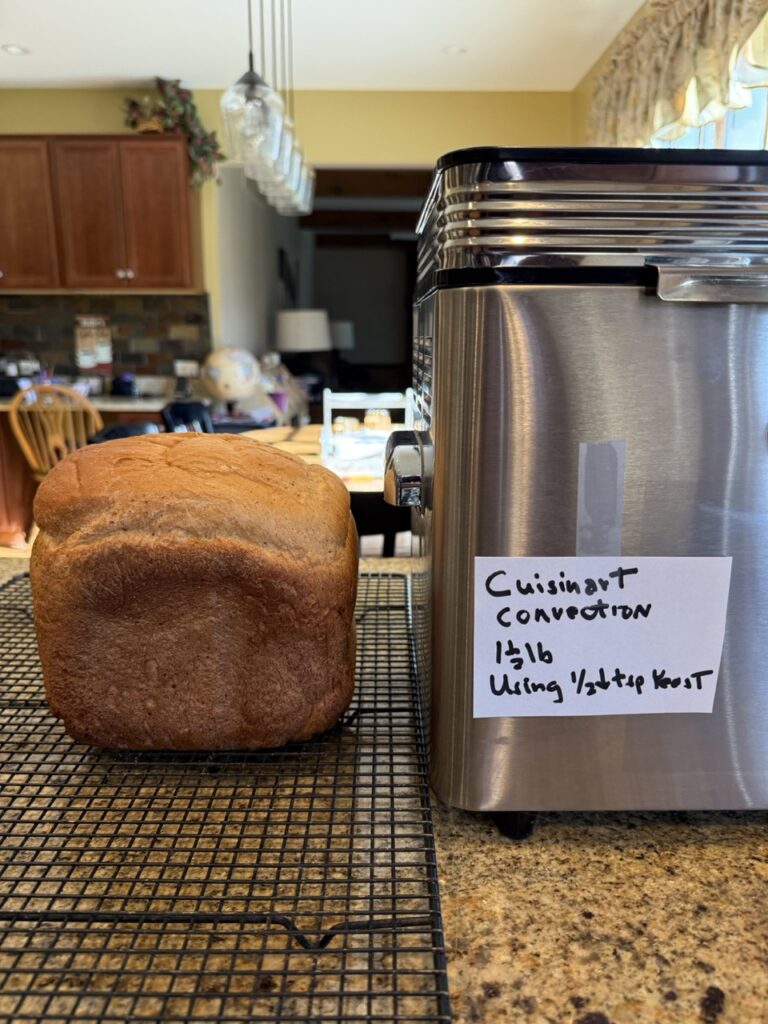
This Cuisinart unit uses a small fan to turn its oven into a convection oven. It also uses method #1. The idea of using a fan isn’t new, Oster had a machine in the 1990s that had a convection fan.
- A secondary heater can be placed in the lid of the bread maker to help brown the top of the loaf. This is what the Virtuoso does. Option #1 is also utilized, and is likely the main source of top browning.

The Zojirushi Virtuosos (Plus) uses a 40 watt heater in its lid plus the method used in #1.
The Plus does a nice job browning the top of a loaf, but is it objectively better than the other methods?
Mike, do you think that Zojirushi deliberately made the Supreme’s top browning capabilities worse to sell more Virtuoso machines?
No, that would be contrary to their branding. Anyway, if you can buy a decent Chinese bread maker for less than $100 that browns the tops of breads perfectly well, it would not be in Zojirushi’s best interest to make a $350 bread maker that performs poorly. However, I’m getting ahead of myself. I need to construct an experiment to demonstrate whether my hypothesis is correct or incorrect.
The hypothesis
The Zojirushi Supreme does an acceptable job in browning the tops of bread.
We are interested in comparing options 2 and 5. Also, why isn’t option 5 used by other manufacturers? The most obvious answer is that options 1-4 provide sufficient browning, often at a lower cost. However, other issues are at play. Let’s explore some of them:
The heater in a Supreme has a power rating of 600 watts. The bottom heater in a Virtusos is 600 watts, while the top heater is only 40 watts. That is roughly a 6% increase in heating power. In other words, the top heater provides a heat increase roughly equivalent to a 40-watt refrigerator/appliance light bulb. An Easy-Bake oven requires a 100-watt light bulb to bake a tiny, thin cake in a minuscule oven. The average mid-sized slow cooker uses between 150 and 200 watts. Forty watts does not provide much heat, only about 136 BTUs in an hour, compared to the 600-watt heater, which produces 2027 BTUs in an hour (almost 15 times more heat). The majority of any browning action will be accomplished by the main heating element, not by the extremely puny 40-watt lid heater. It’s possible the designers realized the additional size/build of the Virtuoso needed that extra small boost.

You can see from this specification sheet that the Virtuoso model’s top heater is a very small 40 watts, and that most of the baking is done by the main 600-watt heater.

The power requirements for the Supreme are similar to the Virtuoso, with a 100 watt motor and a 600 watt main heater.
You may ask why Zojirushi didn’t use a bigger lid heater? I can only speculate, as a larger heater would certainly have a greater impact on top browning. However, doing so presents engineering problems:
- A powerful top heater may make it more difficult for end users to use recipes that have not been specifically calibrated for it.
- A powerful top heater could pose a fire hazard if the dough came into contact with the lid.
- A powerful top heater could melt the plastic lid. If the lid were changed to metal, it would then become a burn hazard (users touch the lid a lot). If extra insulation were added to the lid, it would increase the lid’s cost and make the unit even bulkier. The Zo’s are already huge; few people desire an even bulkier bread maker. Additionally, adding insulation would likely require a redesign of the entire unit, resulting in greater expense with little actual performance gain. Remember, I have already shown that simpler designs produce nicely brown breads.
What can be expected from a light-bulb-level heater that adds 6% more heat? Well, hmm.. Perhaps a slight increase in even browning.
The experiment and choice of test equipment
The original Virtuoso and the Supreme list detailed timing information for their courses. For white bread, they are very similar, with slightly longer fermenting times being used by the Supreme. There is also a slight variance in the amount of yeast used. This suggests that the Virtuoso uses a slightly different fermenting temperature, but it is pretty close to those used by the Supreme.
Why not use the newest Virtuoso Plus, which I also have? The Virtuoso Plus manual removes precise course time information. Why would they remove such information? It’s possible that several of the new courses are very similar to each other. Was the addition of some of these courses based on adding useful features, or was it a marketing decision? I don’t know.

The Original Virtuoso includes timing details about each cycle. Very useful information if you want to write a custom course (program).

The Virtuoso Plus eliminates this information.
I always weigh my bulk ingredients, but measure light ingredients like salt and yeast. I believe the degree of error of kitchen scales is significant when weighing items under 10 grams. However, I do possess another scale that registers with a 10-milligram resolution (0.01 grams). For this experiment, I’ll weigh any ingredient under 15 grams using that scale rather than measuring spoons. Additionally, I have checked the accuracy of both scales using standardized weights. They are home-use scales, not lab equipment. However, they are both accurate enough for this test.
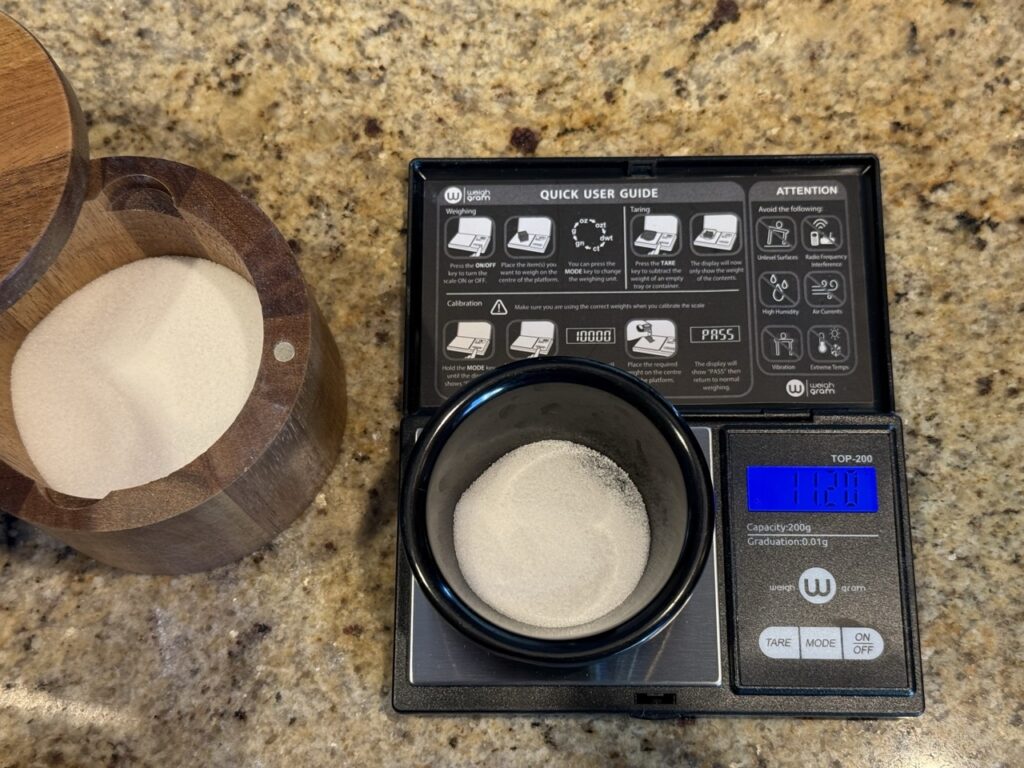
I used a precision scale for any ingredient that weighed under 15 grams. This scale has a resolution of 0.01 grams (10 miligrams).
I’ll use Zo’s white bread loaf as listed in their manuals. The only difference in the recipe in the two manuals is a tiny change in the amount of active yeast. This is likely due to the slightly different fermenting temperatures of the Virtuoso.
I don’t have access to an instrument-grade colorimeter, so I made my own manual one. It will act as the browning standard for this experiment. Due to design limitations, its resolution is set in 10% increments.

I didn’t have access to a colorimeter, so I made this manual one so I had a physical standard to compare the bread tops from the Supreme and Virtuoso machines.
Lastly, the breads will be made simultaneously to negate any environmental differences.
Let’s begin!
Let the experiment begin!

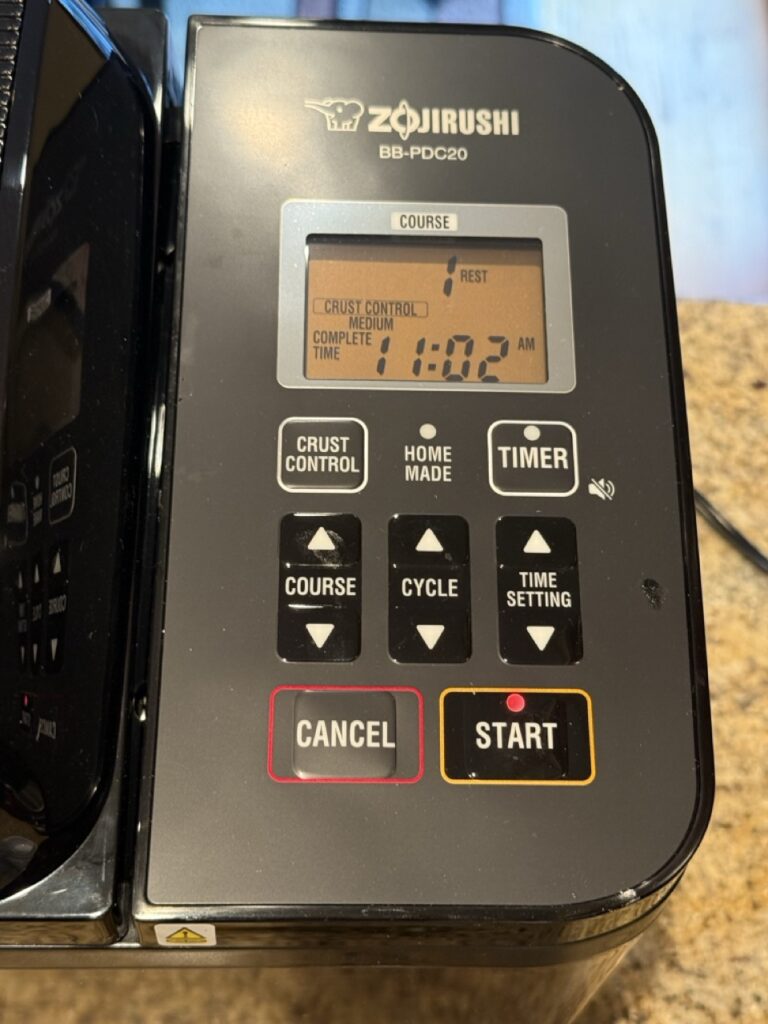
Both machines were set to the basic course, medium crust, with preheat on.

The standard ingredient loading protocol was followed, and each bread pan was loaded identically. Ingredients were the same, except for a slight variation in the yeast per each manual’s instructions. The Virtuoso may have a slightly higher fermenting temperature.
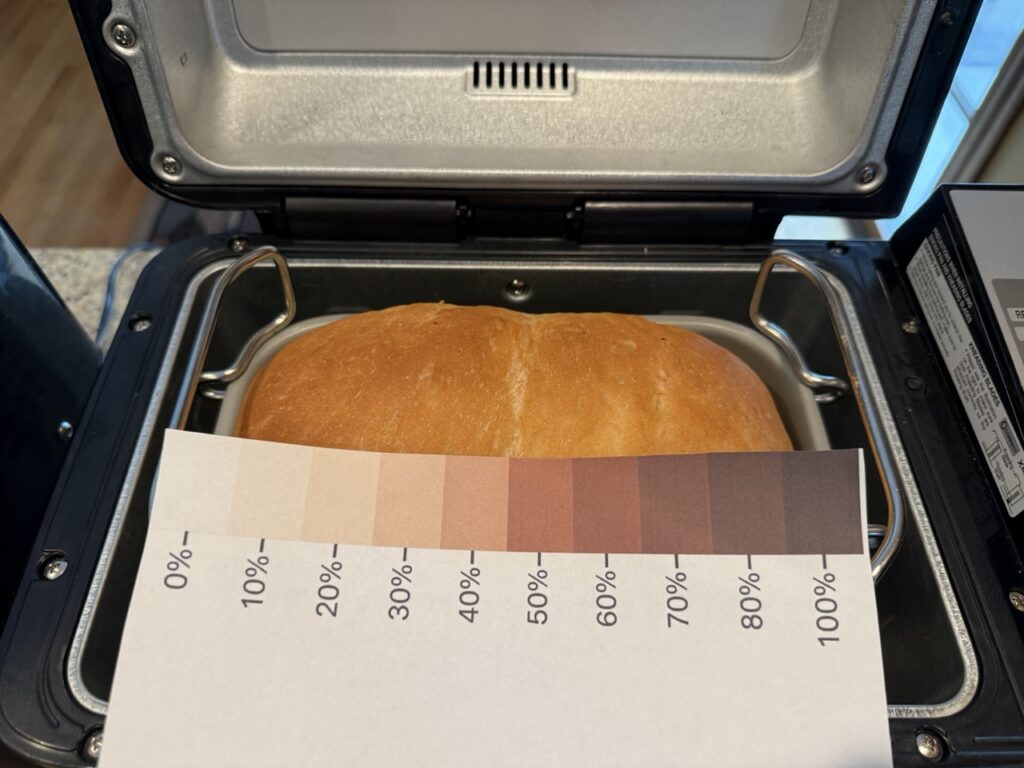
Here we have the loaf from the Zojirushi Virtuoso. I would say that the level of browness is around 45%. Note the camel hump pattern which is common with two paddle machines.
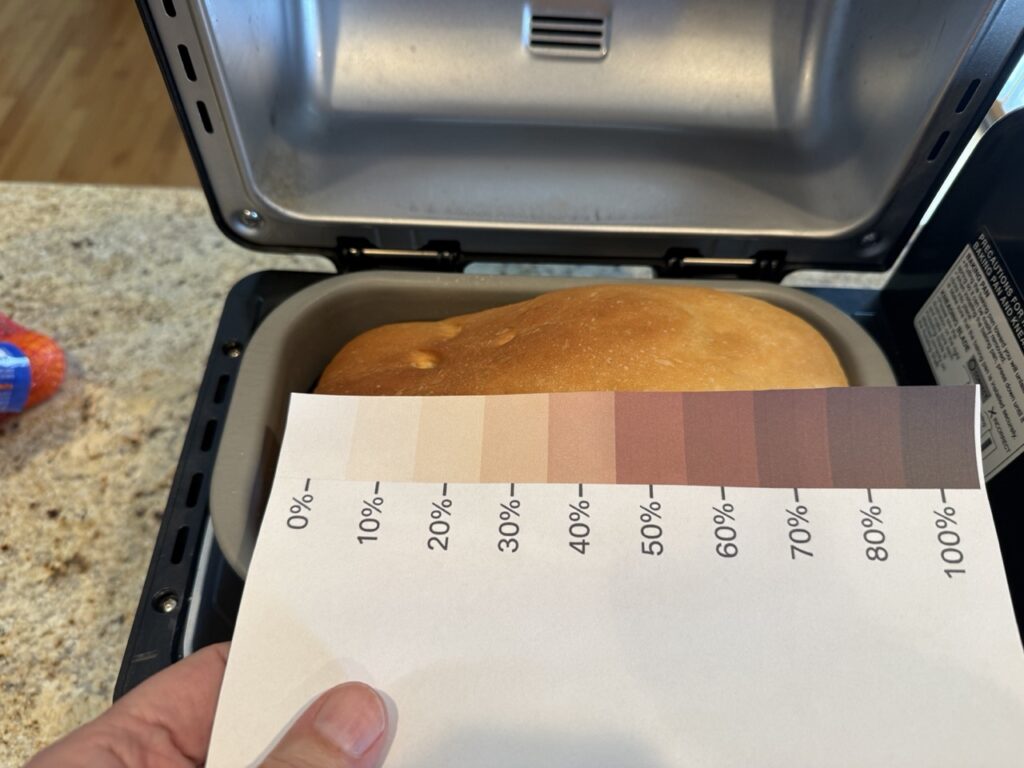
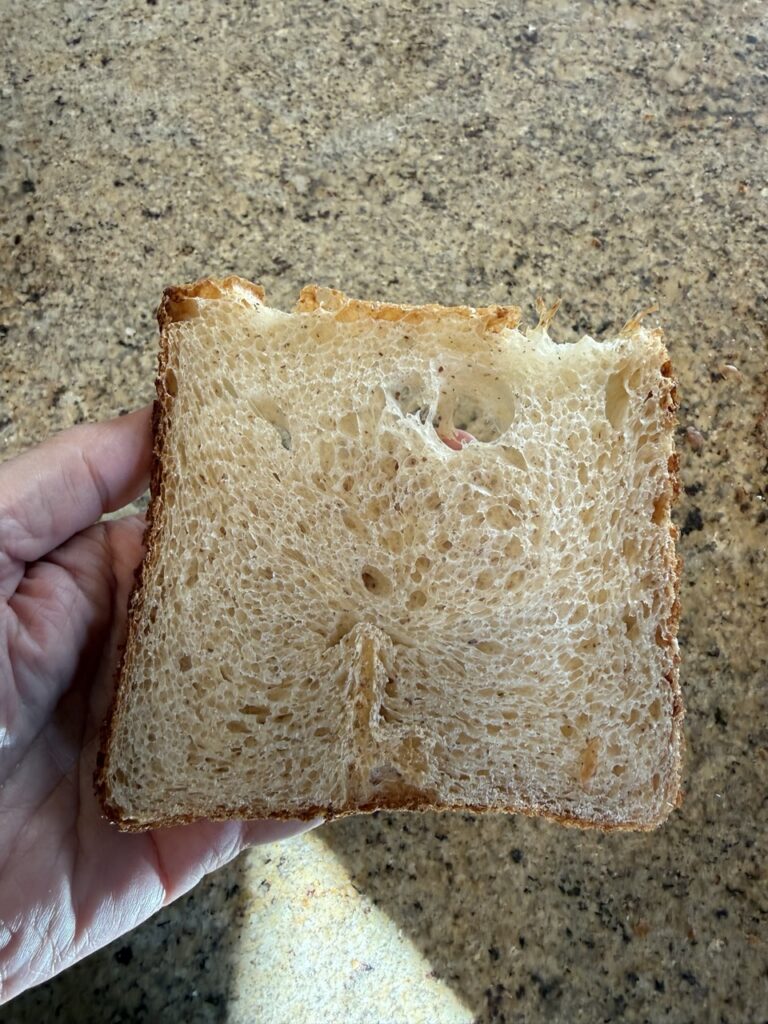
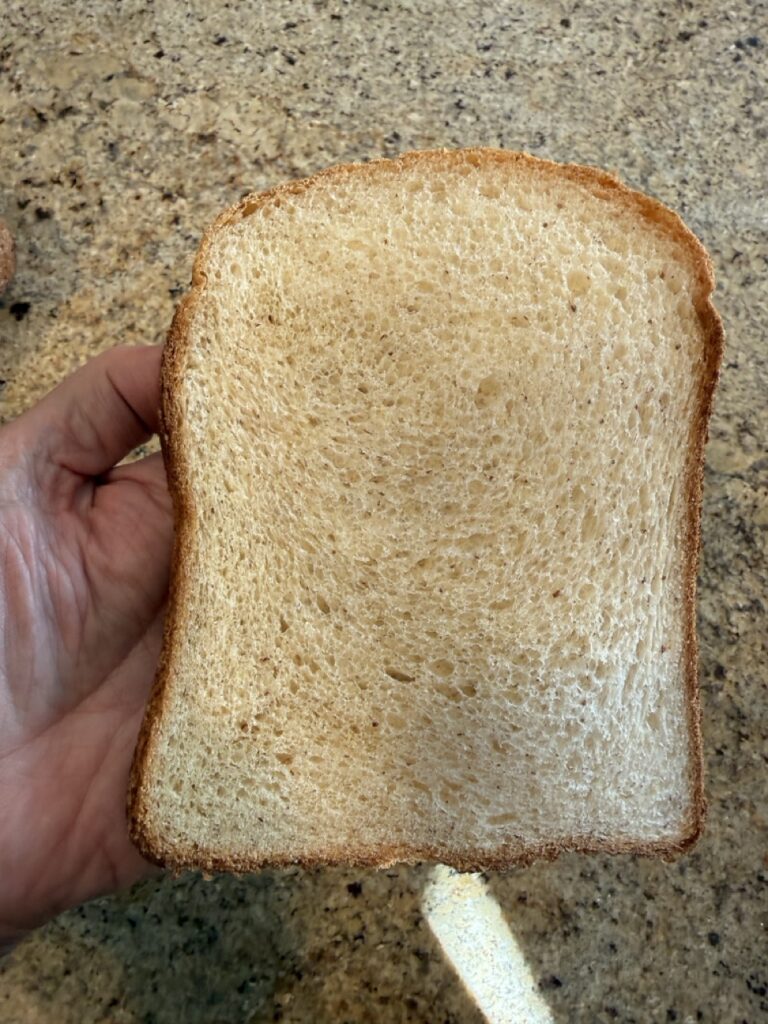
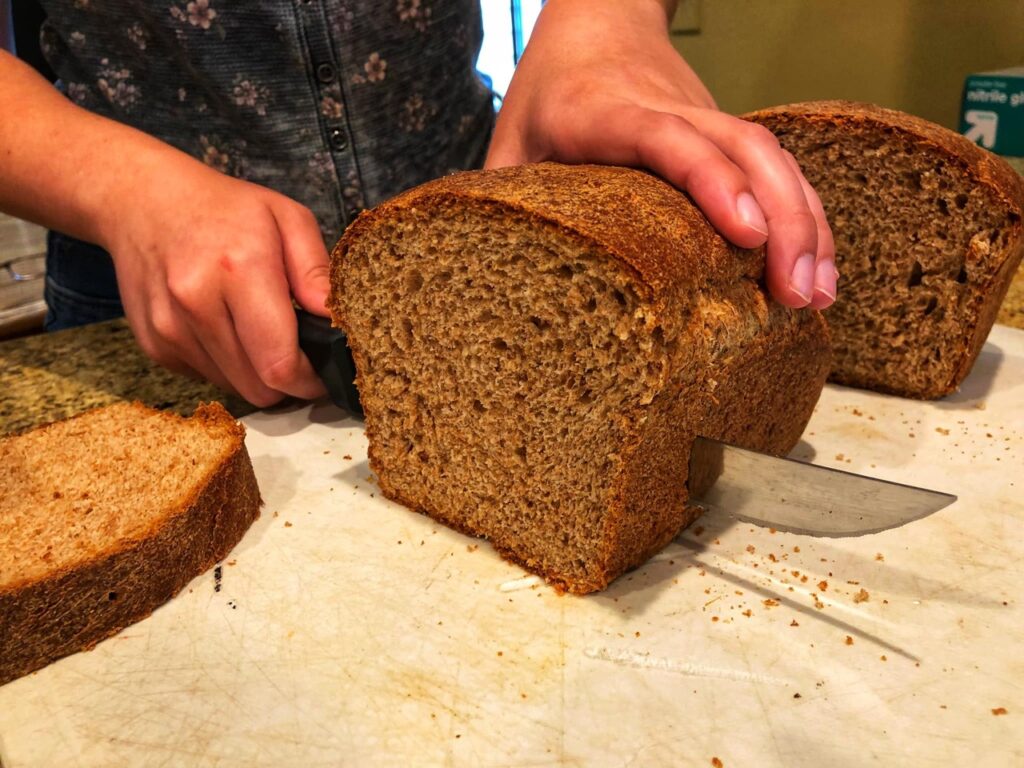
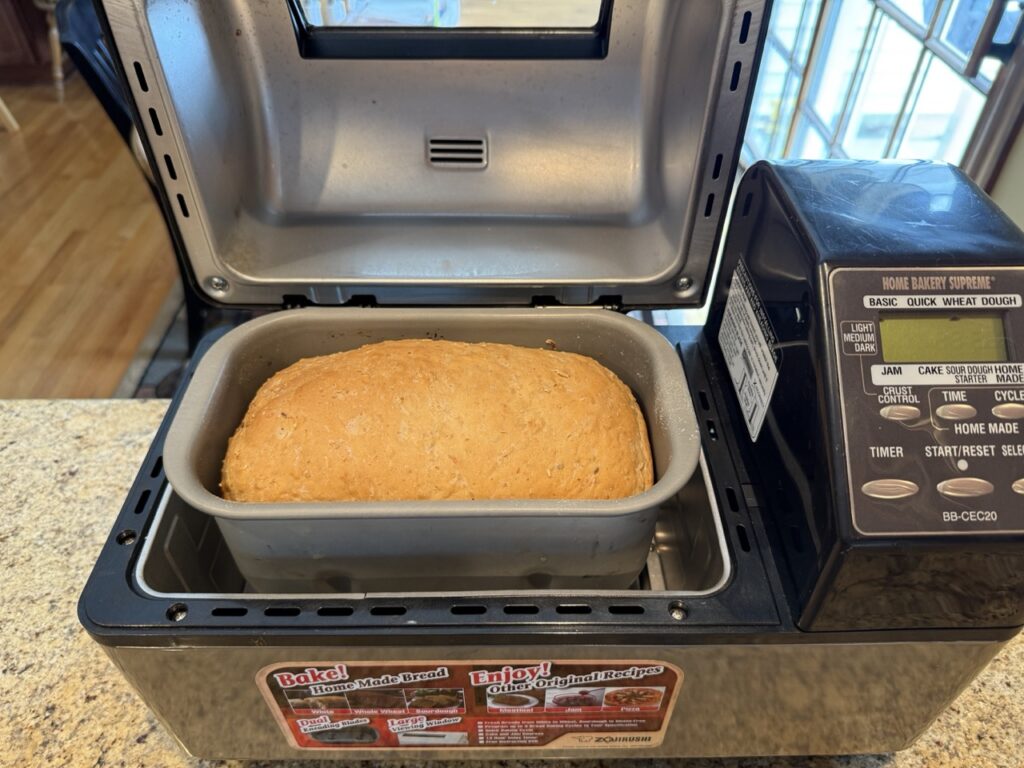
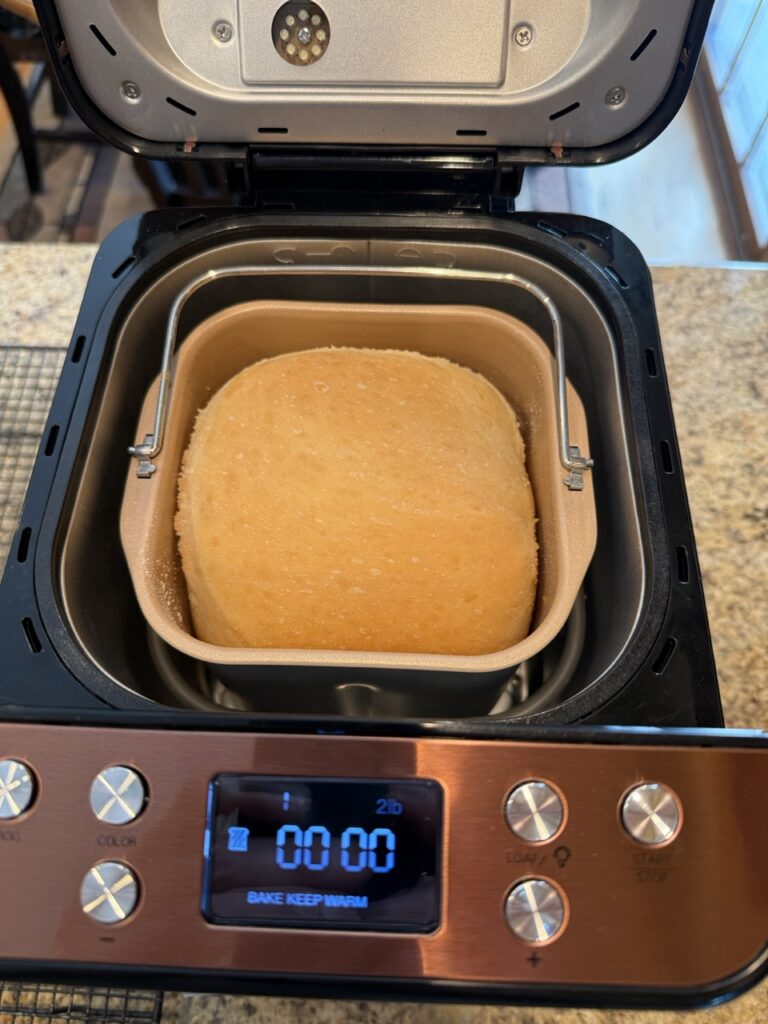
Here is the loaf from the Zojirushi Supreme. The top of the loaf is uneven, which (in my experience) can happen with any bread maker, including the Virtuoso. The general darkness is also around 45%. However, there are some areas that are closer to 50%. I think this is due to the unevenness of the loaf’s top. However, it may be due to the browning method, so a purchaser should take that into consideration, though it does not affect the quality of the bread produced. With that said, I have baked Supreme loaves with evenly browned tops and Virtuoso loaves with unevenly browned tops.
Discussion and Conclusion
This experiment shows that the Supreme is capable of browning the tops of bread baked in it. I believe the uneven browning is due to the loaf’s unevenness, as an earlier photo of a loaf baked (see above) shows perfectly even browning.
I have also shown that there are multiple ways to achieve top browning, and they all seem to work well. Why one designer choses one over the other is unclear. Perhaps the shape of the bread pan requires it, or the size of the machine, or some other unknown problem that the designer was trying to solve.
It is also important to recognize the commenters’ observations and to assume they are valid. She clearly had a very different experience, and that experience went well beyond novice error (20 years of use). Some possibilities include:
-She had a very early machine that was programmed differently.
-She had a defective machine.
-She has a different standard than mine. I’m a guy who eats bread. If it looks like bread and it is baked through, I’m happy. I have been baking bread for almost 45 years, using everything from a food processor to a KA to a Bosch Universal. I have been using bread makers for over 37 years. Despite all that, I would not consider myself an expert baker. Generally, I make bread, and people eat it. That is as far as it goes.
I did this experiment for my own interest. But I also did it for other Zojirushi Supreme users. Many have the X20 and C20 versions of these machines. I think this experiment shows that the Zojirushi Supreme can make an excellent loaf of bread. That makes sense. Why would anyone spend $350 for a Supreme that didn’t work well when you can buy a brand new Chinese bread maker that works great for around $50?
I’m not saying that the Supreme and the Virtuoso (Plus) models are the same. The Virtuoso models have further refinements, and those refinements may be what some users want. I’m just saying that they are both great machines. If you are a Supreme owner, be proud. You own a superior appliance.
I welcome others to run this experiment if they have both machines. If there was a pattern of difference, we could explore this topic more and perhaps come up with a reason for that difference.
It is important to explore any contrary opinion using critical thinking. So many people formulate opinions on just about everything based on limited information or others’ opinions. This is off topic, but I think that it is important enough to emphasize that if something doesn’t hit you right, it is easy to investigate further. The other day, I was assaulted by advice-giving “doctor” videos on YouTube. As a doctor, I could easily tell that what they were saying was inaccurate and misleading. It turns out these very real-looking doctors were created by AI. They were totally fake. Please don’t be influenced by one-sided arguments or groups/individuals who are manipulating you for their own ends. You deserve more than that. OK, I’ll get off my soapbox now.
Peace
Mike