
My grandparents didn’t speak English. Well, I guess they did speak English but they chose to only use their native tongue at home. Sadly, this meant that I knew little about them or their former lives in Eastern Europe.
The one connection to my heritage was through the wonderful foods that my grandmother made.
My grandparents saved and bought a two flat on the west side of Chicago where they raised their family of seven children in a tiny upstairs apartment. Three minuscule bedrooms, a living room, and a kitchen big enough for a large table and a built in china cabinet. There was a old fashioned farmer’s sink, a white refrigerator with a rounded top, and a stove. My early memories were of a stove that possibly used wood or coal, but later on I remember a gas stove that had some sort of a heater built into it. I don’t think their apartment had any sort of central heat, and they relied on space heaters to keep warm in the winter.
My grandmother was a short woman, and to me, appeared to be a bit stout. She was always in motion getting this or that. My grandparents were elderly by the time I was around, and my grandfather spent most of his time in bed. I remember him as a frail man. However, he was quite strong in his younger days.
The kitchen, was the heart of the house. When my parents would visit we would all sit around the kitchen table. Coffee was served along with some sort of homemade strudel, a rolled coffee cake called a kolache, or jam filled cookies called kolachky. I was offered coffee, even at a young age. Mine was usually equal parts coffee and milk with an overdose of sugar. The adults drank theirs black.

My grandmother wore her hair pulled back in a bun, and unless she was going out, she wore one of her house dresses that had tiny patterns on them. Some were pink, others yellow, but all in the exact same style. Over her house dress would be some sort of an apron. Hair bun, house dress, and apron, I thought of them as the required uniform for grandmothers.


When she would see me she would smile and say, “Good boy,” at which point she would give me a hug. She smelled vaguely of yeast and garlic. It was a pleasant smell.
Many years later I learned that both my grandmother and my grandfather spoke fluent English. In fact, my sister told me that my grandfather didn’t even have an accent. I believe that he wanted the grand kids to learn their native tongue so he never spoke English around us. None of us took the hint.
My parents lived in my grandparent’s downstairs apartment until my oldest sister was nine. She has fond memories of going upstairs and being pampered by our aunts, who were teens at that time. This was during the war years and she recalls sitting on the front porch with my aunts and soldiers who were on leave, “I have a photograph of that somewhere,” she told me.
My aunts had cleaning duties on Saturday and my sister would go upstairs and watch them as they meticulously washed and dusted the entire apartment. When all was done my Aunt Susie would play on the piano “Lilli Marlene, ” “The Parade of the Wooden Soldiers.” and a few other tunes, a recollection that my sister cherishes to this day. Apparently, an unnamed soldier had sent my Aunt Lil the “Lilli Marlene” piano music, since her name will Lillian. I’m guessing that this was from a hopeful but unsuccessful suitor, as she eventually married my Uncle Steve.
My sister remembers my grandmother making bakery every Saturday. She would set up a folding table and place it in the kitchen next to the china cabinet. My grandmother would heap flour on the table and make a crater in the center of the flour mountain. There she would add her liquids, which varied depending if she was making a sweet bread, or her luscious light rye. She did this all from memory; no recipe or measuring cups or spoons were required. She knew how much liquids to add, and when the knead was done by the touch of her hand. I had dozens, possibly hundreds of slices of her rye bread over the years and I never remember a single one being less than perfect.

I’m 15 years younger than my oldest sister, and my aunts were long married by the time that I came around. However, my grandmother’s habits continued. She was always busy, always making things from scratch. She would still can vegetables from her Victory Garden, grind her own hamburger meat, make her own noodles, and bake her own bakery.
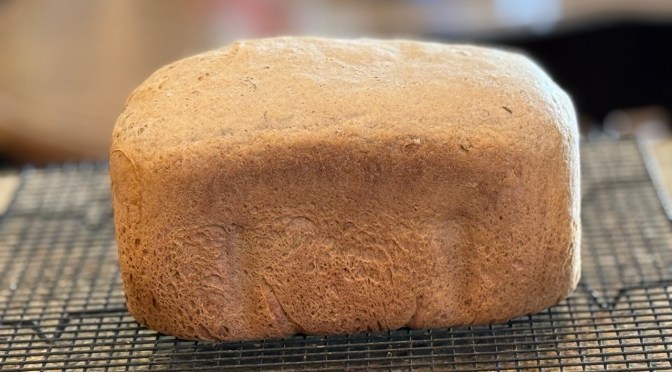
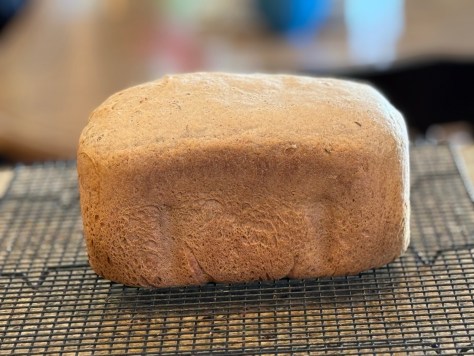
Her bread is my fondest memory of her. I remember that the light rye bread was often dotted with caraway seeds that added their own distinct flavor. She would bake it into a giant round, so large that it had to cut into reasonable chunks before slicing. The bread had a hard crust and a solid, yet soft interior. It was heaven in a slice and was delicious with cold butter, or served up in a ham, hard boiled egg, and horseradish sandwich.
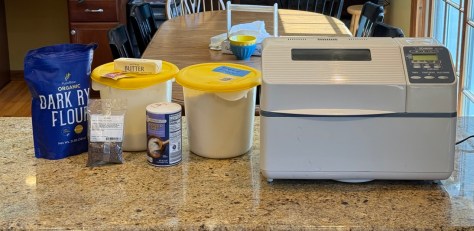
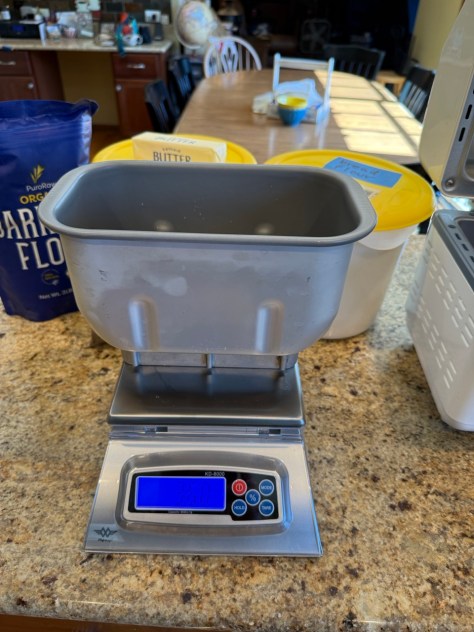
In memory of my grandmother I decided to make a light rye in the bread maker. My goal was to make a bread similar to her’s as a homage, rather than trying to duplicate her recipe. Let’s be honest, there were no bread makers when she was making bread, and if one did exist it is unlikely that she would have used it.
This bread tastes very similar to hers, but the crumb is a bit lighter and more spongy. The crust, however, is dead on. Here is the recipe that I used from the Zojirushi bread maker manual:


Peace,
Mike


