I’m a competent cook, but I’m not a hobby cook. I don’t mind putting a meal together, but it isn’t the driving force of my life. In fact, the only part of cooking that I truly enjoy is playing with kitchen appliances. I’m a gadget guy.
Inflation and the Trump tariff taxes are affecting me just like everyone else, but it’s clear I can reduce my day-to-day costs by cooking at home.
My son’s girlfriend came over for a weekday dinner yesterday. She has had dinner here many times and is more like a family member rather than a guest. However, I know she doesn’t do well with acidic foods, especially those with a lot of tomato products; so many of my “go-to” recipes were shelved for yesterday’s dinner. I wanted to make something she would enjoy, but it had to be easy for me, too. In this case, I upped the ante a bit by making some homemade yeasted rolls in a bread maker. I’ll likely post that recipe soon. The rolls were made the day before and kept in a Rubbermaid container. All I needed to do was make the stuffing casserole and microwave some vegetables. Easy peasy.
This recipe is from Lil’ Luna, but I have seen similar ones from many authors. It is definitely a recipe conceived in the 1970s, as it relies heavily on pre-packaged foods. With that said, it is cheap, extremely simple to make, and it tastes good.
Screenshot
I made the stuffing and set it aside. I used water plus Better Than Bouillon instead of chicken stock. You could just use water, which may be a better option as the stuffing and soup are already salty. At this point, also preheat your oven to 375°F (190°C).
I dumped all of the other ingredients into a 9 x 13 pan. It would be a good idea to spray the pan with a non-stick spray… but I didn’t, and it was fine. I’m using 1/2 of a Costco roasted chicken. I’ll buy a chicken, pull off the meat, and freeze it into two vacuum-sealed bags. This chicken was from 2024 (it is now 2026), and it was perfectly good as vacuum seal bags prevent freezer burn.
I mixed up the concoction and then added 1 drained can of mixed vegetables. You could use any vegetable, canned or frozen (thawed), that you like. Options include peas and carrots, green beans, mushrooms, or just carrots.
I then spread out the mixture.
I then sprinkled the cooked dressing over the mixture and baked it for about an hour at 375°F (190°C). You want to bake the casserole until it is bubbly and the dressing has browned a bit. I like to “over-bake” a bit to really firm up the casserole, but you do you.
Here it is plated up with a homemade yeasted roll, broccoli, and some jellied cranberries.
The dinner was a hit and served 4 of us; 2 lunch servings were left for the next day. It uses a lot of processed foods, but it’s quick to make, cheap, and tastes good.
Let’s do a price break down:
(From the Aldi US website on 1/8/26)
Stuffing mix. $1.05
Mushroom soup. $0.79
Chicken soup. $0.79
Chicken $2.50 (1/2 of a Costco $5 roasted chicken)
Canned Veg. $1.09
Butter. $0.41
Sour Cream. $1.00
Total $7.63. or $1.27 Per Serving
For these cost savings, I’m using Aldi-branded foods. The chicken is from Costco, their famous $4.99 roasted chicken. I’m only using one-half of the meat, so one chicken can be used for several meals. I’m using canned vegetables, but frozen could be substituted for a small additional up-charge. You can also use canned chicken. In that case the meal could become a shelf-stable option that you keep on your “just in case” shelf.
Add whatever sides you like to bulk out the meal. This may be a good meal to try if you are new to cooking or if you are trying to teach your kids how to cook. Teaching your kids how to cook is a great gift. I taught my kids, starting simply when they were young, and they are all competent adult cooks. They are saving money, just like me…and possibly you!
Food prices have been rising significantly and are expected to continue increasing with the new tariff taxes that we are all now paying. Since everything, from the aluminum in a soda can to the tomatoes on our salads, is imported, it is expected that the prices of most foods will increase further over time. Even US-sourced foods are skyrocketing in price. I was recently at the grocery store and spotted a beef brisket being sold for an astounding $75! I always thought of brisket as a tough, cheap cut of meat, but along with ribs and chicken wings, what was once cheap is now expensive.
Seventy-five dollars for a beef brisket!
I was on a road trip with my wife. We stopped for breakfast at McDonald’s. I got a breakfast meal, she got an Egg McMuffin, coffee, and a soda, and our bill was almost $20. Eating at McDonald’s was always a cheap way to feed my family when we didn’t want to cook. My kids eat less conservatively than Julie or me. If we were traveling as a family, a breakfast at McDonald’s could now cost us $60 to $70. I’m starting to think of Fast Food as a luxury option!
Groceries have become expensive, but it is still more cost-effective to cook at home. Chicken thighs are relatively inexpensive, especially when you buy them in bulk. I’ll often purchase them at Costco, as they are already portioned into smaller packs that are suitable for freezing. If I find a reasonable price elsewhere, I separate the chicken into meal-sized portions and freeze them using my vacuum sealer.
A vacuum sealer is the unsung hero of food preservation. Vacuum sealers can be a relatively inexpensive purchase and can dramatically reduce your food waste. I’ll separate meats into meal-sized portions, label the vacuum bags with the type of meat and the date, and then freeze them. This prevents waste from freezer burn.
If we only use part of a package of bacon, I’ll vacuum-seal the rest and store it in the refrigerator. Vacuum-sealed bacon will stay fresh much longer. I’ll do the same with a cut avocado to prevent it from turning brown.
Individual portions of a casserole or soup can be vacuum sealed and frozen. Need a quick lunch? You can reheat the food by the “boil in bag” method, or by venting and microwaving.
Being creative, you can extend the lives of many foods by vacuum sealing. A vacuum-sealed chunk of cheese won’t dry out and will stay mold-free. Strawberries (using a vacuum jar or a Mason Jar sealed with a vacuum-seal jar attachment) will stay fuzz-free much longer in the fridge. Fresh meats will also remain good longer in the refrigerator if vacuum sealed first. Sometimes, I’ll find meat on sale and I’ll keep it in the fridge to cook the next day. Life happens, and plans change. If I have to delay cooking, I’ll vacuum-seal the refrigerated meat to extend its shelf life longer.
The most significant expense associated with using a vacuum sealer is the cost of the bags. Brand-name bags are great, but they are expensive. However, you can find acceptable and much cheaper off-brand alternatives when buying in bulk on Amazon and other sites.
I typically use a different type of vacuum sealer, known as a chamber vacuum sealer. This type creates a stronger vacuum and easily handles liquid contents. Traditional external vacuum sealers require special techniques when sealing liquids. Another significant advantage of using a chamber vacuum sealer is the lower cost of the bags, which is comparable to that of a Ziploc bag. Again, buying them in bulk is the key.
You can get a decent traditional external vacuum sealer for under $100, with many costing under $60. Chamber sealers used to cost well over $1,000, but Chinese-made versions hit the market a few years ago, and I have seen chamber sealers in the sub-$300 range. The brand-named $1,000 sealers were designed for semi-professional use and were intended to last a consumer a lifetime. I can’t verify the longevity of the no-brand units, but they would likely last well enough for a homeowner if properly maintained. I have tried a few of them, and they seal just as well as the brand-named products.
I made this little video for a friend who was beginning to use a vacuum sealer. However, you might find it helpful as well.
Baked chicken is delicious, but can be boring if served too often. There are thousands of recipes that use chicken as an ingredient, stretching this meat while creating a delightful end result. Today’s recipe is for Chicken Paprikash, featuring chicken thighs in a creamy paprika sauce. Due to the richness of the dish, one decent-sized chicken thigh served over noodles is usually enough for most of my family members, with my son occasionally opting for two. You can substitute other chicken parts if you wish. Chicken legs are even less expensive than chicken thighs. I’m guessing that two good-sized legs would constitute a portion for a typical eater.
I use an electric pressure cooker (similar to an Instant Pot) to speed up my cooking process. However, you can also prepare the same recipe in a heavy pot/Dutch oven or even a heavy, high-sided frying pan with a lid. This dish can be prepared on the stovetop or by starting on the stovetop and then finishing it in the oven. There are also recipes for paprikash that can be made in a slow cooker. If you choose a different method, just Google for recipe times. For instance, “recipe for Chicken Paprikash in a Dutch oven.” Many of the recipes will be similar, but the times and possible amounts of liquids may vary. If you are using a manual stove-top pressure cooker (which operates at a higher pressure), you can reduce the pressure cooking time slightly (13 minutes instead of 15 minutes under pressure).
Chicken Paprikash Made In An Instant Pot- Electric Pressure Cooker.
Ingredients
-Oil
-3-4 pounds chicken thighs
-salt and pepper
-1 large onion chopped
-heaping teaspoon jar garlic
-¼ cup paprika
-1 heaping tablespoon tomato paste
-12 oz chicken broth, or water with a broth substitute like “Better Than Bullion.”
-1 cup sour cream
-½ cup half-and-half or heavy cream (optional)
Season the chicken with salt and pepper. Set the pressure cooker to “sear” and add a small amount of oil. Lightly brown the chicken in batches, avoiding overcrowding, as this will cause the chicken to steam instead of brown.
Remove the chicken and add new chicken pieces to brown until the job is completed. Set aside the browned chicken for now.
Add the chopped onion and let it soften in the pressure cooker (the cooker is still on sear/sauté). When soft, add the garlic and stir for around 30 seconds. Then add the paprika and lightly cook it to bring out its flavor. Avoid burning the paprika. Add the tomato paste. After around 20 seconds, add the broth to the mix and stir everything together.
Return the chicken to the pot and pressure cook on high for 15 minutes. Let the chicken “rest” for 10 minutes after cooking is done before releasing the pressure. This will keep the chicken juicy.
Remove the chicken to a serving platter. Put the sour cream in a bowl and add around ½ cup of the broth from the pressure cooker, stirring until everything is incorporated. Then mix this into the broth in the pot.
Optional: I sometimes add ½ cup of half-and-half or heavy cream if I have it on hand.
If you prefer a thicker sauce, mix a heaping tablespoon or two of cornstarch with around two tablespoons of cold water, then stream/mix this mixture into your boiling broth.
Adjust the salt and pepper to your taste in the sauce and pour it over the chicken.
Serve on a starch of your choice. Noodles work well. I had some dried spätzle that I cooked up.
A biscuit, bread, or muffin can complement the meal, making your dinner hearty and satisfying.
My measurements are approximate as I cook by feel. With many recipes, a slight variance doesn’t make much of a difference in the end product. For instance, using ¾ cup or 1 1/4 cups of sour cream will both yield a delicious paprikash. When you are starting your cooking journey, the most essential ingredients to measure are the spices (including salt), as too much can ruin a dish. Baking tends to require more exact measurements, but even with baking, some variance is allowed.
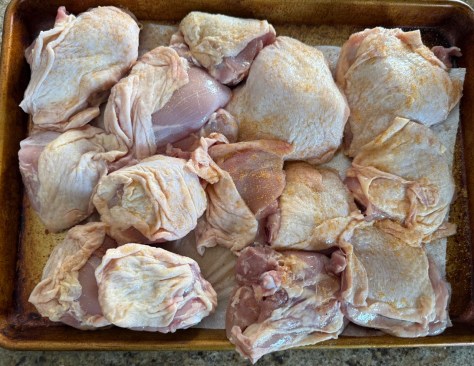
Chicken Paprikash utilizes many common food staples and doesn’t require exotic ingredients. Pat the chicken dry to reduce spattering when browning. I used some seasoned salt, but salt and pepper work too. Brown the chicken in batches, avoiding overcrowding.Sauté the onions in the electric pressure cooker until they soften, then add the garlic. Adding the garlic too early will cause it to burn.Add the paprika and cook it gently, avoiding burning. Add the tomato paste. Add the broth and mix until everything is combined.Return the chicken to the pot, secure the lid, and pressure cook for 15 minutes. After the cooking time is done, allow the chicken to rest in the cooker for 10 minutes before releasing the steam. In a pinch, you can release the steam immediately, but that may result in slightly drier chicken. Mix some of the hot liquid from the pressure cooker into the sour cream until smooth. Then pour this mixture back into the pressure cooker, which is once again set to “sear/brown.”With the pressure cooker still set to “sear/brown,” adjust the salt/pepper levels to your liking. Add salt only a little at a time (around 1/2 teaspoon), tasting in between each addition. You can always add salt, but you can’t remove it. If you want to add a thickener, such as cornstarch, the liquid must be boiling. 1-2 heaping tablespoons of cornstarch dissolved in approximately two tablespoons of cold water should suffice. Add this in a stream while stirring, and your sauce should thicken in a minute or two.Pour the sauce over the chicken to complete the dish. Reserve additional sauce to be added over the noodles. Served over some noodles, accompanied by a biscuit to complete the meal. Very filling and delicious!