Category Archives: frugal cooking

Zojirushi Bread Makers: What Model To Buy? An In-Depth Review.

As I mentioned in previous blogs, three things excite me: I love to learn, I love to create, and I love to teach.  That’s my jam.

I enjoy delving beyond the superficial and exploring various topics in depth.  Some of my interests are mainstream, while others are not.

 As a child, I was fascinated by watching my mom knead yeasted bread dough on the kitchen table. However, kneading dough by hand is not my thing. 

One of the few items that I got from my divorce in the 1980s was a large food processor, as my ex was not a cook and didn’t want it.  I studied that gadget and prepared many foods using it, including kneading bread dough. When you are a dirt-poor resident physician living on generic food, the prospect of bakery-quality bread is compelling. 

My love of machines, along with my love of food, got me interested in bread makers, and I did a deep dive to understand them in the 1990s and early 2000s.  I explored many machines in my study, from expensive to bargain, most of which I gave away when my interest waned. 

For many years after that, I continued to bake bread, making many loaves at a time, first with a Kitchenaid, and then with a Bosch Universal mixer.  Now, my kids are out of the house, and I no longer need such productivity.

For many years I made six loaves at a time of 100% Whole Wheat Bread using my Bosch Universal Mixer.

I’m not a professional chef, and I’m sure that many know a lot more about bread-making than I do.  However, I do know more than some, and I would like to offer that knowledge in this post. Remember, this is my opinion; you may have a different one.

About a year ago, I rediscovered my remaining bread makers on a basement shelf and was once again fascinated by these simple gadgets that could do something extraordinary: make delicious bread at the touch of a button.  I got hooked again.

I have used many different brands of bread machines. After baking hundreds of loaves in various machines, I’m here to state that all bread makers have the potential to produce an excellent loaf of bread if their instructions are followed precisely.  If you don’t believe me, just check out the many YouTube videos showing folks getting great results with every brand under the sun.

If I believe that all bread makers can make a great loaf of bread, why would I ever buy a premium machine, like a Zojirushi?  Let me use a car example.  Both a Yugo and a Lexus will get you to the same place in the same amount of time.  However, the Lexus will get you there in style, and it will likely be more reliable as well.

I thrifted a vintage Japanese-manufactured Regal bread maker for $14. Although not as well-built as my Zojirushi machines, it was still built like a tank. I recently tested an inexpensive and newer Briskind bread maker.  It makes a perfectly nice loaf of bread, but it is light as a feather and feels a bit cheap. How long will it last with regular use?  You can watch teardown videos for cheaper brands where the low-quality drive belt has shredded or some other part has failed. This usually means that it is time to send the bread maker to a landfill. 

This thrifted Regal machine was made in Japan and is built like a tank. It was likely manufactured in the mid-1990s.
This recent Briskind model made a decent loaf of bread, but it is light as a feather, and I wonder about the quality of its components.

I have Zojirushi machines from the early 2000s that still work perfectly. Additionally, Zojirushi sells replacement pans and paddles and also has a bread maker repair service. If you have the cash and know that you’re committed to bread machine bread making, it is reasonable to consider a Zojirushi machine.  

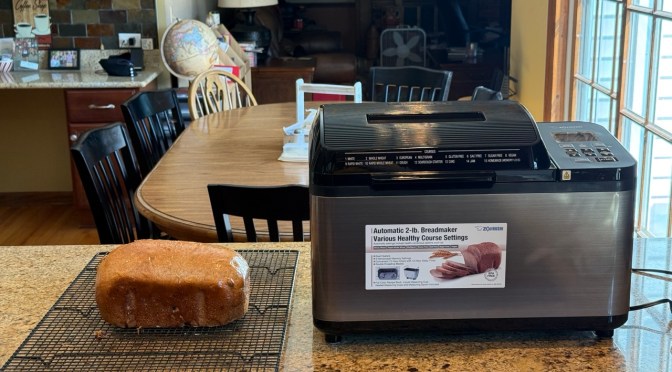
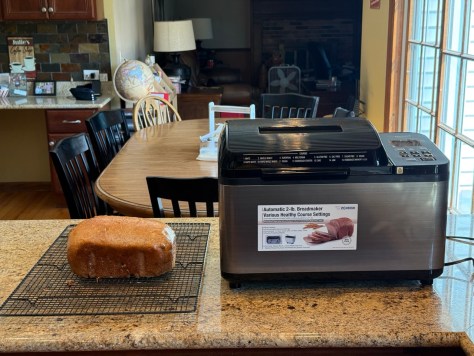
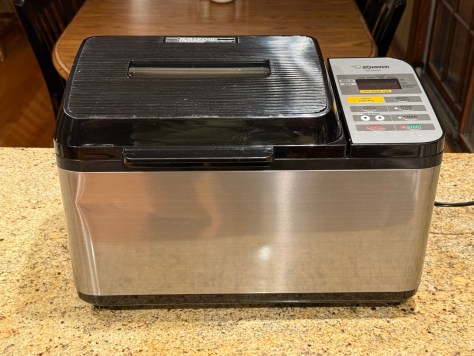
Currently, Zojirushi offers four models of bread makers. Two of them make 1-pound loaves, and the other two make 2-pound loaves.  I’ll only be discussing the 2-pound machines, as those are the ones with which I have experience. Specifically, I’ll be talking about the Zojirushi Supreme and the Zojirushi Virtuoso (Plus).

I did some research before this post to get some others’ answers on the benefits of one model over the other. YouTube comparison videos were primarily based on repeating the manufacturer’s listed feature sets; therefore, they were of no use to me, as they provided zero actual usage information.  Contributors on sites like Quora, Reddit, and Amazon Reviews commented when someone asked if they should buy the Supreme or the Virtuoso, stating, “Get the Virtuoso, there is no comparison,” and “Get the Virtuoso, you won’t regret it.” But why?  Clearly, those commenters had a Virtuoso and were happy with it.  But would they have been just as pleased with a Supreme? Commercial review sites often list the Virtuoso Plus as the number one bread machine, but they don’t examine the two models side by side.  I could find only one review that examined both; America’s Test Kitchen preferred the Zojirushi Supreme over the Virtuoso Plus due to its more straightforward user interface.  

Please do not use AI to explore the differences or capabilities of any of these machines.  I found multiple serious errors in the information provided by AI search engines during my research for this post.

I have owned and tested all four versions of these Zojirushi machines, so I feel that I can offer a fair opinion.  

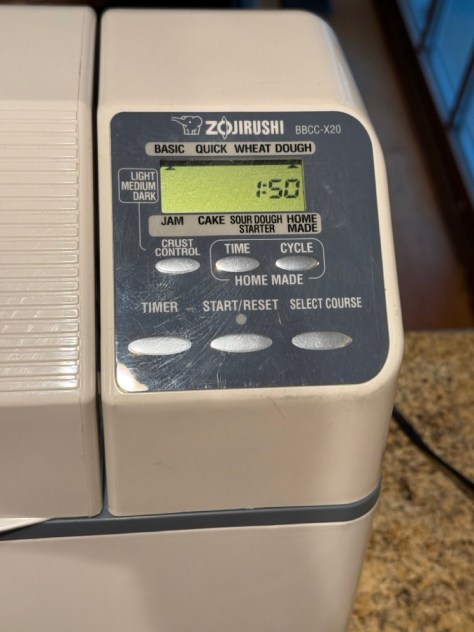
I have used both the X20 (discontinued in 2010) and CEC20 (current model) versions of the Supreme machines, as well as the PAC20 (discontinued in 2018)  and PDC20 (current model) versions of the Virtuoso (Plus). All make an excellent loaf of bread.

Zojirushi bread makers have unique features.  However, some of these features have drifted down to less expensive bread machines. Innovations tend to do that. Beyond the classic features that all bread makers have, here are a few more unique ones that both the Supreme and the Virtuoso/Virtuoso Plus share:

-Preheat.  Zojirushi bread makers will heat up and warm ingredients before they start the kneading cycle.  A few other machines that feature this option include models from Panasonic, Breadman, and Brevelle.

-Custom courses (baking programs).  These machines have three custom courses, allowing the end-user to program all aspects of a baking program in lieu of using the factory-programmed courses. Most will never need this function, but if you are serious about bread-making or need to adapt a recipe to your bread machine, this option could be invaluable. Several models from other manufacturers can also do this, including some machines from Breadman, Panasonic, Brevelle, Vevor, and others. 

-Sourdough starter course.  You use the machine to quickly incubate a yeast-based sourdough starter, allowing you to make a sourdough-like bread the same day. I believe that some Cuisinart machines also have this feature.

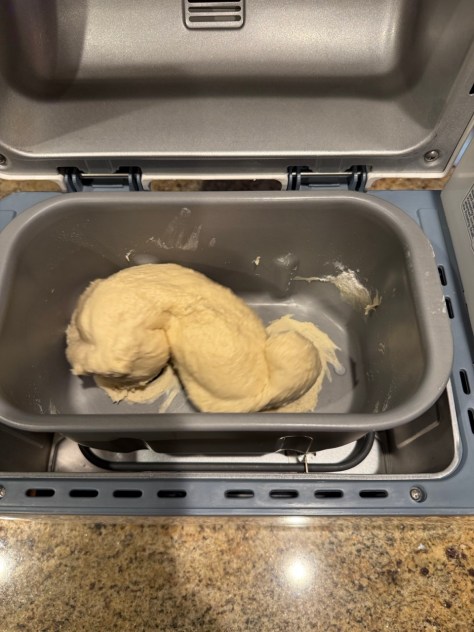
-Twin kneading paddles.  All Zojirushi 2-pound machines feature bread pans with two kneading paddles, which produce a loaf more similar in shape to bakery bread.  This makes the machines slightly more mechanically complicated and sometimes leads to an uneven loaf top.  However, the loaf shape is a definite aesthetic plus over other bread makers. Several other brands have models that use a similar double paddle system, including Vevor, West Bend, and Saki. 

Zojirushi machines omit some of the cycles, like “sweet dough,” that you can find on many other machines.  However, their Basic white bread course, combined with their crust color control, does a good job with many types of bread. 

In addition to bread-making programs, Zojirushi 2-pound bread makers also have a Jam course and a Cake/Quick Bread course.  These programs are also available on many other bread makers.

Other brands may have programs for everything from stir-frying to making rice.  Most of us will not use all of these extras, as it is usually better to do these tasks more traditionally. 

What is the difference between the X20 Supreme (discontinued) and the CEC20 Supreme (current) models?

The X20 was the earlier version of the CEC20, and for the life of me, I can’t see a difference between the two.  They appear identical, offer the same options, and perform similarly in my tests.  I’m guessing (and this is a guess) that some internals have been changed.  

Should you buy a used X20  instead of a CEC20, as a used X20 will be cheaper?  You would have to decide if the cost savings are worth having an older machine.  In my limited sample, the X20 remains an excellent performer.

The Zojirushi X20 has a control panel that is identical to the CEC20 and performs similarly to the newer model, in my opinion.
Here is the control panel from the CEC20. It is the same as the X20.

What is the difference between the Supreme models and the Virtuoso models? 

The Virtuoso bread makers add the following features:

Making a loaf using the Virtuoso Plus.
The Virtuoso looks very similar to the Virtuoso Plus, but the user interface is a bit different.

Top Heater

Both the older Virtuoso and the newer Virtuoso Plus have a top heating element to more evenly brown the top of a loaf of bread.  All breadmakers must have the ability to brown the tops of their bread adequately, and they all incorporate passive or active systems to achieve this.

In the case of the less expensive Zojirushi Supreme, a passive convection system is utilized, where heat rises from the baking chamber and the outer wall space. It is then vented through the bread maker’s cover.  

The dedicated top heating element in the Virtuoso machines does a slightly better top-browning job, but the system used in the Supreme also works well. The top heating element is not a deal breaker, in my opinion. 

Gluten Free Course (program)

Kneading bread dough helps gluten form from glutenin and gliadin, yielding a delightful chewy yet tender slice of bread. However, gluten-free bread doesn’t have gluten, so the kneading cycle is really just a mixing cycle when making this type of loaf.  Additionally, long multiple rises are not helpful, so this course focuses on the final rise. You could program a Supreme machine to do the same thing, but it is more convenient to have a dedicated button for this purpose. Other bloggers on the internet report that using this cycle gives a better finished product than using the Basic course (white bread) when making gluten-free bread. 

Baking Pan With Handles

Both the Supreme and the Virtuoso have top-notch baking pans.  They are heavyweight and have an excellent system to mate with the bread maker.  However, the Virtuoso Machines took a step further by providing exceptionally high-quality handles on the bread pan. The non-handle pans on the Supreme work fine, but the handles on the Virtuoso are a nice addition.

Real Time Clock

Most breadmakers only provide the time to completion when you select a course (program).  For instance, a display may show 3:25 when you choose a white bread (Basic) course. If you start your machine at 10:00 AM, you need to mentally add three hours and twenty-five minutes to determine the finish time (1:25 PM).  Honestly, this is no big deal.  However, the Virtuoso Machines will give you the actual time of completion.  If you start the bread at 10:00 AM, and the bake is three and twenty-five minutes, the completion time will read “1:25 PM” on the display of Virtuoso machines.  

Pause On Cover Lifting

Kneading will pause when you lift the cover to “take a peek” on Virtuoso machines. On the Supreme, the kneading keeps on going.  

Shape Cycle

The homemade option allows you to create a custom course where you can program the timing of each step of the baking process.  Both the Supreme and the Virtuoso machines allow you to do this.  However, the Virtuoso adds the ability to add a step called Shape after kneading.  This will enable you to remove the dough and reshape it if you wish. I don’t believe that there is a way to replicate this Shape function on the Supreme models.

The Virtuoso Plus offers the following features in addition to the older Virtuoso machine.

The user interface on the Virtuoso Plus is cleaner than that of the older Virtuoso.

Cleaner-looking button interface

The buttons on the Virtuoso Plus have a cleaner look compared to the slightly more cluttered look of the buttons on the Virtuoso. 

Multiple New Courses on the Virtuoso Plus

Many less expensive bread makers have long offered a dozen or more programs, catering to a wide range of options, ranging from sweet breads to pasta dough.  However, traditional courses like Basic, Whole Wheat, and Dough do everything that most of us need.  The one exception is the Gluten-Free course mentioned above, as gluten-free bread is a hybrid between a dough and a batter.   

Zojirushi didn’t just copy a bunch of programs from other companies; they tried to be different with “healthy options’ like Vegan Bread course, as well as specialty courses like Multigrain and European Loaf. However, another blogger tested these courses against the standard Basic course and generally found little difference in the breads made with the dedicated courses vs. the Basic one.  

It is possible that, under some conditions, a dedicated course may yield a better loaf, but that is unclear. Most of us just want regular bread.  Using the standard Basic bread course, I have made a variety of white breads, herb breads, cheese breads, and raisin breads.  Using the Whole Wheat course, I have created multiple types of whole wheat bread, 7-grain bread, oatmeal bread, and rye bread. I have made many different doughs using the dough cycle, too.  If you are a typical baker, you may not need all those additional courses, and it isn’t clear (except for the Gluten-Free course) that they are significantly better than using the standard courses on the Supreme model. In some ways, all of the extra courses feel more like gimmicks rather than essential additions.  But that is just my opinion. Your mileage may vary.

Ending thoughts

Zojirushi machines are pricey, and if you are just testing the bread machine waters, you may be better served by a less expensive brand, either new or thrifted.  However, if you are in for the long haul, then the additional quality of a Zojirushi machine may be for you. 

I have used all four models, and the one additional Virtuoso/Virtuoso Plus feature that may be useful for some is the Gluten-Free course.  If you don’t need that feature, you might consider the Supreme model, which is considerably less expensive and offers most of the abilities of the Virtuoso machines. 

In my opinion, I don’t believe that the bread coming out of a Virtuoso machine is significantly better than the bread coming out of a Supreme machine. Let me once again use a car analogy.  Let’s say you knew what model of car you wanted, but you had to decide what trim level you were going to buy. You could choose between the base model, which had all of the basics covered, or you could buy the platinum version, with many little refinements that made it just a bit nicer. Some would say, “I will save thousands as the basic car has everything that I need.”  Others will say, “I want all of those little extras, and I’m willing to spend the extra cash to get them.”  If you are in the first category, get the Supreme.  If you are in the latter category, go with the Virtuoso Plus. 

Should you consider the used market? I would say yes, but there are risks. Check sites like ebay, and Facebook Marketplace. If you keep searching over time you can find machines for significantly less than others of the same model on the same site. Just make sure that you read the description carefully and that the paddle and kneading blade are included, and in good shape.

All bread makers are devices that make our lives better by allowing us to bake delicious, homemade bread with the touch of a button. I accept their imperfections, like the paddle holes in the bottom of the bread.   If you want artisan loaves, then bake by hand. And, yes, I know that you can remove the dough from a machine and hand-form it.  I’m just trying to make a point that most of us use bread machines to provide home-made bread for our families, not to enter into contests. Additionally, most just want bread, and decent basic machines accomplish that function well.

How about a slice of warm bread with a little butter and jam?

Happy bread machine decision-making!

Mike

Save Money, Make Grandma’s Light Rye Bread

My grandparents didn’t speak English. Well, I guess they did speak English but they chose to only use their native tongue at home. Sadly, this meant that I knew little about them or their former lives in Eastern Europe.

The one connection to my heritage was through the wonderful foods that my grandmother made.

My grandparents saved and bought a two flat on the west side of Chicago where they raised their family of seven children in a tiny upstairs apartment. Three minuscule bedrooms, a living room, and a kitchen big enough for a large table and a built in china cabinet. There was a old fashioned farmer’s sink, a white refrigerator with a rounded top, and a stove. My early memories were of a stove that possibly used wood or coal, but later on I remember a gas stove that had some sort of a heater built into it. I don’t think their apartment had any sort of central heat, and they relied on space heaters to keep warm in the winter.

My grandmother was a short woman, and to me, appeared to be a bit stout. She was always in motion getting this or that. My grandparents were elderly by the time I was around, and my grandfather spent most of his time in bed. I remember him as a frail man. However, he was quite strong in his younger days.

The kitchen, was the heart of the house. When my parents would visit we would all sit around the kitchen table. Coffee was served along with some sort of homemade strudel, a rolled coffee cake called a kolache, or jam filled cookies called kolachky. I was offered coffee, even at a young age. Mine was usually equal parts coffee and milk with an overdose of sugar. The adults drank theirs black.

I was probably six in this photo, and even then, I would drink coffee when I visited my grandparents.

My grandmother wore her hair pulled back in a bun, and unless she was going out, she wore one of her house dresses that had tiny patterns on them. Some were pink, others yellow, but all in the exact same style. Over her house dress would be some sort of an apron. Hair bun, house dress, and apron, I thought of them as the required uniform for grandmothers.

A birthday party for my grandmother, likely in the late 1940s.
My grandparents, circa 1950s?
My grandfather is standing, and seated directly below him is my grandmother. By the style of the outfits, I’m guessing the 1920s.

When she would see me she would smile and say, “Good boy,” at which point she would give me a hug. She smelled vaguely of yeast and garlic. It was a pleasant smell.

Many years later I learned that both my grandmother and my grandfather spoke fluent English. In fact, my sister told me that my grandfather didn’t even have an accent. I believe that he wanted the grand kids to learn their native tongue so he never spoke English around us. None of us took the hint.

My parents lived in my grandparent’s downstairs apartment until my oldest sister was nine. She has fond memories of going upstairs and being pampered by our aunts, who were teens at that time. This was during the war years and she recalls sitting on the front porch with my aunts and soldiers who were on leave, “I have a photograph of that somewhere,” she told me.

My aunts had cleaning duties on Saturday and my sister would go upstairs and watch them as they meticulously washed and dusted the entire apartment. When all was done my Aunt Susie would play on the piano “Lilli Marlene, ” “The Parade of the Wooden Soldiers.” and a few other tunes, a recollection that my sister cherishes to this day. Apparently, an unnamed soldier had sent my Aunt Lil the “Lilli Marlene” piano music, since her name will Lillian. I’m guessing that this was from a hopeful but unsuccessful suitor, as she eventually married my Uncle Steve.

My sister remembers my grandmother making bakery every Saturday. She would set up a folding table and place it in the kitchen next to the china cabinet. My grandmother would heap flour on the table and make a crater in the center of the flour mountain. There she would add her liquids, which varied depending if she was making a sweet bread, or her luscious light rye. She did this all from memory; no recipe or measuring cups or spoons were required. She knew how much liquids to add, and when the knead was done by the touch of her hand. I had dozens, possibly hundreds of slices of her rye bread over the years and I never remember a single one being less than perfect.

Here, my Uncle Jim is holding one of my grandmother’s rounds of light rye bread.

I’m 15 years younger than my oldest sister, and my aunts were long married by the time that I came around. However, my grandmother’s habits continued. She was always busy, always making things from scratch. She would still can vegetables from her Victory Garden, grind her own hamburger meat, make her own noodles, and bake her own bakery.

Her bread is my fondest memory of her. I remember that the light rye bread was often dotted with caraway seeds that added their own distinct flavor. She would bake it into a giant round, so large that it had to cut into reasonable chunks before slicing. The bread had a hard crust and a solid, yet soft interior. It was heaven in a slice and was delicious with cold butter, or served up in a ham, hard boiled egg, and horseradish sandwich.

In memory of my grandmother I decided to make a light rye in the bread maker. My goal was to make a bread similar to her’s as a homage, rather than trying to duplicate her recipe. Let’s be honest, there were no bread makers when she was making bread, and if one did exist it is unlikely that she would have used it.

This bread tastes very similar to hers, but the crumb is a bit lighter and more spongy. The crust, however, is dead on. Here is the recipe that I used from the Zojirushi bread maker manual:

The ingredients are very simple. Use the the Active Dry Yeast amount listed. The Rapid Rise Amount is for when you are using the “Quick Wheat” setting on the bread maker.
Since all of the ingredients were listed in grams, I was able to weigh everything, including the water. No mess, and so easy!
Here is everything in the bread maker. Remember, liquids on the bottom, then dry ingredients, finally yeast in a little well made in the flour.
I set the course to “Basic Wheat” and pressed start. That was it!
The finished loaf. Not the beautiful round that my grandma made, but a lot easier!
You can see that the crumb is soft and airy. Childhood memories restored!

Peace,

Mike

Save Money, Make Homemade Yeasted Rolls

Most families have their own traditions, as does ours.  Their significance may or may not be recognizable to others, but they are still important.

One of our traditions centers around our birthday celebrations.  When someone in our family has a birthday they get to choose the dinner menu for their special day.  The rest of us work as a team to make that dinner for the celebrant.  Our labor is part of the gift that we give them.

Inflation, the Trump tariff taxes, and other factors have made beef prices skyrocket through the roof and now we think twice when considering hamburgers for dinner.  Steak has become a rare luxury item in our home, so it is no surprise that it is a frequently requested item for a birthday dinner.

We recently celebrated my daughter’s birthday.  This was her chosen menu:

Steak, salad, broccoli, real mashed potatoes, cut up strawberries, yeast rolls and Rainbow cake.  

What is Rainbow cake? When my kids were very young my wife had a major operation that left her bed bound for many weeks.  I took off time from work to not only take care of her, but also our small children, one who was still in diapers. I wanted things to be as normal as possible for our children, and I came up with activities that we could do ranging from going to the zoo to having picnics at our local park.  I did all of the cooking during that time and one day I came up with the idea of making a rainbow cake. I added a magical descriptions about the cake concerning the power of the rainbow, and the cake became a hit.  In fact, some of my kids request that I still make Rainbow cake for their birthdays to this very day.

My daughter enjoying a slice of Rainbow cake for her birthday.

All of the above is just background for the reason of this post, which is another writing to encourage you to save money by using a bread maker.

I  have done several posts showing how easy and inexpensive it is to make bakery quality bread using a bread maker.  Today, I’ll write about using the dough function to make other yeasted products.  In this case, dinner rolls.

I don’t think that I have made dinner rolls in over a decade, so don’t expect perfection.  The bread maker easily makes a perfect dough, but dinner rolls are still more work than pressing a button as you have to form them, and bake them in the oven.

I found a traditional recipe from an author named “Sally” that looked good, so I went with that.  Honestly, they turned out delicious.  They were exponentially better than commercial dinner rolls and significantly better than those from the grocery store bakery.  Rich, yet light, they had a slightly sweet and eggy flavor and were a dynamite addition to our birthday feast. For me, they were extremely nostalgic, as they reminded me of the wonderful rolls that my mom made so many years ago. 

I was too lazy to cost out this recipe, but I know that they these rolls are significantly less expensive than comparable ones purchased from a good bakery.  The level of work is a bit more than the “press and forget” bread from a bread maker.  But since the machine does all of the heavy lifting, it is a pleasure to make them.  

Consider giving this recipe a try, and you will elevate a simple dinner into something special. Let’s take a look at the recipe.

This recipe is for a traditional bake. To convert the recipe for a bread maker remember to add your liquid ingredients first, followed by the dry ingredients and the yeast last.

I measured the milk and added the butter to it. I microwaved the mixture for around 15 seconds until the milk was warm to touch but not hot.

Into the baking pan it went.

In went an egg and then the salt.

Next, I added the sugar.

I weighed the flour, as that is the most accurate way to measure it.

Lastly, in went the yeast.

I selected the basic dough course and pressed start.

This is an extra step, but do it if you have time. After the dough was kneading for 5-10 minutes I checked it. It was looking a bit slack. There was still dough that wasn’t incorporating into the dough ball. This can happen even with careful measuring for a variety of reasons ranging from humidity, to variations in the brand of flour, to the size of the egg. If I did nothing the dough would probably be OK, but fixing it is easy.

I added about one tablespoon of flour and waited about 30 seconds to see if I needed to add more. That one tablespoon was enough, all was good.

Now the machine was on its own. I would come back when it beeped that it was done making the dough.

Here is the dough all puffy and beautiful.

I placed the dough on a lightly floured surface and allowed it to rest for around 10 minutes. This makes it more “cooperative” with shaping.

The next step involved a pastry scraper. This is a very inexpensive gadget with many uses. If you don’t have one you can just use a knife.

The dough was divided into 12 pieces. You can use a scale to be precises, but I just eyeballed it.

The edges of each piece was pinched together, and then I rolled the dough in my hand to form a nice ball.

The dough balls were placed in a 9 x 13 pan that I had sprayed with some cooking spray. Yes, not professionally shaped, but good enough. Don’t let perfectionism prevent you from bread making!

I covered the pan and placed it in a draft-free location and allowed the buns to double in size. I think it took between 30-40 minutes (I lost track of time).

I then baked them at 350F (175C) for 20-25 minutes. My oven may vary from yours so keep an eye on your rolls.

The rolls were a hit at dinner. The amount of work was more than making a bread maker loaf, but it was still very easy. The biggest drawback was that I had to be around when the dough was rising and then baking. Neither was a big deal.

Happy Baking

Mike

Save Money, Bake Your Own Oatmeal Bread

It amazes me how inexpensive bread is when you make it yourself. Yes, you can buy a loaf of bread for a couple of bucks at the supermarket, but that bread is awful and has almost no substance.

To buy bread that has bread like qualities expect to pay anywhere from $4-$10 a loaf.

You can make homemade bread for a fraction of those costs, and customize it to suite your tastes and needs. However, making bread can be a labor intensive process. You can circumvent the labor by using a bread machine.

I have been rediscovering my bread maker, which is over 20 years old. Additionally, I found another used bread maker at a thrift store for only $14 which works well. As you know, I like to play around with machines.

My bread maker has to be at least 20 years old.

I picked up this bread maker at a second hand store for $14 and it works surprisingly well. It even came with its original guide and recipe book. In fact, today’s recipe is from that book!

The wonderful thing about a bread maker is that you add the ingredients, which takes a few minutes, and press a button. Everything is then done automatically. Imagine having your house filled with the aroma of freshly baked bread. It is quite intoxicating.

I have been experimenting with a lot of different loaves from simple white to pesto bread. I made an excellent 7 grain bread that was considerably less expensive than its store bought counterpart. However, I wondered if I could reduce the cost further by using oatmeal as my multi-grain component. I followed a recipe in the Regal bread maker manual/cookbook and it turned out with great success. The cost of the loaf? Only $1.02!

Here is the recipe:

9-11 ounces water

1.5 teaspoon salt

2 tablespoons honey

1.5 tablespoons butter or margarine

2/3 cup quick oats

3 and 1/4 cups bread or AP flour (I used AP flour)

2 teaspoons active dry yeast

Add ingredients in the order listed and use the white bread or “basic” cycle. This recipe is suitable for a bread maker that can make a 1.5 or 2 pound loaf.

Start with 10 ounces of water. If you want to do things right, check the dough after it has been kneaded for around 5 minutes. If the dough looks ratty and not in a smooth ball add more water, about 1 tablespoon and wait 30 seconds before you add the next tablespoon. Stop when the the dough forms a ball. If the dough looks too wet, add a tablespoon of flour in the same manner that you would add the water. You are looking for a smooth ball similar to the photo below.

Let the bread cool for around 20 minutes before attempting to slice it. A serrated knife makes slicing easy. If the paddle is stuck in the bread carefully remove it using something like a plastic spoon as you don’t want to scratch the non-stick coating on the paddle. I take the pan out of the machine as soon as the bread is done. Then, I usually leave the bread in the pan for 5-10 minutes before trying to remove it. This results in less tearing of the bread at the paddle site.

The bread was really delicious. It is best to slice as you go as homemade bread lacks the preservatives that store-bought breads have. However, my family is more likely to use the bread if it is pre-sliced. I like to store it in a container that protects it while having a bit of air circulation. This keeps it the freshest and minimizes mold. The bread is best on day one and two, and usable as excellent toast on day 3 and possibly 4. After that save remains for croutons, bread pudding, stuffing, bread crumbs, and French toast. Remember, you can always freeze part of the loaf if you can’t consume it all in a couple of days.

I’m keeping mine fresh using a cake dome that has a little air hole in the top. Others use a bread box that has ventilation holes, while others use a bread bag. Plastic bags will keep it the softest the longest, but plastic traps moisture and promotes mold. However, I have stored my bread that way too.

Peace

Mike

Save Money, bake whole wheat bread. Zojirushi vs. Thrifted Bread Maker: Who Wins?

I have now written several post on making bread using a bread maker. I’m a gadget guy who has a couple of bread makers as I like to compare how different machines work. Along these lines my $14 thrifted bread maker works well as does my Zojirushi Virtuoso, which is considered a top of the line machine.

Today, I’ll make some bread in the Zojirushi machine and explore the differences between it and my $14 thrifted bargain.

Here is the recipe that I’m using today.

Remember to add the ingredients in the order listed. I’m using the whole wheat setting on the Zojirushi. The Zojirushi frequently wins top awards for the quality of the bread that it produces. It has a unique twin paddle system that makes a loaf shaped similar to the bread that you would buy at a bakery. It also has a second heating element in the lid to help with browning of the bread. You can create your own bread programs on the Zojirushi. Lastly, it has a pre-warm cycle that heats up all of the ingredients before it starts the kneading process. How important are these features? Let’s make some bread and find out.

I like to weigh my flour to get a more accurate measurement. You can weight all of your ingredients, but many of my recipes are in standard volume measurements and I’m usually too lazy to convert every single ingredient.

To 9 ounces of water I added 1.5 teaspoons of salt.

And 1.5 tablespoons of oil. I’m using olive oil here.

The recipe calls for 2 tablespoons of molasses, but I’m using honey. If you use the same measuring spoon that you used for the oil, the honey will easily slide out.

I thought I would try adding 1/8 teaspoon of ascorbic acid as this can help with rise and has some some mold fighting qualities. This step is completely optional.

Now its time to add the flour, which I did by weight. Half whole wheat and half bread flour, two cups each.

In went the two teaspoons of active dry yeast.

A bread maker is a set it and forget it gadget. However, since I’m using this recipe for the first time I wanted to make sure that the dough looks good. If there was a lot of flour remaining or if the dough ball looked “ratty” I would have added a tablespoon of water and repeat this step until I had a nice smooth ball like the one above. If the dough looked too wet and was not forming a clean ball I would add a tablespoon of flour and repeat after 30 seconds until it looked like the above.

Into the bread maker it went on the whole wheat setting.

The bread turned out well, it was soft with a good crumb.

Here are my conclusions on my $14 thrifted Regal machine versus my top of the line Zojirushi Virtuoso.

-Both can make a decent loaf of bread.

-The $14 thrifted machine has a vertical pan, so when you slice the bread you get a square slice that reminds me of square sandwich bread. The Zojirushi machine makes a long loaf that resembles bakery bread. Its somewhat unique double paddle pan creates a more traditional loaf than most other horizontal pan machines with a single paddle. Those slices can be quite tall. Note, if you cut those tall slices in half they fit just fine in a toaster.

-Both machines bake the bread well, but the Zojirushi has a finer and more even crumb.

-Some say that the double paddles on the Zojirushi kneads a better dough. However, I don’t see much of a difference.

-The top heating element on the Zojirushi does brown the top of the bread a bit better, but not enough to make it an important feature in my opinion. I have also used the Zojirushi Supreme which doesn’t have a top heater and it seems to brown the top of the bread well too.

-The Zojirushi allows you to program three additions “courses” (programs) where you can determine all aspects of the kneading, raising, and baking process. This is pretty cool if you are a baking nerd.

-The Zojirushi machines is much heavier and robust than my thrifted machine. It will likely last longer.

-Usually the paddles followed by the bread pan are the first things that need to be replaced on a bread maker. Zoljirushi will sell you these replacement parts, while most other companies won’t. However, they are quite expensive, close to the cost of a new off-brand bread maker.

-The Zojirushi sometimes makes a lopsided loaf. This doesn’t happen with the thrifted machine as the pan is vertical.

In conclusion: Yes, the Zojirushi Virtuosos makes the best loaf, but my $14 thrifted machine also does a fine job. If you are into making bread machine bread get the Zojirushi. However, it is quite expensive. I picked up mine used for much less than the retail price. If you want to save some money but still want a Zojirushi consider the Zojirushi Supreme which is basically the same machine as the Virtuoso, but without the top heater. Additionally, it has a few less “courses” (programs). However, the only additional program that is worth considering on the Virtuoso is the gluten free program. But you can program one of the memories in the Supreme to do the same thing.

With all of my praise for the Zojirushi I have to say that my thrifted machine makes fine bread and great dough. Unless you are a nerd like me it is hard to justify the additional expense of the Zojirushi machines. However, you do you.

Peace

Mike

How To Buy A Used Bread Maker For Cheap.

I recently wrote a post encouraging the consideration of home baking using a bread maker.  A big part of this effort is to offer people options as they feel ever pushed by inflation and the Trump tariff taxes. 

Being raised in a one-income family of seven, I learned ways to stretch a dollar without feeling like I was being punished.  With a bit of ingenuity, it is possible to have a good life without spending a lot of money.  What could be a better mood lifter than homemade bread, pizza, and rolls?

If you have read my other posts, you know I love machines, especially kitchen gadgets.  OK, I love power tools too. My rediscovered bread makers were high-end in their time, and I am accustomed to high bread standards. At the same time, it makes little sense to encourage potentially struggling readers to drop hundreds of dollars on a bread machine to “save money.”  That is why it was interesting for me to see all of the used machines on the market for less than the cost of breakfast for two at a dive restaurant.  

Taking a few precautionary steps can help you obtain a decent machine for next to nothing.  I wanted to prove this to myself using my own hard-earned cash.  I stopped by a local second-hand store and spied a Regal bread maker, likely from the 1990s.  I checked it out in the store and decided that it was worth my $14.  Today I’ll walk you through the process so you can also make an informed decision if you decide to take the used bread maker plunge.

First, do a visual inspection. Normal wear and tear is OK, but avoid machines that look dented or abused. This Regal machine was dusty, but it cleaned up nicely with a little TLC. The bread maker came with its original box and recipe guide, another plus! This suggests that the former owner treated the machine with care.

Check out the inside. Make sure that the machine has both its bread pan and its kneading paddle. Make sure that the bread pan can lock in place. This model’s pan had to be twisted in. Remove the bread pan and examine the baking chamber. Crumbs are normal, but avoid machines where the interior looks burnt or smells burnt. This machine was pretty clean.

This machine was made in Japan, so it is likely a quality build.

Check to see if the machine does what you need it to do. You mostly need a standard white bread program, a whole wheat program, and a dough program. This unit has a few other options too. I was able to plug in the machine at the store and test the display and buttons. Everything seemed to work.

Examine the unit for any hidden damage. In this machine the plastic pins that held the cover in place were broken. However, this did not impact the functioning of the machine.

Bread pans are expensive to replace and it is likely that an old model like this one wouldn’t have replacement parts anyway. Make sure that the non-stick coating on the pan looks good and that the paddle rotates freely.

I decided to make a small loaf just to see if the machine worked. The loaf baked properly, but it was a bit smaller than expected. However, that can be corrected with a little ingredient tweaking.

The texture was not quite as good as my expensive bread makers, but the crust was good, the bread was fully cooked, and it was delicious. This bread maker makes the older style vertical loaf, but that works if you cut the bread perpendicular to the pan (as above). It makes up to a 2 pound loaf, which is another plus at this price.

All in all, an amazing value for $14. This small purchase opens up a world of fantastic homemade breads of all types as well as dough perfect for rolls, pizza, and baguettes. It also features a few extra cycles for foods like quick breads, and sweet breads. A great purchase!

Check out your local thrift store or Facebook Marketplace to find your bread maker today! You could get stuck with a broken machine, but at this price… well, you have to sometimes take a few risks in life.

Peace,

Mike

Save Money, Make Inexpensive And Delicious Bread Machine Bread!

This is another in my series on saving money on groceries while improving your dining experience. 

As inflation and the Trump tariff taxes continue to push up prices, it makes sense to find ways to stretch your food dollars.  Making your own bread is not only less expensive than store-bought bread, but it also tastes better and can be customized to your needs. Like thicker or thinner slices?  No problem., Sick of the outrageous prices of gluten-free bread?  Make your own. Desire a specialty bread for a special meal?  Absolutely!

My wife made a run to the grocery store and was happy that Ezekiel Bread had been restocked.  However, she wasn’t pleased when she realized that a small loaf was now ten dollars. She didn’t buy the loaf.

Bread is the staple of life, and just about every culture has some form of bread.  Bread is considered a subsistence food that provides the calories, vitamins, minerals, protein, and fiber necessary for life.  

When I was growing up, my mother bought “Silvercup” bread, which was one step above “Wonder Bread.”  It was good for sandwiches, but likely not the best in terms of nutrition.  We also bought bread from our neighborhood bakery. What a difference that bread was.  I have fond memories of walking into that place and being welcomed by the scent of freshly baked bread.  I remember, with fascination, the clerk taking a fresh loaf, pushing it through a slicing machine, and then deftly shoving it into a waxed bag.  That bread was the best.

My grandmother made most of her family’s bread, and it was delicious.  She made a light rye bread that was baked into a large, round loaf.  She didn’t buy yeast; instead, she would seed a new batch of dough with a portion of the dough she had saved from the week before.  I can’t imagine that she measured anything; she just knew what to do after baking thousands of loaves of bread by hand. Making bread was part of her life, and I’m sure it occupied at least one whole day of her week.

My mom would make yeasted bakery, but I don’t recall her making bread.  Most of her yeast bakes consisted of various filled coffee cakes, which we called kolaches, not to be confused with those delicious fruit-filled cookies called Kolacky.  

I’m not sure exactly when I made my first loaf of bread, but I started to make it regularly during my residency.  I was divorced at that time, and one of the few things that I took from that marriage was a large Cuisinart food processor, as my ex had no use for it.

I love machines, and the Cuisinart is one of them. I was determined to learn how to utilize every aspect of its capabilities, including its ability to knead bread dough.  I read somewhere that a flour company had a recipe book for “cool rise bread,” and I tracked down their address, which was in another state.  This was before the internet, so that task was more complicated than typing in a query in Google. I wrote them a letter..

A few weeks later, I received a nice note from the flour company, saying that they were surprised to hear from me, as their flour was not sold in the Chicago market.  However, they sent me the booklet and wished me well. I adapted their recipes for my food processor.

Cool-rise recipes were ideal for me at that time, as I could quickly mix and knead the dough in the food processor, then drop the dough into a couple of bread pans that I placed in the refrigerator, where they would slowly rise. Eight to 48 hours later, I would bake the bread at my convenience.  Having fresh bakery fresh bread as a poor medical resident was a tremendous morale booster. Typically,  I ate generic white bread that tasted like sawdust. 

When the bread machine craze hit in the 1990s, I bought a machine that made one-pound loaves.  I upgraded to a machine that made 2-pound loaves sometime in the early 2000s, and I still have that machine today. However, I eventually stopped using my bread machine, and I’m not sure why.

This bread machine is over 20 years old, and it still works!

As my kids got older, I would make bread for them as a treat; soon, they were helping me in the process. By then, I had graduated to a Bosch Universal Mixer, a tremendous mixer that could make six loaves of 100% whole wheat bread at a time.  It was great. However, the Bosch method still required work, and I no longer need six loaves of bread. 

My Bosch Universal Mixer can easily make six loaves of 100% whole wheat bread.
I rarely need this much bread now.
The bread made in the Bosch is fantastic, but it still requires some work.

During the pandemic, I was cleaning my basement and rediscovered my bread machine. Would it even power up after sitting dormant for years?  The answer was yes!.

I do most of the household’s cooking and make a lot of food from scratch.  I cook many combination foods, such as soups, stews, and casseroles.  These types of foods lend themselves well to a bread product, and I’ll often whip up something ranging from cornbread to a savory muffin.  However, nothing has quite the allure of the smell of freshly baked bread.

Humans have been making some form of bread for over 14,000 years, and it is possible to make bread with the simplest methods and ingredients.  Some people love the physicality of kneading dough, but I’m not one of them.  However, I love the taste of homemade yeast products, and that is where my old bread machine comes to my rescue.  I can toss in a few inexpensive ingredients, press a button, and a few hours later, I have a fantastic loaf of warm bread.

There are hundreds of bread recipes that can be made in a bread machine.  White, rye, wheat, fruited, nutted, egg-enriched, sweet, savory, you name it. I made a nice white loaf today.  What did it cost me for a 2-pound loaf of fresh, delicious bread?  Around seventy-eight cents, including the cost of the electricity. 

Bread machines are no longer trendy, so you can often get a used one at a second-hand store for almost nothing.  Just make sure that the pan and paddle are included and that it powers up when plugged in.  They are very durable, as mine is still running strong, despite being over 20 years old. Most electronic gadgets left in a basement for years would be out of commission. Mine is not an isolated case, as there are internet reports of others who are still using their bread machines decades after purchase.

In fact, I recently searched for bread machines on Facebook Marketplace and found many used models in the $10-25 range.  You can’t even go to McDonald’s for that amount of cash.  If you are interested, this is what to look for:

-Get a machine that makes between a 1.5 and 2-pound loaf

-Most prefer a traditional horizontal pan, but a vertical pan also works.

-Make sure that the unit comes with the baking pan AND the paddle. 

-Make sure it powers up when plugged in.

-You can find recipes on the internet, and you can likely download your particular machine’s manual/recipe guide from the manufacturer’s website.

Many new bread machines sell for under $100, but top-of-the-line machines, such as those from Zojirushi, cost hundreds.  Zojirushi is considered the best, but most will do fine with a less expensive brand.

Machines come with multiple programs to make different types of bread.  Most users will use only three types: standard (white) bread, whole wheat, and dough.  The dough setting is a great option, as the machine will do all of the hard work of making the dough, and all you have to do is form it for baking.  The dough setting is terrific for making pizza dough, rolls, coffee cakes, and braided breads, where you make the dough in the machine but bake it in your regular oven.

Most bread machines come with various programs to bake different types of bread, such as white and whole wheat. The controls may appear complicated, but they are very easy to learn, and in most cases, all you need to do is press a button.

Some additional program settings may be included such as sweet breads, and gluten-free bread. If your bread maker doesn’t have a particular specialty setting you can try using the standard white bread setting. Additionally, some machines allow you to create programs where you determine each step of the bread making process. This last option is for advanced users who develop their own recipes or who use unique bread flours that require unusual mixing, kneading, and backing times. Will you use the cake, yogurt, or jam settings that your machine may have?  Probably not, but that’s your choice.

Although many ingredients can be used to make bread, here are the basic ones and why they are necessary:

Flour – There are many types of flour, but for simplicity, let’s focus on white flour.  Most bread machine recipes instruct you to use bread flour, a flour with a 15% gluten content.  When your machine kneads dough, the gluten proteins are altered, becoming stretchy and more flexible.  This results in a delicious, chewy, and spongy bread.  All-purpose (AP) flour is a versatile flour suitable for a wide range of applications.  It typically has a gluten content of 12-13% so bread made with AP flour won’t be quite as chewy or structurally sound as bread made from bread flour.  In an ideal world, use bread flour for optimal results. You can simulate bread flour by adding a couple of tablespoons of Vital Wheat Gluten to AP flour to your bread ingredients, or just forgo the vital wheat gluten and still make a delicious breadmaker loaf using only AP flour. I often do that as I always have AP flour on hand. Lastly, cake flour contains only 7-9% gluten, as you don’t want a chewy cake; the low gluten content assures a tender result. 

AP flour is inexpensive. This bag will make five one-pound loaves of bread. I often use AP flour because it’s in my household stock.
Bread flour is also inexpensive, and it makes a better loaf. If you make bread regularly, consider buying and using bread flour.

Yeast-yeast is a living organism that feeds on the sugars and starches in bread dough and produces carbon dioxide gas, or CO2, as a byproduct.  It is the CO2 gas bubbles that cause bread to rise. The yeast is killed in the baking process. Yeast comes in various types.  Some bread machines use Active Dry Yeast, while others require Bread Machine Yeast, which is also called Instant Yeast. Instant Yeast granules are smaller and dissolve faster than the granules of Active Dry Yeast.

My bread machine uses Active Dry Yeast that I can buy in bulk at Costco. Each loaf uses only around ten cents’ worth of yeast.

Sugar-any form of sugar can be used, white sugar, brown sugar, honey, and molasses.  Small amounts of sugar are added to help jump-start the yeast’s growth. 

Any sugary product can be used for bead making, but most people have white sugar on hand. The recipe below uses around five cents of sugar.

Salt-salt adds flavor and also controls yeast growth.  Never mix salt with the yeast when you add your ingredients; put them in a separate spot in the machine’s bread pan.  

Water– is needed to bind all of the ingredients together.  Naturally, other liquids, such as milk, are sometimes used to achieve a different type of loaf.

Other ingredients-.Eggs, dried fruits, spices, cheese, meats, different types of flours, nuts, butter, cooking oil, powdered milk, you name it.  Each addition requires a slightly different recipe and may require different rising and baking times.  The good news is that others have already figured out all of this. If you have a new machine, read the manual/recipe booklet.  If you purchased a used breadmaker, download its manual, which will include recipes ranging from white bread to pizza dough, specifically created for your machine.

A simple and inexpensive white bread recipe.

*You must add ingredients into the baking pan in the order written. 

-1.5 cups warm water

-2 T cooking oil

-1 and 3/4 t salt

-4 cups or 500 gms bread flour (or AP flour)

-2 T sugar

-2 ¼ tsp bread maker yeast (I use regular Active Dry Yeast with good results)

I weigh my flour for better results. Five hundred grams is equivalent to 4 cups of flour.
Add ingredients in the order listed. I keep the salt and the yeast in separate spots, as salt can kill yeast if it is too concentrated.
Just press a button and the machine will mix and knead the dough in several cycles before baking it.
A perfect loaf!
Use a serrated bread knife when cutting soft breads. The knife on the top is a food service knife, and it wasn’t very expensive. Its slightly longer length works well to make short work out of making slices.
Nothing is quite as wonderful as fresh, warm, crusty homemade bread!

Use your bread maker’s “normal” or “white loaf” setting. Mine makes a great loaf of white bread in 3.5 hours. Total cost of the loaf, including electricity?  $0.78!

Allow the bread to cool at least 30 minutes before cutting.  A serrated knife works best. Any will do, but I like a knife that is a bit longer. It is not necessary to buy an expensive serrated knife, as they are no different from a less expensive one.  Serrated knives don’t cut the bread; they tear into it.  I have also used a standard Chef’s knife.  If it is sharp enough, it will slice bread. 

Remember, that homemade bread has no preservatives or other agents to keep it looking fresh.  If you don’t consume it in a couple of days, freeze it.  You can purchase inexpensive bread bags on Amazon, as well as other types of containers, to store unused bread. If we have any left after a meal, we usually use a large Ziploc-style bag, as we have those on hand.

Homemade bread machine bread is delicious and almost effortless to make. Having a homemade slice of bread with dinner elevates the experience, and a lunch sandwich made with homemade bread is superior to any packaged product.  If you see a machine at a thrift store, give it a try.  If you want to buy new, there are many machines available in the sub-$100 range.  Happy bread making!

Mike

Images are my own or screenshots used only for educational purposes.

Save Money, Make Chicken Paprikash For Dinner Tonight!

Food prices have been rising significantly and are expected to continue increasing with the new tariff taxes that we are all now paying.  Since everything, from the aluminum in a soda can to the tomatoes on our salads, is imported, it is expected that the prices of most foods will increase further over time. Even US-sourced foods are skyrocketing in price.  I was recently at the grocery store and spotted a beef brisket being sold for an astounding $75!  I always thought of brisket as a tough, cheap cut of meat, but along with ribs and chicken wings, what was once cheap is now expensive.

Seventy-five dollars for a beef brisket!

I was on a road trip with my wife.  We stopped for breakfast at McDonald’s.  I got a breakfast meal, she got an Egg McMuffin, coffee, and a soda, and our bill was almost $20. Eating at McDonald’s was always a cheap way to feed my family when we didn’t want to cook. My kids eat less conservatively than Julie or me.  If we were traveling as a family, a breakfast at McDonald’s could now cost us $60 to $70. I’m starting to think of Fast Food as a luxury option!

Groceries have become expensive, but it is still more cost-effective to cook at home. Chicken thighs are relatively inexpensive, especially when you buy them in bulk.  I’ll often purchase them at Costco, as they are already portioned into smaller packs that are suitable for freezing.  If I find a reasonable price elsewhere, I separate the chicken into meal-sized portions and freeze them using my vacuum sealer. 

A vacuum sealer is the unsung hero of food preservation.  Vacuum sealers can be a relatively inexpensive purchase and can dramatically reduce your food waste.  I’ll separate meats into meal-sized portions, label the vacuum bags with the type of meat and the date, and then freeze them. This prevents waste from freezer burn.  

If we only use part of a package of bacon, I’ll vacuum-seal the rest and store it in the refrigerator.  Vacuum-sealed bacon will stay fresh much longer.  I’ll do the same with a cut avocado to prevent it from turning brown.  

Individual portions of a casserole or soup can be vacuum sealed and frozen.  Need a quick lunch?  You can reheat the food by the “boil in bag” method, or by venting and microwaving. 

Being creative, you can extend the lives of many foods by vacuum sealing.  A vacuum-sealed chunk of cheese won’t dry out and will stay mold-free.  Strawberries (using a vacuum jar or a Mason Jar sealed with a vacuum-seal jar attachment) will stay fuzz-free much longer in the fridge.  Fresh meats will also remain good longer in the refrigerator if vacuum sealed first.  Sometimes, I’ll find meat on sale and I’ll keep it in the fridge to cook the next day.  Life happens, and plans change.  If I have to delay cooking, I’ll vacuum-seal the refrigerated meat to extend its shelf life longer.

The most significant expense associated with using a vacuum sealer is the cost of the bags. Brand-name bags are great, but they are expensive.  However, you can find acceptable and much cheaper off-brand alternatives when buying in bulk on Amazon and other sites.  

I typically use a different type of vacuum sealer, known as a chamber vacuum sealer.  This type creates a stronger vacuum and easily handles liquid contents.  Traditional external vacuum sealers require special techniques when sealing liquids. Another significant advantage of using a chamber vacuum sealer is the lower cost of the bags, which is comparable to that of a Ziploc bag.  Again, buying them in bulk is the key. 

You can get a decent traditional external vacuum sealer for under $100, with many costing under $60.  Chamber sealers used to cost well over $1,000, but Chinese-made versions hit the market a few years ago, and I have seen chamber sealers in the sub-$300 range.  The brand-named $1,000 sealers were designed for semi-professional use and were intended to last a consumer a lifetime.  I can’t verify the longevity of the no-brand units, but they would likely last well enough for a homeowner if properly maintained. I have tried a few of them, and they seal just as well as the brand-named products.

I made this little video for a friend who was beginning to use a vacuum sealer. However, you might find it helpful as well.

Baked chicken is delicious, but can be boring if served too often.  There are thousands of recipes that use chicken as an ingredient, stretching this meat while creating a delightful end result.  Today’s recipe is for Chicken Paprikash, featuring chicken thighs in a creamy paprika sauce.  Due to the richness of the dish, one decent-sized chicken thigh served over noodles is usually enough for most of my family members, with my son occasionally opting for two.  You can substitute other chicken parts if you wish.  Chicken legs are even less expensive than chicken thighs.  I’m guessing that two good-sized legs would constitute a portion for a typical eater. 

I use an electric pressure cooker (similar to an Instant Pot) to speed up my cooking process.  However, you can also prepare the same recipe in a heavy pot/Dutch oven or even a heavy, high-sided frying pan with a lid. This dish can be prepared on the stovetop or by starting on the stovetop and then finishing it in the oven.  There are also recipes for paprikash that can be made in a slow cooker.  If you choose a different method, just Google for recipe times.  For instance, “recipe for Chicken Paprikash in a Dutch oven.”  Many of the recipes will be similar, but the times and possible amounts of liquids may vary.  If you are using a manual stove-top pressure cooker (which operates at a higher pressure), you can reduce the pressure cooking time slightly (13 minutes instead of 15 minutes under pressure).

Chicken Paprikash Made In An Instant Pot- Electric Pressure Cooker.

Ingredients

-Oil

-3-4 pounds chicken thighs

-salt and pepper

-1 large onion chopped

-heaping teaspoon jar garlic

-¼ cup paprika

-1 heaping tablespoon tomato paste

-12 oz chicken broth, or water with a broth substitute like “Better Than Bullion.”

-1 cup sour cream

-½ cup half-and-half or heavy cream (optional)

  1. Season the chicken with salt and pepper.  Set the pressure cooker to “sear” and add a small amount of oil.  Lightly brown the chicken in batches, avoiding overcrowding, as this will cause the chicken to steam instead of brown.
  2. Remove the chicken and add new chicken pieces to brown until the job is completed. Set aside the browned chicken for now.
  3. Add the chopped onion and let it soften in the pressure cooker (the cooker is still on sear/sauté).  When soft, add the garlic and stir for around 30 seconds.  Then add the paprika and lightly cook it to bring out its flavor.  Avoid burning the paprika.  Add the tomato paste. After around 20 seconds, add the broth to the mix and stir everything together.
  4. Return the chicken to the pot and pressure cook on high for 15 minutes.  Let the chicken “rest” for 10 minutes after cooking is done before releasing the pressure.  This will keep the chicken juicy.
  5. Remove the chicken to a serving platter.  Put the sour cream in a bowl and add around  ½ cup of the broth from the pressure cooker, stirring until everything is incorporated.  Then mix this into the broth in the pot.  
  6. Optional:  I sometimes add ½ cup of half-and-half or heavy cream if I have it on hand.
  7. If you prefer a thicker sauce, mix a heaping tablespoon or two of cornstarch with around two tablespoons of cold water, then stream/mix this mixture into your boiling broth.
  8. Adjust the salt and pepper to your taste in the sauce and pour it over the chicken.
  9. Serve on a starch of your choice.  Noodles work well.  I had some dried spätzle that I cooked up.  
  10. A biscuit, bread, or muffin can complement the meal, making your dinner hearty and satisfying.

My measurements are approximate as I cook by feel.  With many recipes, a slight variance doesn’t make much of a difference in the end product.  For instance, using ¾ cup or 1 1/4 cups of sour cream will both yield a delicious paprikash.  When you are starting your cooking journey, the most essential ingredients to measure are the spices (including salt), as too much can ruin a dish.  Baking tends to require more exact measurements, but even with baking, some variance is allowed. 

Chicken Paprikash utilizes many common food staples and doesn’t require exotic ingredients.
Pat the chicken dry to reduce spattering when browning. I used some seasoned salt, but salt and pepper work too.
Brown the chicken in batches, avoiding overcrowding.
Sauté the onions in the electric pressure cooker until they soften, then add the garlic. Adding the garlic too early will cause it to burn.
Add the paprika and cook it gently, avoiding burning. Add the tomato paste.
Add the broth and mix until everything is combined.
Return the chicken to the pot, secure the lid, and pressure cook for 15 minutes.
After the cooking time is done, allow the chicken to rest in the cooker for 10 minutes before releasing the steam. In a pinch, you can release the steam immediately, but that may result in slightly drier chicken.
Mix some of the hot liquid from the pressure cooker into the sour cream until smooth. Then pour this mixture back into the pressure cooker, which is once again set to “sear/brown.”
With the pressure cooker still set to “sear/brown,” adjust the salt/pepper levels to your liking. Add salt only a little at a time (around 1/2 teaspoon), tasting in between each addition. You can always add salt, but you can’t remove it. If you want to add a thickener, such as cornstarch, the liquid must be boiling. 1-2 heaping tablespoons of cornstarch dissolved in approximately two tablespoons of cold water should suffice. Add this in a stream while stirring, and your sauce should thicken in a minute or two.
Pour the sauce over the chicken to complete the dish. Reserve additional sauce to be added over the noodles.
Served over some noodles, accompanied by a biscuit to complete the meal. Very filling and delicious!