I recently wrote a post encouraging the consideration of home baking using a bread maker. A big part of this effort is to offer people options as they feel ever pushed by inflation and the Trump tariff taxes.
Being raised in a one-income family of seven, I learned ways to stretch a dollar without feeling like I was being punished. With a bit of ingenuity, it is possible to have a good life without spending a lot of money. What could be a better mood lifter than homemade bread, pizza, and rolls?
If you have read my other posts, you know I love machines, especially kitchen gadgets. OK, I love power tools too. My rediscovered bread makers were high-end in their time, and I am accustomed to high bread standards. At the same time, it makes little sense to encourage potentially struggling readers to drop hundreds of dollars on a bread machine to “save money.” That is why it was interesting for me to see all of the used machines on the market for less than the cost of breakfast for two at a dive restaurant.
Taking a few precautionary steps can help you obtain a decent machine for next to nothing. I wanted to prove this to myself using my own hard-earned cash. I stopped by a local second-hand store and spied a Regal bread maker, likely from the 1990s. I checked it out in the store and decided that it was worth my $14. Today I’ll walk you through the process so you can also make an informed decision if you decide to take the used bread maker plunge.
First, do a visual inspection. Normal wear and tear is OK, but avoid machines that look dented or abused. This Regal machine was dusty, but it cleaned up nicely with a little TLC. The bread maker came with its original box and recipe guide, another plus! This suggests that the former owner treated the machine with care.
Check out the inside. Make sure that the machine has both its bread pan and its kneading paddle. Make sure that the bread pan can lock in place. This model’s pan had to be twisted in. Remove the bread pan and examine the baking chamber. Crumbs are normal, but avoid machines where the interior looks burnt or smells burnt. This machine was pretty clean.
This machine was made in Japan, so it is likely a quality build.
Check to see if the machine does what you need it to do. You mostly need a standard white bread program, a whole wheat program, and a dough program. This unit has a few other options too. I was able to plug in the machine at the store and test the display and buttons. Everything seemed to work.
Examine the unit for any hidden damage. In this machine the plastic pins that held the cover in place were broken. However, this did not impact the functioning of the machine.
Bread pans are expensive to replace and it is likely that an old model like this one wouldn’t have replacement parts anyway. Make sure that the non-stick coating on the pan looks good and that the paddle rotates freely.
I decided to make a small loaf just to see if the machine worked. The loaf baked properly, but it was a bit smaller than expected. However, that can be corrected with a little ingredient tweaking.
The texture was not quite as good as my expensive bread makers, but the crust was good, the bread was fully cooked, and it was delicious. This bread maker makes the older style vertical loaf, but that works if you cut the bread perpendicular to the pan (as above). It makes up to a 2 pound loaf, which is another plus at this price.
All in all, an amazing value for $14. This small purchase opens up a world of fantastic homemade breads of all types as well as dough perfect for rolls, pizza, and baguettes. It also features a few extra cycles for foods like quick breads, and sweet breads. A great purchase!
Check out your local thrift store or Facebook Marketplace to find your bread maker today! You could get stuck with a broken machine, but at this price… well, you have to sometimes take a few risks in life.
This is another in my series on saving money on groceries while improving your dining experience.
As inflation and the Trump tariff taxes continue to push up prices, it makes sense to find ways to stretch your food dollars. Making your own bread is not only less expensive than store-bought bread, but it also tastes better and can be customized to your needs. Like thicker or thinner slices? No problem., Sick of the outrageous prices of gluten-free bread? Make your own. Desire a specialty bread for a special meal? Absolutely!
My wife made a run to the grocery store and was happy that Ezekiel Bread had been restocked. However, she wasn’t pleased when she realized that a small loaf was now ten dollars. She didn’t buy the loaf.
Bread is the staple of life, and just about every culture has some form of bread. Bread is considered a subsistence food that provides the calories, vitamins, minerals, protein, and fiber necessary for life.
When I was growing up, my mother bought “Silvercup” bread, which was one step above “Wonder Bread.” It was good for sandwiches, but likely not the best in terms of nutrition. We also bought bread from our neighborhood bakery. What a difference that bread was. I have fond memories of walking into that place and being welcomed by the scent of freshly baked bread. I remember, with fascination, the clerk taking a fresh loaf, pushing it through a slicing machine, and then deftly shoving it into a waxed bag. That bread was the best.
My grandmother made most of her family’s bread, and it was delicious. She made a light rye bread that was baked into a large, round loaf. She didn’t buy yeast; instead, she would seed a new batch of dough with a portion of the dough she had saved from the week before. I can’t imagine that she measured anything; she just knew what to do after baking thousands of loaves of bread by hand. Making bread was part of her life, and I’m sure it occupied at least one whole day of her week.
My mom would make yeasted bakery, but I don’t recall her making bread. Most of her yeast bakes consisted of various filled coffee cakes, which we called kolaches, not to be confused with those delicious fruit-filled cookies called Kolacky.
I’m not sure exactly when I made my first loaf of bread, but I started to make it regularly during my residency. I was divorced at that time, and one of the few things that I took from that marriage was a large Cuisinart food processor, as my ex had no use for it.
I love machines, and the Cuisinart is one of them. I was determined to learn how to utilize every aspect of its capabilities, including its ability to knead bread dough. I read somewhere that a flour company had a recipe book for “cool rise bread,” and I tracked down their address, which was in another state. This was before the internet, so that task was more complicated than typing in a query in Google. I wrote them a letter..
A few weeks later, I received a nice note from the flour company, saying that they were surprised to hear from me, as their flour was not sold in the Chicago market. However, they sent me the booklet and wished me well. I adapted their recipes for my food processor.
Cool-rise recipes were ideal for me at that time, as I could quickly mix and knead the dough in the food processor, then drop the dough into a couple of bread pans that I placed in the refrigerator, where they would slowly rise. Eight to 48 hours later, I would bake the bread at my convenience. Having fresh bakery fresh bread as a poor medical resident was a tremendous morale booster. Typically, I ate generic white bread that tasted like sawdust.
When the bread machine craze hit in the 1990s, I bought a machine that made one-pound loaves. I upgraded to a machine that made 2-pound loaves sometime in the early 2000s, and I still have that machine today. However, I eventually stopped using my bread machine, and I’m not sure why.
This bread machine is over 20 years old, and it still works!
As my kids got older, I would make bread for them as a treat; soon, they were helping me in the process. By then, I had graduated to a Bosch Universal Mixer, a tremendous mixer that could make six loaves of 100% whole wheat bread at a time. It was great. However, the Bosch method still required work, and I no longer need six loaves of bread.
My Bosch Universal Mixer can easily make six loaves of 100% whole wheat bread.I rarely need this much bread now.The bread made in the Bosch is fantastic, but it still requires some work.
During the pandemic, I was cleaning my basement and rediscovered my bread machine. Would it even power up after sitting dormant for years? The answer was yes!.
I do most of the household’s cooking and make a lot of food from scratch. I cook many combination foods, such as soups, stews, and casseroles. These types of foods lend themselves well to a bread product, and I’ll often whip up something ranging from cornbread to a savory muffin. However, nothing has quite the allure of the smell of freshly baked bread.
Humans have been making some form of bread for over 14,000 years, and it is possible to make bread with the simplest methods and ingredients. Some people love the physicality of kneading dough, but I’m not one of them. However, I love the taste of homemade yeast products, and that is where my old bread machine comes to my rescue. I can toss in a few inexpensive ingredients, press a button, and a few hours later, I have a fantastic loaf of warm bread.
There are hundreds of bread recipes that can be made in a bread machine. White, rye, wheat, fruited, nutted, egg-enriched, sweet, savory, you name it. I made a nice white loaf today. What did it cost me for a 2-pound loaf of fresh, delicious bread? Around seventy-eight cents, including the cost of the electricity.
Bread machines are no longer trendy, so you can often get a used one at a second-hand store for almost nothing. Just make sure that the pan and paddle are included and that it powers up when plugged in. They are very durable, as mine is still running strong, despite being over 20 years old. Most electronic gadgets left in a basement for years would be out of commission. Mine is not an isolated case, as there are internet reports of others who are still using their bread machines decades after purchase.
In fact, I recently searched for bread machines on Facebook Marketplace and found many used models in the $10-25 range. You can’t even go to McDonald’s for that amount of cash. If you are interested, this is what to look for:
-Get a machine that makes between a 1.5 and 2-pound loaf
-Most prefer a traditional horizontal pan, but a vertical pan also works.
-Make sure that the unit comes with the baking pan AND the paddle.
-Make sure it powers up when plugged in.
-You can find recipes on the internet, and you can likely download your particular machine’s manual/recipe guide from the manufacturer’s website.
Many new bread machines sell for under $100, but top-of-the-line machines, such as those from Zojirushi, cost hundreds. Zojirushi is considered the best, but most will do fine with a less expensive brand.
Machines come with multiple programs to make different types of bread. Most users will use only three types: standard (white) bread, whole wheat, and dough. The dough setting is a great option, as the machine will do all of the hard work of making the dough, and all you have to do is form it for baking. The dough setting is terrific for making pizza dough, rolls, coffee cakes, and braided breads, where you make the dough in the machine but bake it in your regular oven.
Most bread machines come with various programs to bake different types of bread, such as white and whole wheat. The controls may appear complicated, but they are very easy to learn, and in most cases, all you need to do is press a button.
Some additional program settings may be included such as sweet breads, and gluten-free bread. If your bread maker doesn’t have a particular specialty setting you can try using the standard white bread setting. Additionally, some machines allow you to create programs where you determine each step of the bread making process. This last option is for advanced users who develop their own recipes or who use unique bread flours that require unusual mixing, kneading, and backing times. Will you use the cake, yogurt, or jam settings that your machine may have? Probably not, but that’s your choice.
Although many ingredients can be used to make bread, here are the basic ones and why they are necessary:
Flour – There are many types of flour, but for simplicity, let’s focus on white flour. Most bread machine recipes instruct you to use bread flour, a flour with a 15% gluten content. When your machine kneads dough, the gluten proteins are altered, becoming stretchy and more flexible. This results in a delicious, chewy, and spongy bread. All-purpose (AP) flour is a versatile flour suitable for a wide range of applications. It typically has a gluten content of 12-13% so bread made with AP flour won’t be quite as chewy or structurally sound as bread made from bread flour. In an ideal world, use bread flour for optimal results. You can simulate bread flour by adding a couple of tablespoons of Vital Wheat Gluten to AP flour to your bread ingredients, or just forgo the vital wheat gluten and still make a delicious breadmaker loaf using only AP flour. I often do that as I always have AP flour on hand. Lastly, cake flour contains only 7-9% gluten, as you don’t want a chewy cake; the low gluten content assures a tender result.
AP flour is inexpensive. This bag will make five one-pound loaves of bread. I often use AP flour because it’s in my household stock.Bread flour is also inexpensive, and it makes a better loaf. If you make bread regularly, consider buying and using bread flour.
Yeast-yeast is a living organism that feeds on the sugars and starches in bread dough and produces carbon dioxide gas, or CO2, as a byproduct. It is the CO2 gas bubbles that cause bread to rise. The yeast is killed in the baking process. Yeast comes in various types. Some bread machines use Active Dry Yeast, while others require Bread Machine Yeast, which is also called Instant Yeast. Instant Yeast granules are smaller and dissolve faster than the granules of Active Dry Yeast.
My bread machine uses Active Dry Yeast that I can buy in bulk at Costco. Each loaf uses only around ten cents’ worth of yeast.
Sugar-any form of sugar can be used, white sugar, brown sugar, honey, and molasses. Small amounts of sugar are added to help jump-start the yeast’s growth.
Any sugary product can be used for bead making, but most people have white sugar on hand. The recipe below uses around five cents of sugar.
Salt-salt adds flavor and also controls yeast growth. Never mix salt with the yeast when you add your ingredients; put them in a separate spot in the machine’s bread pan.
Water– is needed to bind all of the ingredients together. Naturally, other liquids, such as milk, are sometimes used to achieve a different type of loaf.
Other ingredients-.Eggs, dried fruits, spices, cheese, meats, different types of flours, nuts, butter, cooking oil, powdered milk, you name it. Each addition requires a slightly different recipe and may require different rising and baking times. The good news is that others have already figured out all of this. If you have a new machine, read the manual/recipe booklet. If you purchased a used breadmaker, download its manual, which will include recipes ranging from white bread to pizza dough, specifically created for your machine.
A simple and inexpensive white bread recipe.
*You must add ingredients into the baking pan in the order written.
-1.5 cups warm water
-2 T cooking oil
-1 and 3/4 t salt
-4 cups or 500 gms bread flour (or AP flour)
-2 T sugar
-2 ¼ tsp bread maker yeast (I use regular Active Dry Yeast with good results)
I weigh my flour for better results. Five hundred grams is equivalent to 4 cups of flour. Add ingredients in the order listed. I keep the salt and the yeast in separate spots, as salt can kill yeast if it is too concentrated.Just press a button and the machine will mix and knead the dough in several cycles before baking it. A perfect loaf!Use a serrated bread knife when cutting soft breads. The knife on the top is a food service knife, and it wasn’t very expensive. Its slightly longer length works well to make short work out of making slices. Nothing is quite as wonderful as fresh, warm, crusty homemade bread!
Use your bread maker’s “normal” or “white loaf” setting. Mine makes a great loaf of white bread in 3.5 hours. Total cost of the loaf, including electricity? $0.78!
Allow the bread to cool at least 30 minutes before cutting. A serrated knife works best. Any will do, but I like a knife that is a bit longer. It is not necessary to buy an expensive serrated knife, as they are no different from a less expensive one. Serrated knives don’t cut the bread; they tear into it. I have also used a standard Chef’s knife. If it is sharp enough, it will slice bread.
Remember, that homemade bread has no preservatives or other agents to keep it looking fresh. If you don’t consume it in a couple of days, freeze it. You can purchase inexpensive bread bags on Amazon, as well as other types of containers, to store unused bread. If we have any left after a meal, we usually use a large Ziploc-style bag, as we have those on hand.
Homemade bread machine bread is delicious and almost effortless to make. Having a homemade slice of bread with dinner elevates the experience, and a lunch sandwich made with homemade bread is superior to any packaged product. If you see a machine at a thrift store, give it a try. If you want to buy new, there are many machines available in the sub-$100 range. Happy bread making!
Mike
Images are my own or screenshots used only for educational purposes.
Food prices have been rising significantly and are expected to continue increasing with the new tariff taxes that we are all now paying. Since everything, from the aluminum in a soda can to the tomatoes on our salads, is imported, it is expected that the prices of most foods will increase further over time. Even US-sourced foods are skyrocketing in price. I was recently at the grocery store and spotted a beef brisket being sold for an astounding $75! I always thought of brisket as a tough, cheap cut of meat, but along with ribs and chicken wings, what was once cheap is now expensive.
Seventy-five dollars for a beef brisket!
I was on a road trip with my wife. We stopped for breakfast at McDonald’s. I got a breakfast meal, she got an Egg McMuffin, coffee, and a soda, and our bill was almost $20. Eating at McDonald’s was always a cheap way to feed my family when we didn’t want to cook. My kids eat less conservatively than Julie or me. If we were traveling as a family, a breakfast at McDonald’s could now cost us $60 to $70. I’m starting to think of Fast Food as a luxury option!
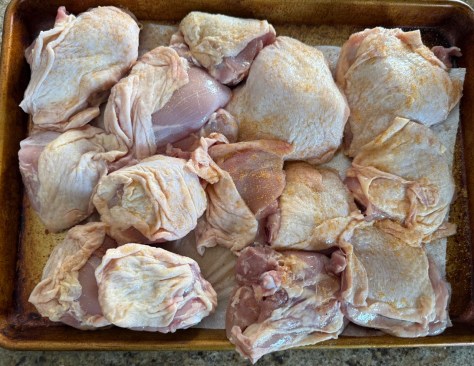
Groceries have become expensive, but it is still more cost-effective to cook at home. Chicken thighs are relatively inexpensive, especially when you buy them in bulk. I’ll often purchase them at Costco, as they are already portioned into smaller packs that are suitable for freezing. If I find a reasonable price elsewhere, I separate the chicken into meal-sized portions and freeze them using my vacuum sealer.
A vacuum sealer is the unsung hero of food preservation. Vacuum sealers can be a relatively inexpensive purchase and can dramatically reduce your food waste. I’ll separate meats into meal-sized portions, label the vacuum bags with the type of meat and the date, and then freeze them. This prevents waste from freezer burn.
If we only use part of a package of bacon, I’ll vacuum-seal the rest and store it in the refrigerator. Vacuum-sealed bacon will stay fresh much longer. I’ll do the same with a cut avocado to prevent it from turning brown.
Individual portions of a casserole or soup can be vacuum sealed and frozen. Need a quick lunch? You can reheat the food by the “boil in bag” method, or by venting and microwaving.
Being creative, you can extend the lives of many foods by vacuum sealing. A vacuum-sealed chunk of cheese won’t dry out and will stay mold-free. Strawberries (using a vacuum jar or a Mason Jar sealed with a vacuum-seal jar attachment) will stay fuzz-free much longer in the fridge. Fresh meats will also remain good longer in the refrigerator if vacuum sealed first. Sometimes, I’ll find meat on sale and I’ll keep it in the fridge to cook the next day. Life happens, and plans change. If I have to delay cooking, I’ll vacuum-seal the refrigerated meat to extend its shelf life longer.
The most significant expense associated with using a vacuum sealer is the cost of the bags. Brand-name bags are great, but they are expensive. However, you can find acceptable and much cheaper off-brand alternatives when buying in bulk on Amazon and other sites.
I typically use a different type of vacuum sealer, known as a chamber vacuum sealer. This type creates a stronger vacuum and easily handles liquid contents. Traditional external vacuum sealers require special techniques when sealing liquids. Another significant advantage of using a chamber vacuum sealer is the lower cost of the bags, which is comparable to that of a Ziploc bag. Again, buying them in bulk is the key.
You can get a decent traditional external vacuum sealer for under $100, with many costing under $60. Chamber sealers used to cost well over $1,000, but Chinese-made versions hit the market a few years ago, and I have seen chamber sealers in the sub-$300 range. The brand-named $1,000 sealers were designed for semi-professional use and were intended to last a consumer a lifetime. I can’t verify the longevity of the no-brand units, but they would likely last well enough for a homeowner if properly maintained. I have tried a few of them, and they seal just as well as the brand-named products.
I made this little video for a friend who was beginning to use a vacuum sealer. However, you might find it helpful as well.
Baked chicken is delicious, but can be boring if served too often. There are thousands of recipes that use chicken as an ingredient, stretching this meat while creating a delightful end result. Today’s recipe is for Chicken Paprikash, featuring chicken thighs in a creamy paprika sauce. Due to the richness of the dish, one decent-sized chicken thigh served over noodles is usually enough for most of my family members, with my son occasionally opting for two. You can substitute other chicken parts if you wish. Chicken legs are even less expensive than chicken thighs. I’m guessing that two good-sized legs would constitute a portion for a typical eater.
I use an electric pressure cooker (similar to an Instant Pot) to speed up my cooking process. However, you can also prepare the same recipe in a heavy pot/Dutch oven or even a heavy, high-sided frying pan with a lid. This dish can be prepared on the stovetop or by starting on the stovetop and then finishing it in the oven. There are also recipes for paprikash that can be made in a slow cooker. If you choose a different method, just Google for recipe times. For instance, “recipe for Chicken Paprikash in a Dutch oven.” Many of the recipes will be similar, but the times and possible amounts of liquids may vary. If you are using a manual stove-top pressure cooker (which operates at a higher pressure), you can reduce the pressure cooking time slightly (13 minutes instead of 15 minutes under pressure).
Chicken Paprikash Made In An Instant Pot- Electric Pressure Cooker.
Ingredients
-Oil
-3-4 pounds chicken thighs
-salt and pepper
-1 large onion chopped
-heaping teaspoon jar garlic
-¼ cup paprika
-1 heaping tablespoon tomato paste
-12 oz chicken broth, or water with a broth substitute like “Better Than Bullion.”
-1 cup sour cream
-½ cup half-and-half or heavy cream (optional)
Season the chicken with salt and pepper. Set the pressure cooker to “sear” and add a small amount of oil. Lightly brown the chicken in batches, avoiding overcrowding, as this will cause the chicken to steam instead of brown.
Remove the chicken and add new chicken pieces to brown until the job is completed. Set aside the browned chicken for now.
Add the chopped onion and let it soften in the pressure cooker (the cooker is still on sear/sauté). When soft, add the garlic and stir for around 30 seconds. Then add the paprika and lightly cook it to bring out its flavor. Avoid burning the paprika. Add the tomato paste. After around 20 seconds, add the broth to the mix and stir everything together.
Return the chicken to the pot and pressure cook on high for 15 minutes. Let the chicken “rest” for 10 minutes after cooking is done before releasing the pressure. This will keep the chicken juicy.
Remove the chicken to a serving platter. Put the sour cream in a bowl and add around ½ cup of the broth from the pressure cooker, stirring until everything is incorporated. Then mix this into the broth in the pot.
Optional: I sometimes add ½ cup of half-and-half or heavy cream if I have it on hand.
If you prefer a thicker sauce, mix a heaping tablespoon or two of cornstarch with around two tablespoons of cold water, then stream/mix this mixture into your boiling broth.
Adjust the salt and pepper to your taste in the sauce and pour it over the chicken.
Serve on a starch of your choice. Noodles work well. I had some dried spätzle that I cooked up.
A biscuit, bread, or muffin can complement the meal, making your dinner hearty and satisfying.
My measurements are approximate as I cook by feel. With many recipes, a slight variance doesn’t make much of a difference in the end product. For instance, using ¾ cup or 1 1/4 cups of sour cream will both yield a delicious paprikash. When you are starting your cooking journey, the most essential ingredients to measure are the spices (including salt), as too much can ruin a dish. Baking tends to require more exact measurements, but even with baking, some variance is allowed.
Chicken Paprikash utilizes many common food staples and doesn’t require exotic ingredients. Pat the chicken dry to reduce spattering when browning. I used some seasoned salt, but salt and pepper work too. Brown the chicken in batches, avoiding overcrowding.Sauté the onions in the electric pressure cooker until they soften, then add the garlic. Adding the garlic too early will cause it to burn.Add the paprika and cook it gently, avoiding burning. Add the tomato paste. Add the broth and mix until everything is combined.Return the chicken to the pot, secure the lid, and pressure cook for 15 minutes. After the cooking time is done, allow the chicken to rest in the cooker for 10 minutes before releasing the steam. In a pinch, you can release the steam immediately, but that may result in slightly drier chicken. Mix some of the hot liquid from the pressure cooker into the sour cream until smooth. Then pour this mixture back into the pressure cooker, which is once again set to “sear/brown.”With the pressure cooker still set to “sear/brown,” adjust the salt/pepper levels to your liking. Add salt only a little at a time (around 1/2 teaspoon), tasting in between each addition. You can always add salt, but you can’t remove it. If you want to add a thickener, such as cornstarch, the liquid must be boiling. 1-2 heaping tablespoons of cornstarch dissolved in approximately two tablespoons of cold water should suffice. Add this in a stream while stirring, and your sauce should thicken in a minute or two.Pour the sauce over the chicken to complete the dish. Reserve additional sauce to be added over the noodles. Served over some noodles, accompanied by a biscuit to complete the meal. Very filling and delicious!