

The recovery from shoulder surgery is often worse than the surgery itself. I had a rotator cuff injury that needed to be repaired. Since this was an elective procedure, I had some time to prepare for it, and I’d like to share some of that information with others who may be planning on a similar procedure. I’m posting this for informational and educational purposes only. This is not medical advice, and you should always follow the instructions from your caregivers.
How you compensate for having an arm in a sling will be determined by whether you are having surgery on your dominant arm or not. I had surgery on my right shoulder, which is also my dominant arm. Trying to do things with my left hand was awkward.
About a week before the surgery, I started to practice using only my left hand for basic functions like dressing and showering. I also tried to prepare simple meals using only that arm. It’s more complicated than you think, but it was easier to practice while I still had a functioning right arm to take over when needed. I discovered that there were some things that I could do well when practicing, but they became more difficult postop. For instance, I could put on a shirt using only one arm before surgery, but I needed assistance doing the same job once I had surgery. Update: I was able to put on a shirt by myself after a week post-op, but it was very uncomfortable to do.

Assistance needed
Luckily, my family could assist me with jobs that would be difficult to do by myself, like removing my surgical bandage and replacing it with a waterproof barrier. If you are in a position where you are flying solo, discuss this with your doctor before your surgery. Perhaps you’ll need a nurse to check in on you. It’s always easier to arrange options beforehand.

Setting things up
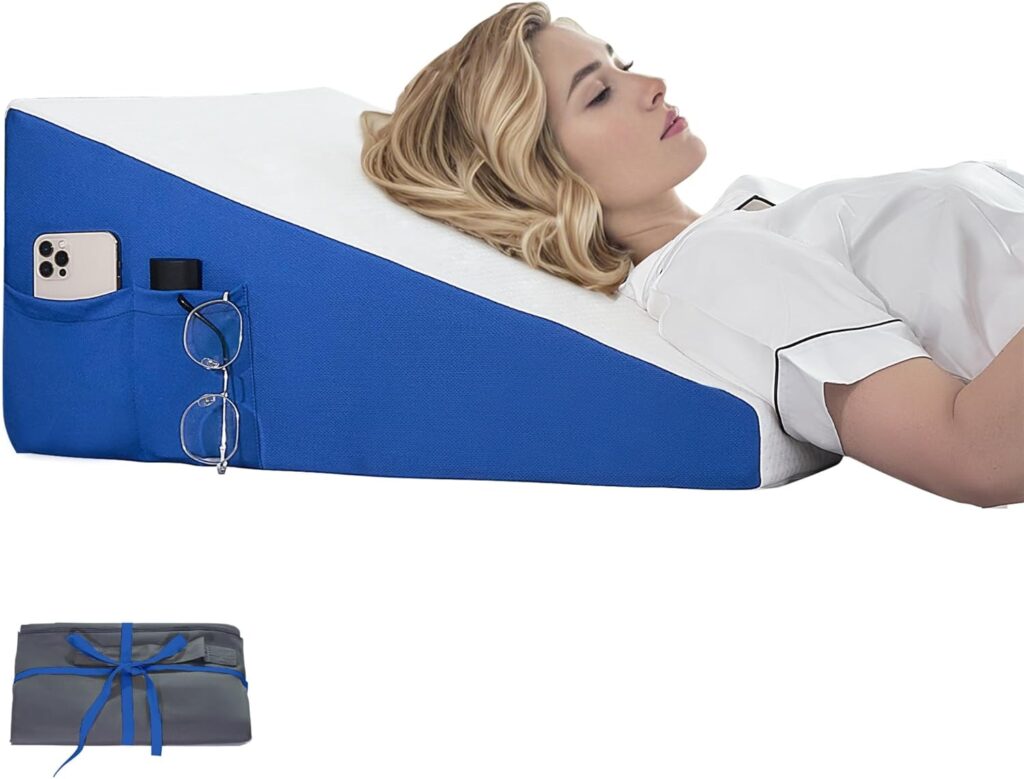
Most doctors suggest sleeping at an incline after rotator cuff surgery. Sleeping flat can be difficult as it places more pressure on your shoulder. People usually sleep in a recliner, but technically, you could sleep in a bed with a wedge pillow or on a couch with stacked pillows. I used a recliner.
My couch has built-in recliners on both ends and since my left hand would be free, I chose the end I could control with that hand. I decided to set up a recovery zone as I’d be spending a lot of time in that space. I ensured the end table next to my “nest” had a lamp I could access. I also had a spot for medication, a charging station for electronic devices, a cup of water, and space for gadgets I enjoy using.

Some people love books, and naturally, they should have books available. I’m more of an electronics person who reads books and magazines on a screen. I also write on a laptop, listen to music and the news, and do almost everything on a computer. I have a lightweight laptop, which I thought would be perfect. However, after surgery, I had a great deal of difficulty handling it as it was slippery, and when I tried to use my right hand to manipulate the mousepad, it caused me quite a bit of pain. Luckily, I have a small iPad Mini that I use when I travel. That was the perfect device, as I could easily manipulate it with one hand. In fact, I’m using speech to text dictation on it to type this post.
You might find yourself in a situation similar to mine, so it makes sense to see if you have a tablet computer around the house that you can use; if not, perhaps you can borrow one. I thought my iPad Mini’s 8-inch screen size was perfect. I would have bought a cheap tablet in a pinch if I did not have access to the Mini. I think any tablet with a screen of 7-11 inches would be usable, but an eight or nine-inch screen size is ideal as it allows for ample viewing and one-handed operation. Some can get by using their phone, but my phone’s screen was too small for me to view for long periods.
Some Android tablets can be bought for under $100, which would be worthwhile if you think you would use the device after your recovery. Small tablets make good e-readers and are great for media consumption when you’re lounging about. iPads are the best tablets (in my opinion), but inexpensive Android-based tablets can do most of the things a tablet user needs to do. Cheap Android tablets are unsuitable for high-resource games but can play simple games. If you are looking for affordable yet reputable tablets, consider the 8” Amazon Fire tablet or the 8” Walmart Onn tablet. Both are basic, but they work. The Onn tablet’s advantage is that it runs regular Android and can access millions of apps. The Fire tablet’s app store is more limited, but the tablet is tightly integrated into the Amazon ecosystem of Kindle ebooks, Prime videos, and Prime music.
My inability to use my computer lasted about a week. After that point, I was able to type with both hands. However, doing this for any length of time got my shoulder going. For quite a while post-op, I preferred the tablet, as it placed less strain on my right arm.
Regarding my recliner, I watched a YouTube video from an occupational therapist who recommended using supports for the neck and the back. The back support could be anything from an actual back support to a rolled towel to a small pillow. We had a removable back support on an office chair that I used. For my neck, I used a simple donut-style travel pillow, the kind you use on an airplane. Both supports made a difference as I tried sleeping with and without them, and I felt more comfortable with the supports in place.
I also had a variety of pillows and blankets that I could configure as my mood dictated. It can be challenging to sleep in a chair, and I wanted to maximize my comfort as much as possible. Overall, my recliner nest worked out well. However, after about a week of sleeping in a chair, I was ready to try my regular bed with a wedge pillow.
Hygiene
The more independent you can be, the better. Before my surgery, I practiced taking showers with one hand. It wasn’t as tricky as it sounds, but I had to adjust. I usually use bar soap, but I needed to give that up for shower gel in a pump bottle. The pump made it easy for me to get the soap out. I bought a shampoo and shower gel combo that worked for me. However, some people prefer separate products. I recommend getting all of those in pump bottles.

It’s difficult to wash under your arms during recovery from rotator cuff surgery. I purchased an inexpensive sponge on a flexible rod from Amazon that helped in that area. I usually use a stick-type deodorant, but applying that post-op was impossible. Instead, I bought some deodorant in an aerosol can. These simple things allowed me to shower independently.

Your doctor will give you specific instructions on showering. My doctor told me that I could remove my bandage in three days. At that point, he told me to cover my incision sites with waterproof material. The only times that I was allowed to take off my sling were during showering, physical therapy, and putting my clothes on. I felt more secure keeping my arm in a sling when showering, and I purchased an inexpensive mesh sling from Amazon. Some patients will buy an inexpensive standard sling from the drugstore for showering, which serves the same purpose. You don’t want to get your expensive prescription sling wet.

I’m fortunate that our shower head detaches from the wall. We also had a shower chair from a past surgery that I could use. These things made my shower life a little easier, but I could have adapted to a less perfect situation if necessary.
Most doctors will ask you to protect your surgical site from water until the incisions are healed. They will tell you to use a waterproof barrier, and I found that Tegadem worked well. This is a transparent film that is breathable but waterproof. It comes in sheets of various sizes and clear bandages. Bathing in a tub should be avoided until your wound sites completely heal.

Men, I recommend sitting for all bathroom tasks until you are steady on your feet. Adapting wiping techniques is straightforward with a bit of creativity. However, I was fortunate to have a bidet.
I use an electric toothbrush and recommend that for anyone undergoing this procedure. You could use a regular toothbrush, but it would be a bit awkward. If possible, get a tube of toothpaste that has a flip-open lid instead of a screw cap.
I’m retired, and I’m letting my beard grow. However, if I had to be tidy, I would switch from my regular razor to an electric razor, which I believe I could manage with one hand.
Ice
Most doctors recommend that you ice your shoulder regularly after surgery. In my case, my doctor wanted me to ice 20 minutes on and 20 minutes off. Right after surgery, my very thick shoulder bandage blocked any coolness to my shoulder. However, I could place an ice pack close to my wound site by tucking it up into my sling, and that provided some comfort.
The surgicenter discharged me with a cheap disposable ice bag that I could fill with ice cubes and water. This was a poor solution. My sister gave me blue gel ice packs she used for her knee surgery. They worked well. They remained flexible when frozen, making it easy to place them where I needed to, and they stayed cold for a long time.

She also lent me a cool therapy ice machine but couldn’t find her AC adapter. I ordered one on Amazon, and it arrived three days after my surgery. The ice machine was terrific as it provided a constant cold to my wound site (by then, I had my bandage off). I found that freezing disposable water bottles worked better than using ice cubes. I had two sets of water bottles and would freeze one while using the other. Naturally, there was also water in the therapy machine as that was what was circulated to my shoulder. I think buying an expensive cool therapy machine for shoulder surgery would be overkill, but if you can borrow one or if your insurance will cover the rental of one, I would highly recommend it; otherwise, I liked the inexpensive gel packs.

When I retired, I built a camper van with a friend. The build included a chest-style refrigerator/freezer. I moved the camper’s fridge to my family room to freeze my ice packs and water bottles. I also kept some frozen meals in it. I still have kids at home who are always on the hunt for a quick meal, and keeping some meals in my little freezer ensured I had easy-to-make food on hand. My camper fridge/freezer was a convenient option. I used it because I had it. Otherwise, a regular freezer would be fine.
Food
Preparing and eating food can be challenging, even for simple tasks like opening a can. Luckily, many inexpensive adaptive gadgets can help with everything from opening a jar to pulling a pop top.


Generally, I went for food items that I could prepare with one hand. I purchased some single-serving frozen dinners that I could easily make in a microwave. I also purchased soup in cans. As far as the soups were concerned, we already had a microwavable bowl cozy. This allowed me to take the bowls from the microwave without scalding myself. If I hadn’t had the cozy, I think it would have been safer to heat them on our induction stove.

Fortunately, my wife and kids took turns making dinner, so there was something to eat at dinner time. However, lunchtime was more on my clock; I picked things I could easily make and never went hungry.
Clothing
Dressing can be a challenge. It’s much easier if you can stay at home during your early recovery, which is what I did. Starting from the feet, I recommend slippers or socks that pull on easily. If you are going out, wear slip-ons or those shoes from Kizik and Skechers that can be put on hands-free.
Stretchy underwear helps, and elastic waistband-type pants are a must. The pants could be sweatpants, pajama pants, or whatever you have. In warmer weather, elastic waistband workout shorts would work. You don’t want to wear pants with buckles and zippers, as both are difficult to close with one hand.
Most recommend using button-down shirts, as getting them around your wounded shoulder is more manageable. Stretchy T-shirts also work. It’s January, but I’m wearing a short-sleeve shirt, as pulling on a long-sleeve is difficult for me.
I purchased a special shirt for shoulder injuries that had snaps along its edge, allowing me to open up one side of the shirt. This was helpful during the first three days of my recovery as I was wearing a gigantic bandage on my injured shoulder, making it impossible to pull any regular shirt over it. After the bandage was off, I could wear button shirts and stretchy T-shirts.
Some crafty folks buy a few cheap tee shirts, split them along their seams, and reattach the two sides with Velcro. If you are a non-sewer, you can use scissors to open the bottom of the arm of a cheap tee shirt to accommodate the shoulder bandage. If desired, you can reattach the opening using safety pins.
This should go without saying, but always sit when you put on your clothing. Standing carries the potential for a fall, a disaster for your healing shoulder. A little stool works well, as does sitting on the toilet seat.
Pain management
You’ll likely be offered a nerve block, an optional procedure. My anesthesiologist highly recommended it. It numbed my arm from surgery to about 8 p.m. and was a godsend. At 8 PM, I started to feel some pain and took a pain pill plus naproxen per my doctor’s instructions. However, at two in the morning, I woke up in horrific pain, at which point I took another pain pill. Unfortunately, that one took about an hour before it kicked in. After that point, I was pretty aggressive with my pain management, especially at night. I would set an alarm to wake me so I could take a dose before the last pill wore off. This allowed me to sleep and kept my pain down to a manageable level. The pain does get better every day, so I was able to taper the narcotic pills over time. Naturally, I always followed my doctor’s advice and instructions.
A word of advice. If you think you’ll be taking medication during the night, it sometimes makes sense to have that medication out and ready in a little container. In a sleepy state, you may take the wrong medicine or too much medication if you pour it out of a medicine bottle. In addition, you can invert the “child-proof” cap on most prescription medicine bottles to turn them into simple screw caps. With both of the above suggestions, use common sense if you have little ones about; you don’t want them getting into your medications.
Other medications
My doctor gave me a prescription medication for nausea, which surprised me. I’ve had other surgeries and never suffered from long-term nausea postop. However, I had quite a bit of nausea after this surgery and was grateful to have the prescription medication.
Doctors often recommend taking some sort of stool softener, which may be a pill or just extra fiber. Narcotic pain medication can be constipating, and no one wants to have to deal with that, along with shoulder pain. If your doctor doesn’t prescribe some sort of stool softener, ask for his or her recommendations on this topic.
Cautionary note
There’s a lot of advice about rotator cuff surgery on YouTube from patients and orthopedic surgeons. You must follow your doctor’s advice. Different doctors do different procedures, and taking another doctor’s advice could potentially hamper your recovery.
Likewise, although the patient-created YouTube videos I watched seemed sincere, their suggestions varied. Use common sense when watching them. I used them primarily for mobility tips rather than orthopedic advice.
I also found videos from occupational therapists discussing topics like getting dressed or sleeping in a recliner. I found those the most helpful.
Final thoughts
Rotator cuff surgery is relatively common but can be an unpleasant recovery. With planning, life becomes more manageable. Make sure you follow your doctor’s advice. You’ll be given written instructions that you should read several times. I found information on my second read that I missed on the first. Remember not to push your recovery limits, as you could potentially re-tear your rotator cuff and cause more problems—best of luck.
The above is my personal opinion and should not be construed as medical advice.
Images are my own and from various websites and are used for educational purposes only.